Getting started with Navigator#
Anaconda Navigator is a desktop application that is built on top of the conda package and environment manager. Navigator enables you to use conda to manage environments and packages, but in a graphical application instead of a command line interface (CLI).
This short guide takes you through the basic steps of using Navigator.
Note
Conda’s getting started guide goes through some of these same instructions while using the conda CLI.
Before you start#
You should have already installed Anaconda Distribution, which contains the Navigator application.
Managing Navigator#
Note
When Navigator opens, it verifies that Anaconda is installed. If Navigator does not start up properly, see the Troubleshooting page.
When you start Navigator, it automatically checks for a new version. If Navigator finds a new version, you will see a dialog box like this:
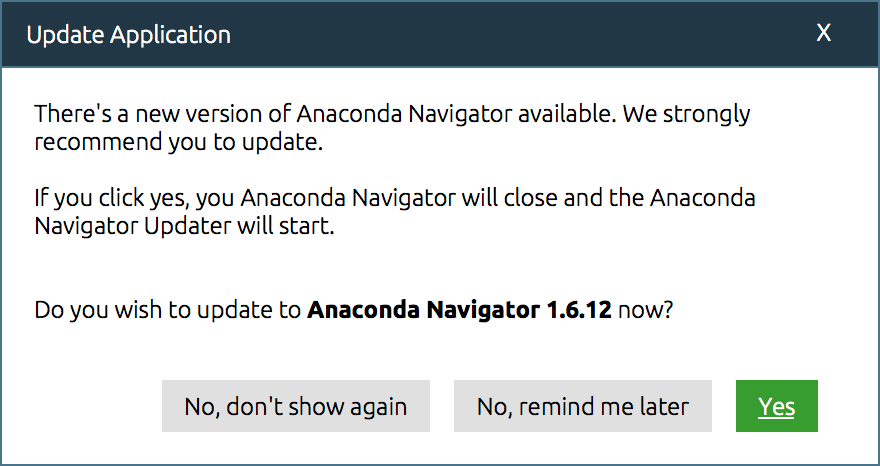
Click Yes to update Navigator to the current version.
Tip
Anaconda recommends keeping Navigator updated to the latest version.
Managing application tiles#
By default, all application tiles available to launch or install within Navigator are displayed on the Home page. Filter the application tiles with the applications dropdown menu.

The dropdown contains filters for all applications, applications that are installed on your computer, applications that are not installed, and applications that have an update available.
Managing environments#
Navigator uses the conda package and environment manager to create conda environments. Conda environments are directories within your file system that contain a specific collection of packages and package dependencies. Environments are isolated from one another and enable you to quickly switch between projects with drastically different needs.
In this example, we will create a new environment named myenvironment:
On the Environments page, click Create.
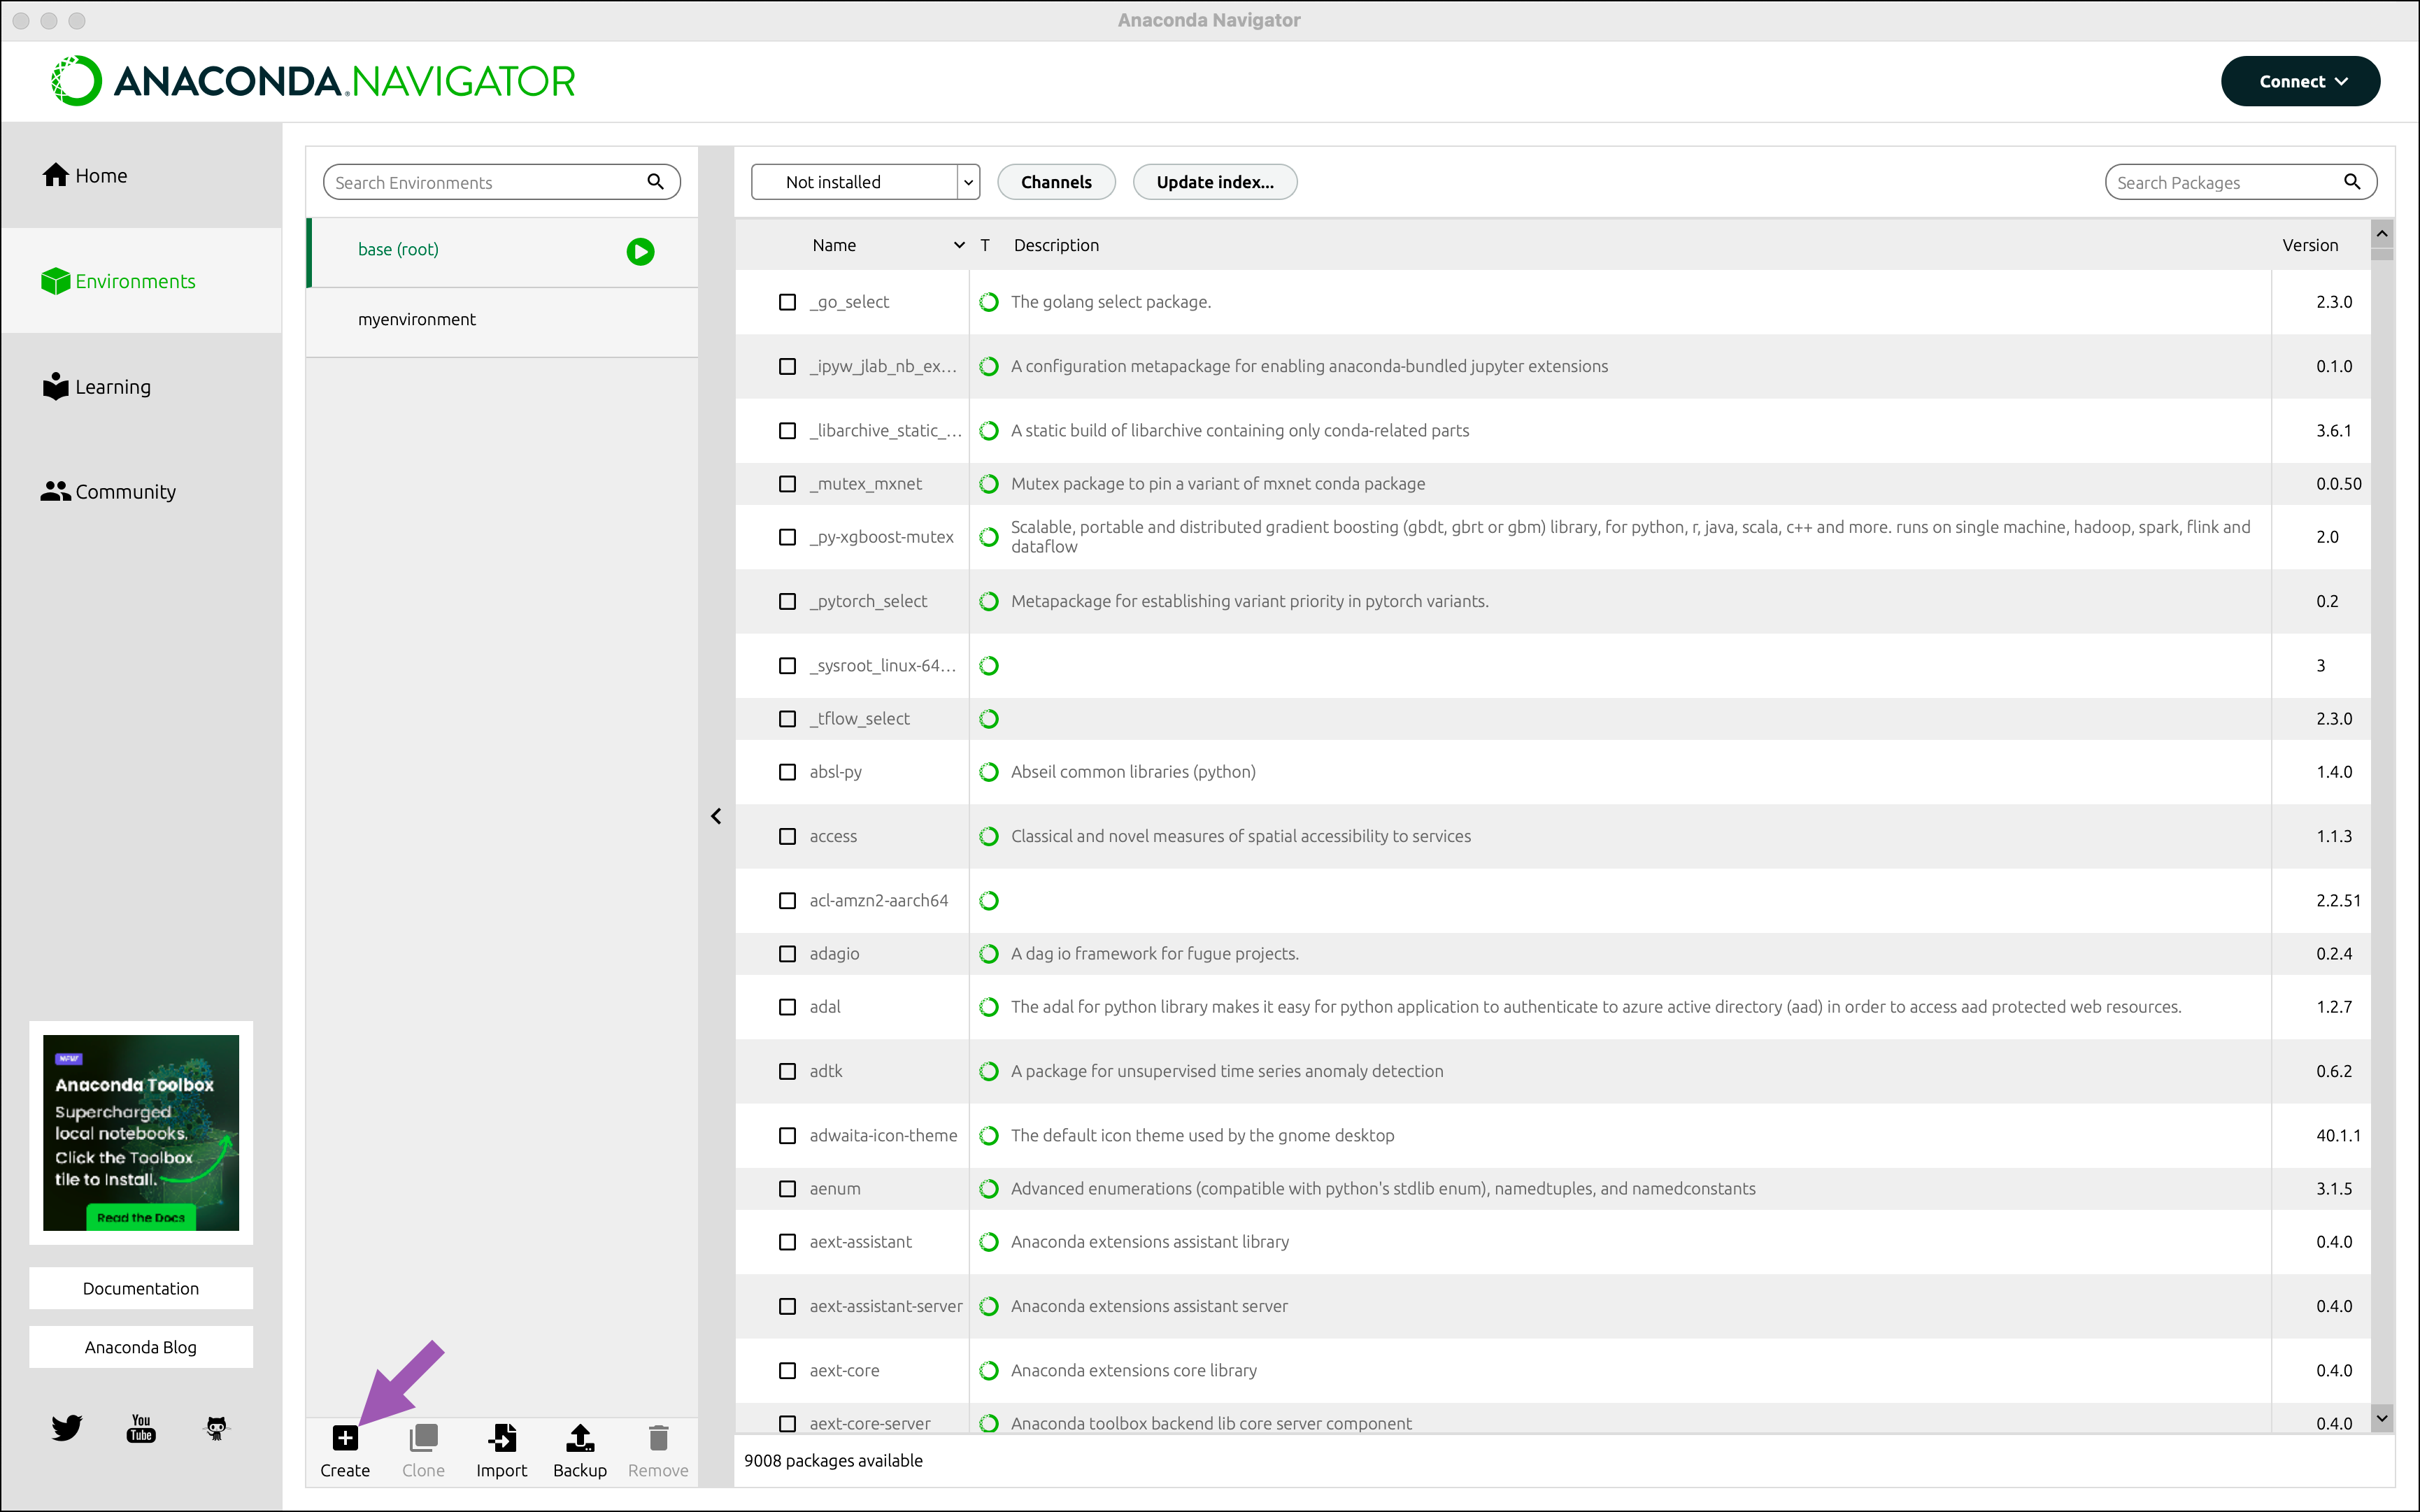
In the Environment name field, type a descriptive name for your environment.
Click Create. Navigator creates the new environment and activates it.
Now you have two environments: the default environment
base (root)andmyenvironment.Caution
Anaconda does not recommend working in your base environment.
Switch between environments by clicking the name of the environment you want to use. This will deactivate the first environment and activate the environment you just selected.
Tip
The active environment is the one with the arrow next to its name.
For more documentation on environments, see Managing environments in the Tutorials section.
Managing Python#
When you create a new environment, Navigator installs Python 3.11 by default. To use a different version of Python in a given environment:
specify when you create the environment
change the Python package version in an existing environment
Changing the Python version when creating an environment#
In this example, we will create a new environment named python39 that contains Python 3.9.18:
On the Environments page, click Create.
In the Environment name field, type the descriptive name “python39”.
Select 3.9.18 from the Python dropdown.
Click Create.
Changing the Python version in an existing environment#
In this example, we will change the Python version of myenvironment to Python 3.12.0:
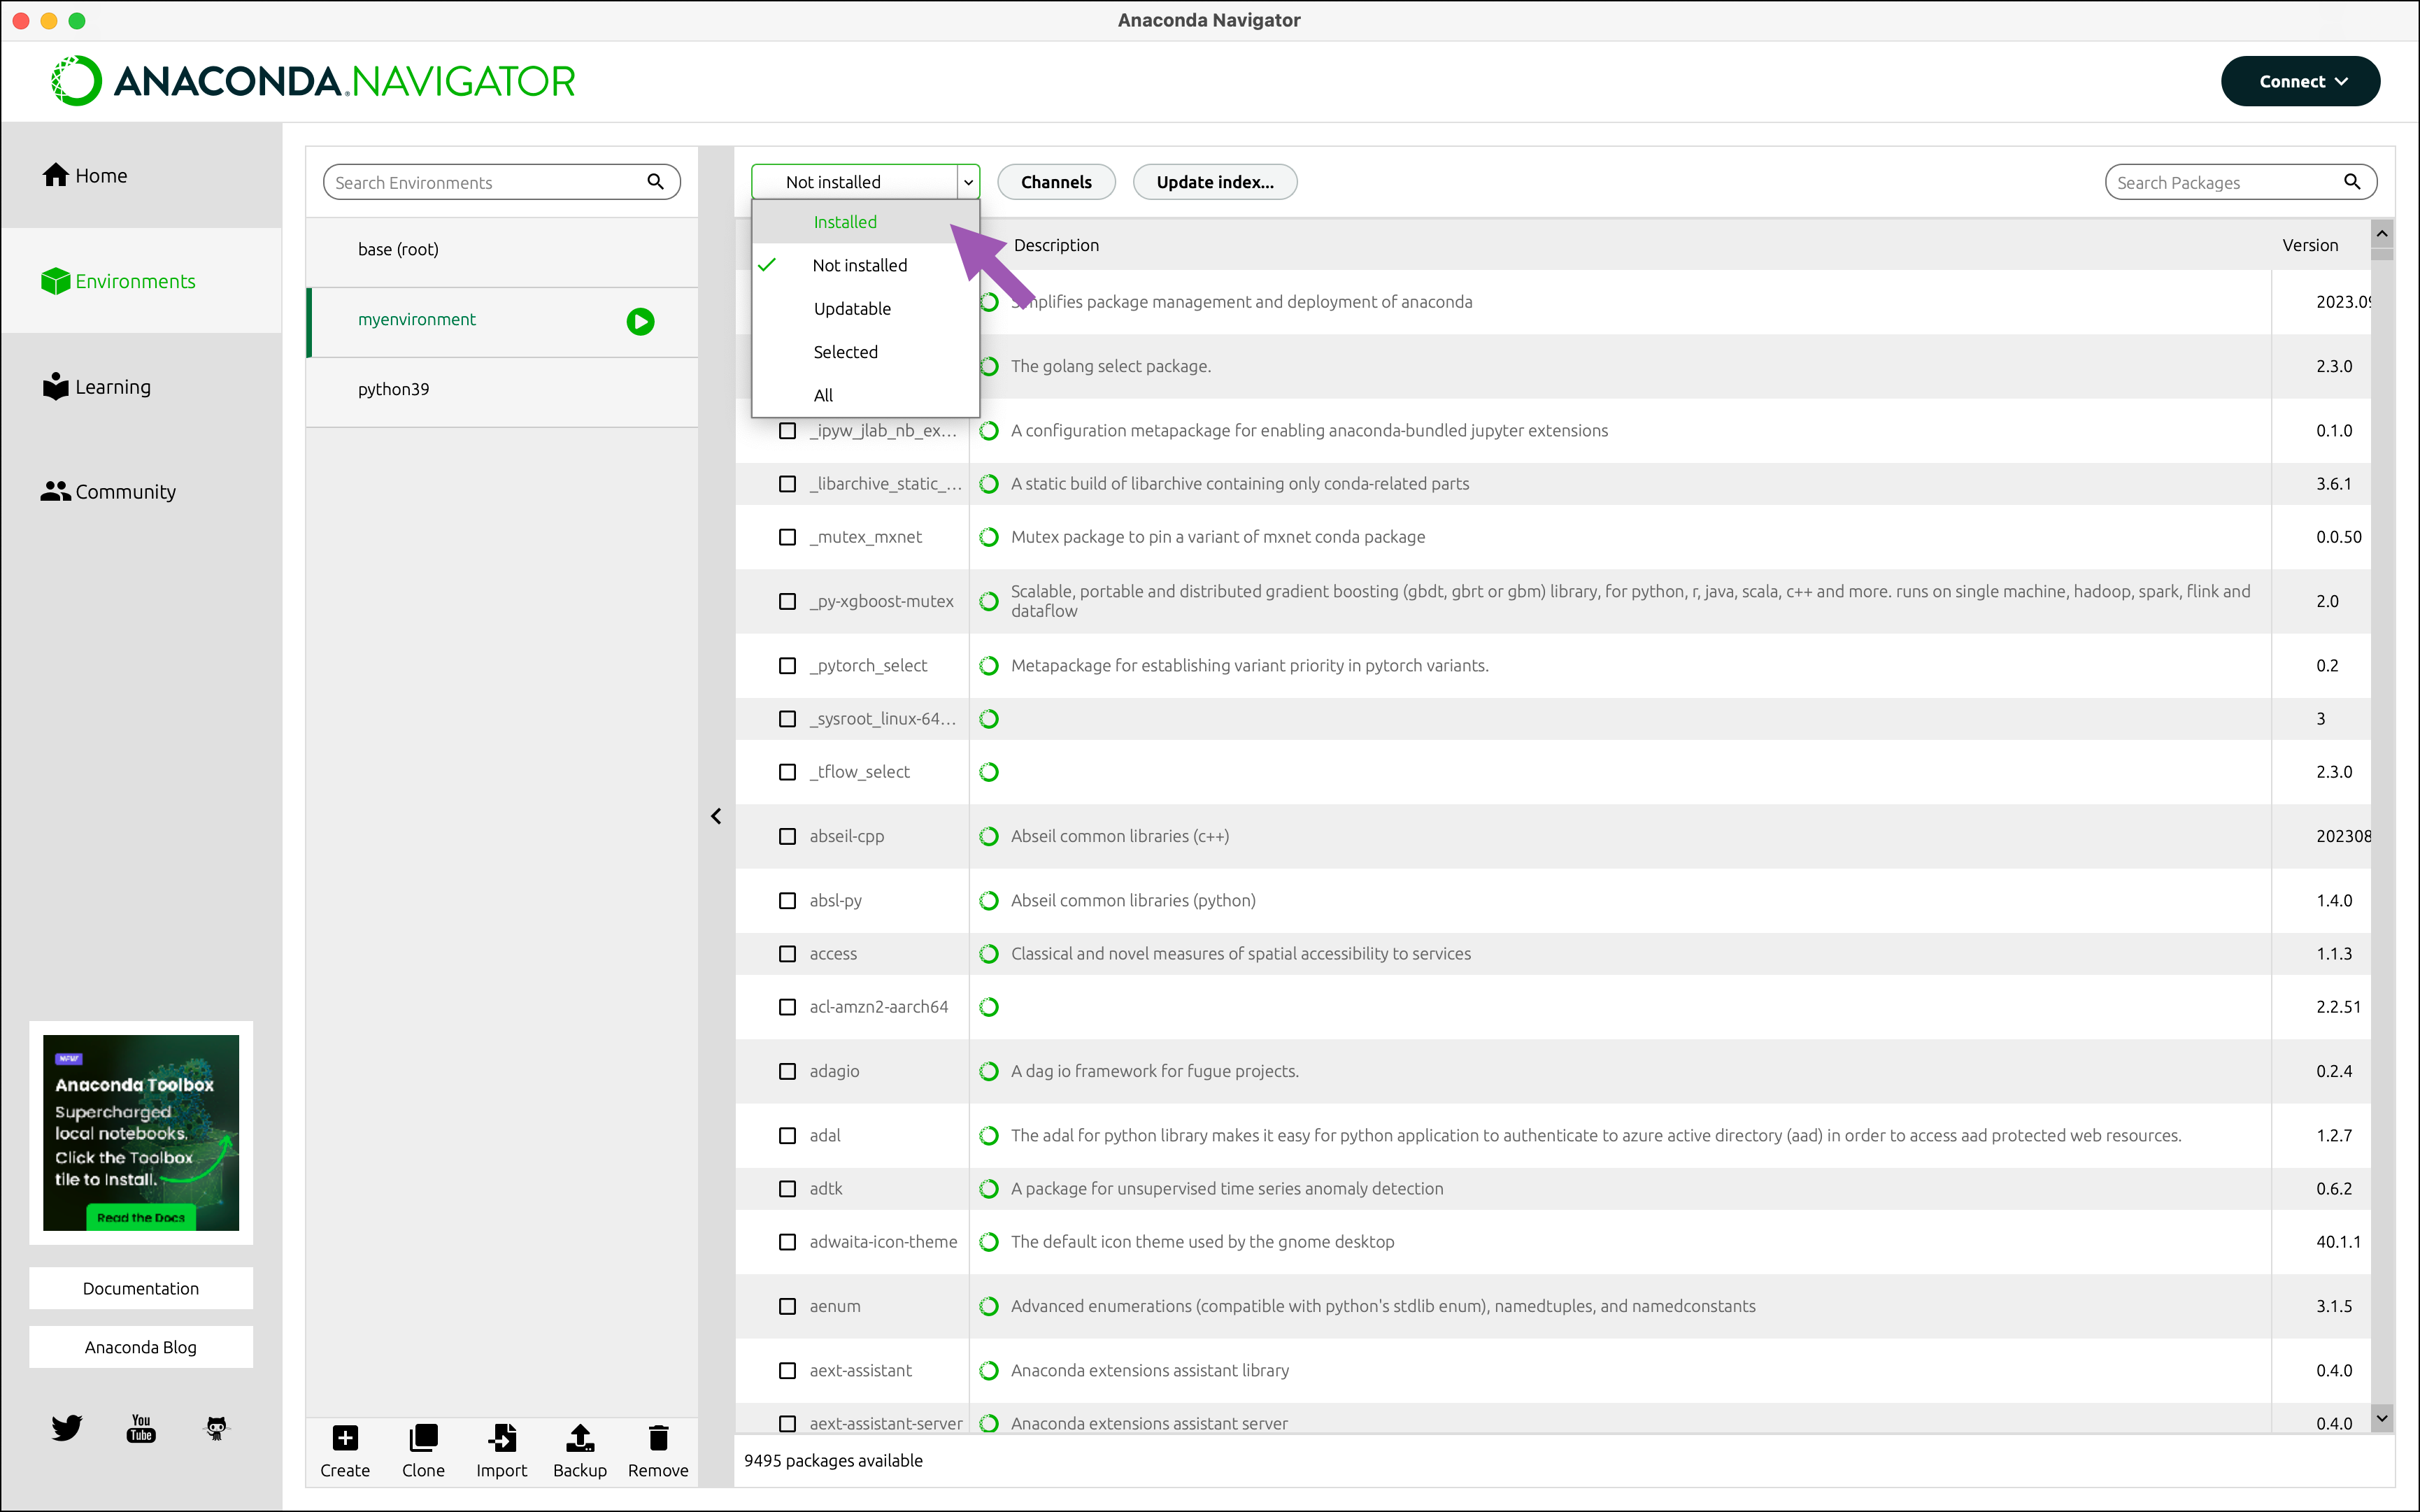
On the Environments page, select
myenvironment(which we created in the Managing environments section above) from the environment list to activate it.Select Installed from the package filter dropdown.
Select the Python package checkbox and hover over Mark for specific version installation.
Select 3.12.0 from the dropdown that appears.
Click Apply.
A dialog listing all the packages that will be modified appears. Click Apply.
Managing packages#
On the Environments page, you can:
View which packages are in each environment
Search for and install new packages
Upgrade existing packages
Delete packages
In this example, we will install a package called beautifulsoup4 into myenvironment.
On the Environments page, select
myenvironmentfrom the environment list to activate it.Open the package filter dropdown and select Not installed to view a list of packages that are available to install from the channels you are connected to.
Type “beautifulsoup4” into the Search packages box.
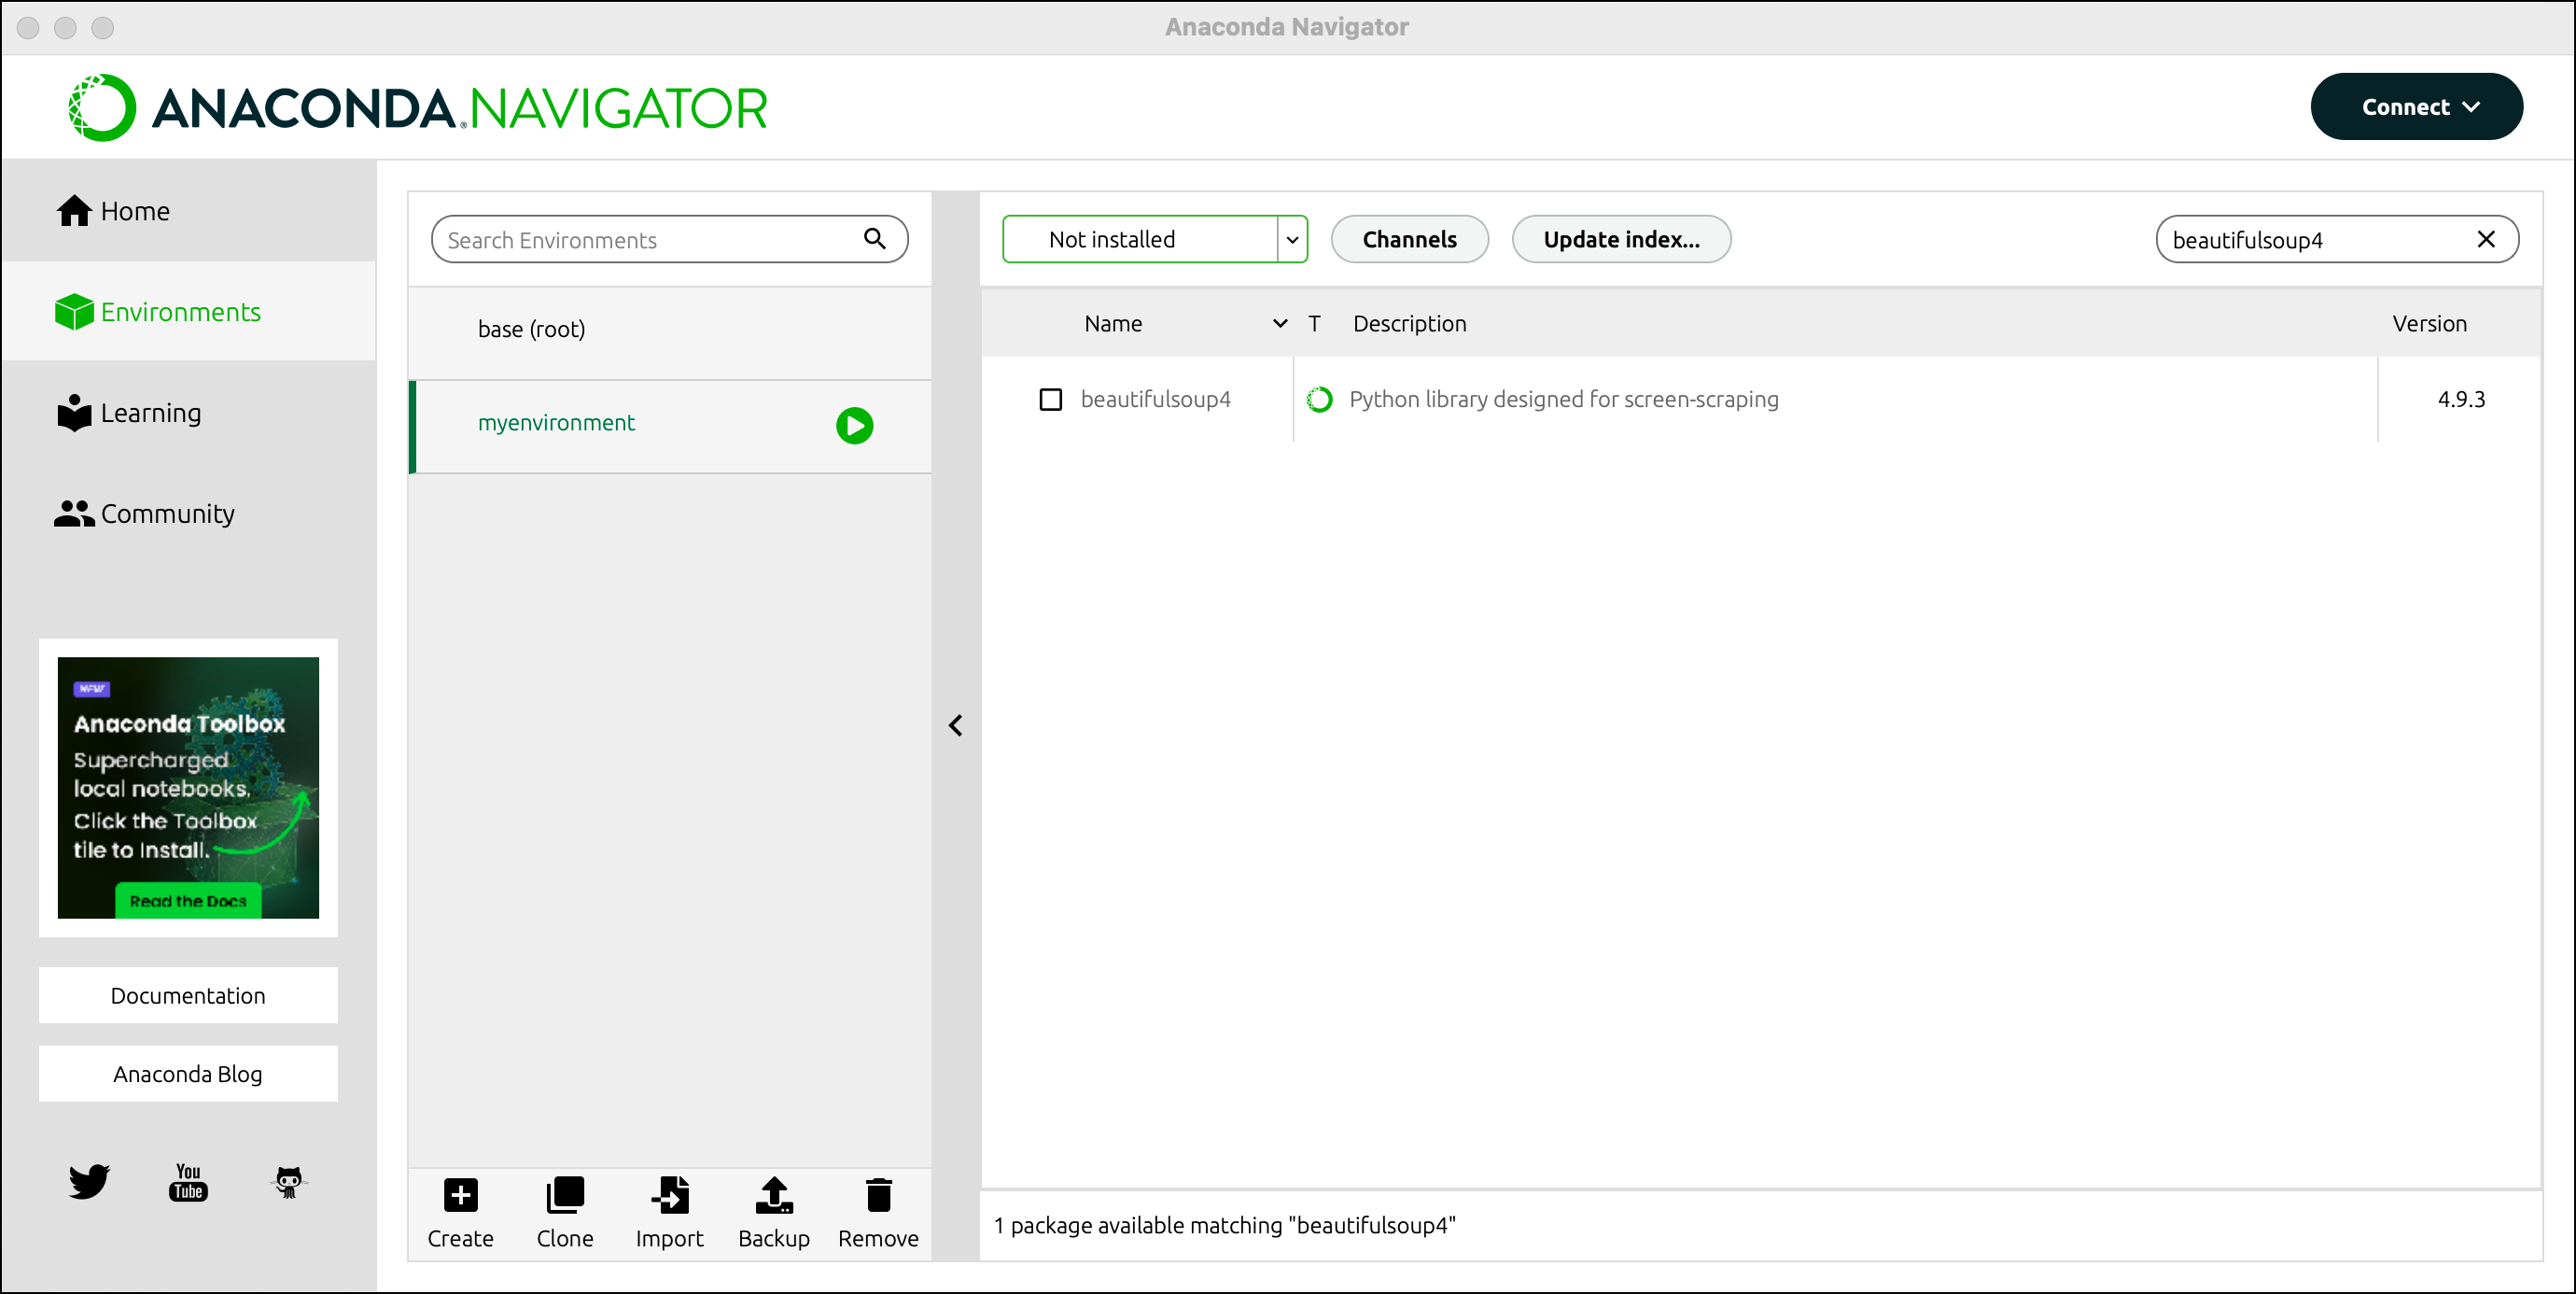
Select the checkbox next to
beautifulsoup4in the package list.Click Apply.
A dialog appears that lists all packages that will be installed. Click Apply.
Open the package filter dropdown and select Installed.
The newly-installed beautifulsoup4 package is now displayed in the list of installed programs in the current environment.
For more documentation on packages, see Managing packages in the Tutorials section.
Managing channels#
By default, Navigator searches in and installs packages from Anaconda’s free public repositories, also known as defaults. This contains the package repositories main, r, and msys2 (Windows only), which are hosted at repo.anaconda.com/pkgs/. There are many more package channels available, hosted on Anaconda.org, in Anaconda Cloud, or in an on-premises server, if your organization hosts their own packages via Anaconda Server.
In this example, we will add a channel connection to conda-forge in Navigator’s channel manager.
Click Channels.
Click Add….
Enter “conda-forge” into the textbox that appears.
Press Enter/return on your keyboard.
Click Update channels.
Your package search within Navigator will now also include packages available via conda-forge.
For more documentation on channels, see Managing channels in the Tutorials section.