How to install and run Pandas from Anaconda Navigator#
Pandas is a common Python tool for data manipulation and analysis. This topic explains how to use Navigator to set up and begin working with Pandas via your choice of tool: terminal, Python, IPython, or Jupyter Notebook. The steps are similar for installing and opening nearly any package.
Open the Environments page.
Click Create. When prompted, enter a descriptive name for the environment, such as “Pandas”.

Select a Python version to run in the environment.
Click Create.
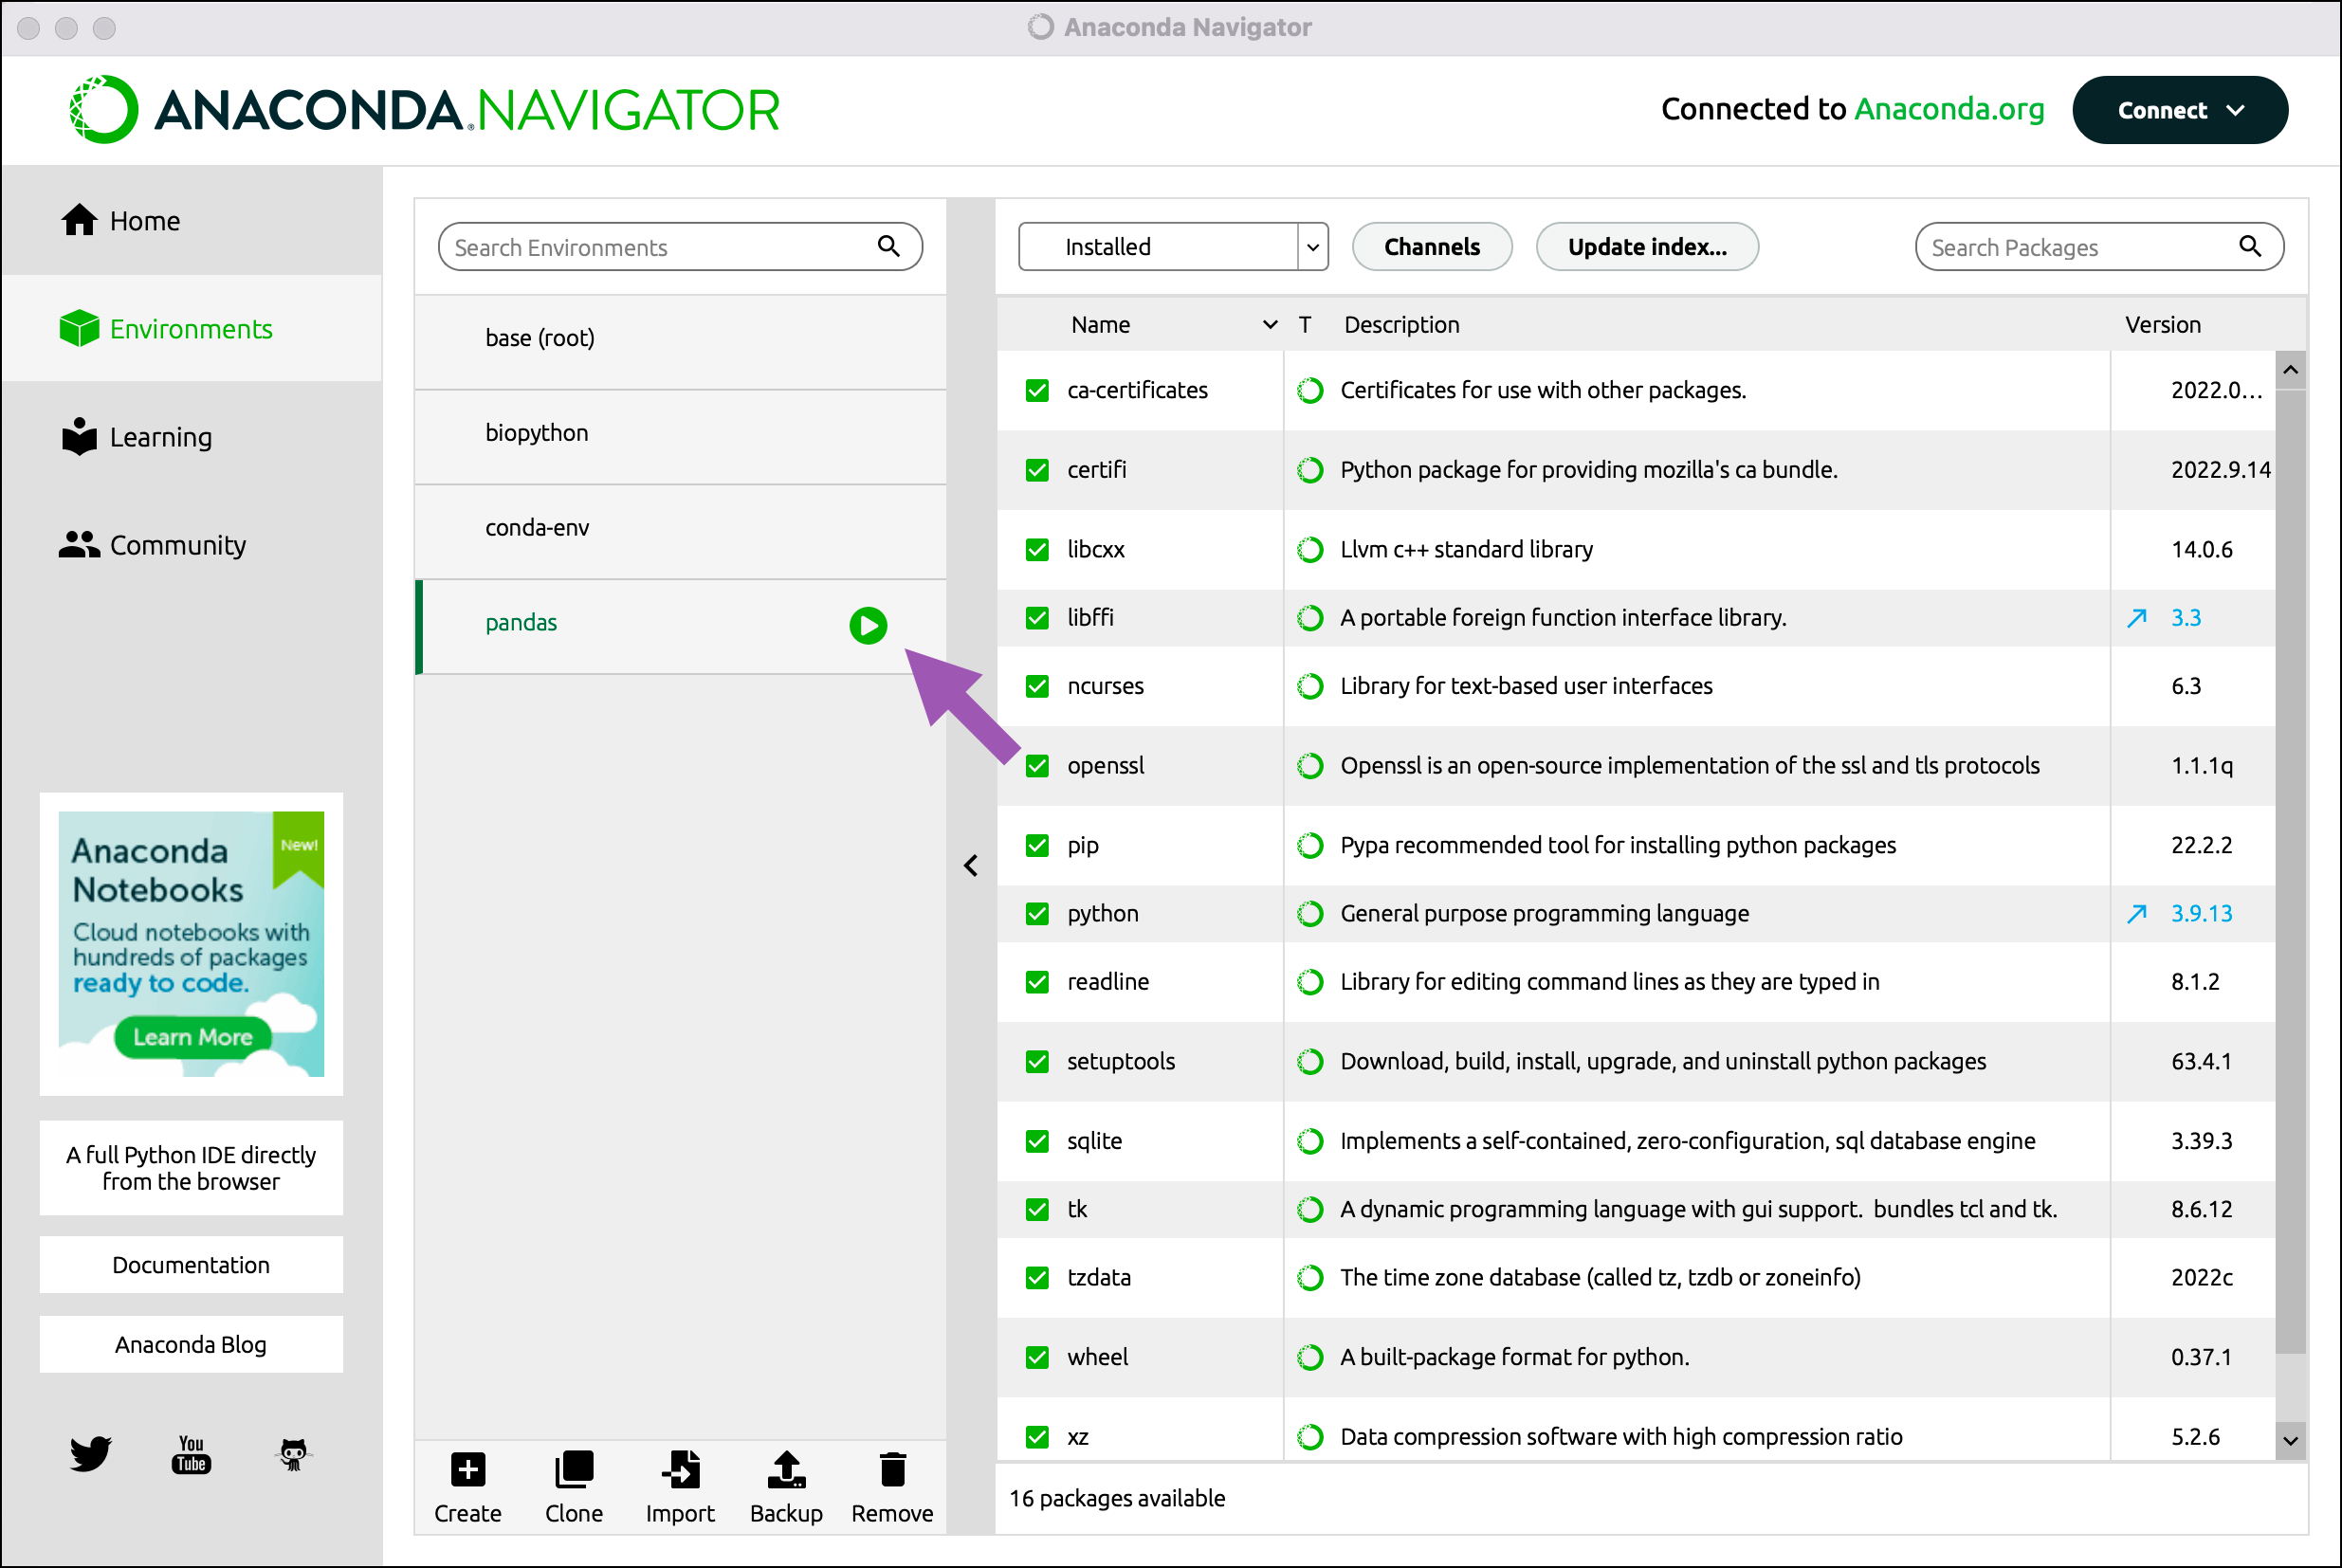
The new, active environment appears in the environments list. An active environment is highlighted with a green play icon.
In the list above the packages table, select All to filter the table to show all packages in all channels.
In the Search Packages field, search for “pandas”. Pandas appears as a package available for installation.
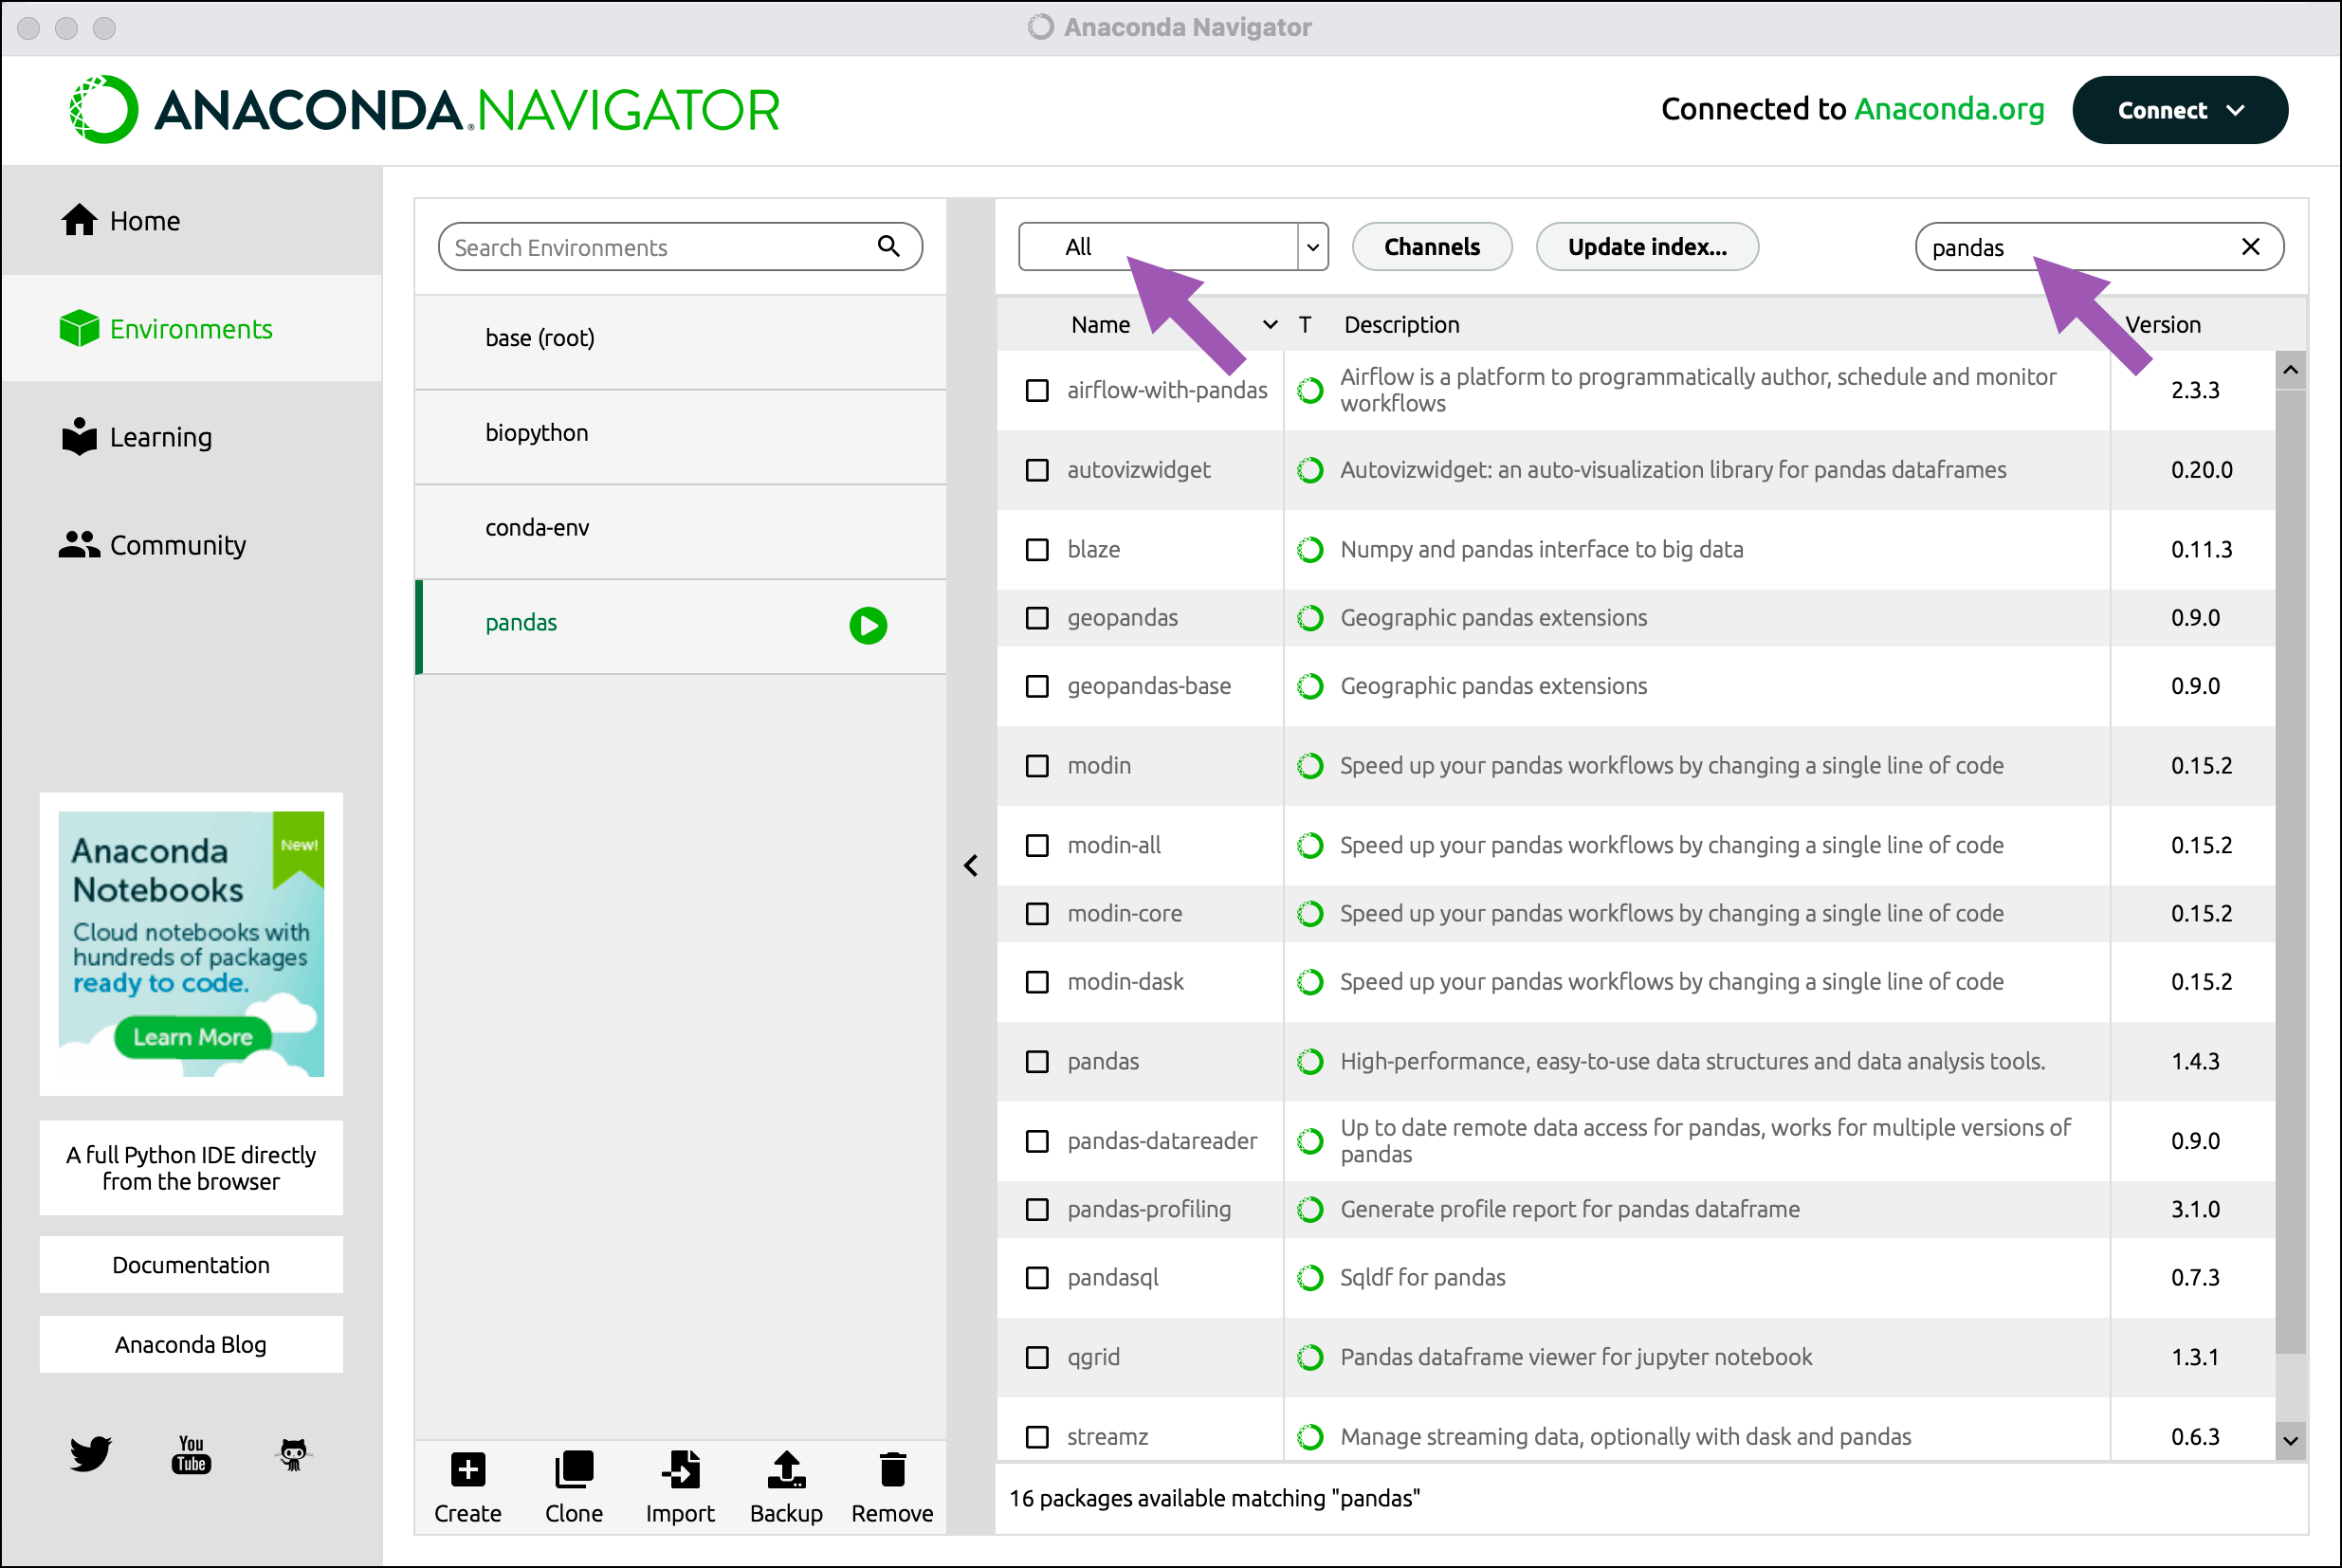
Select the checkbox in front of the Pandas package name.
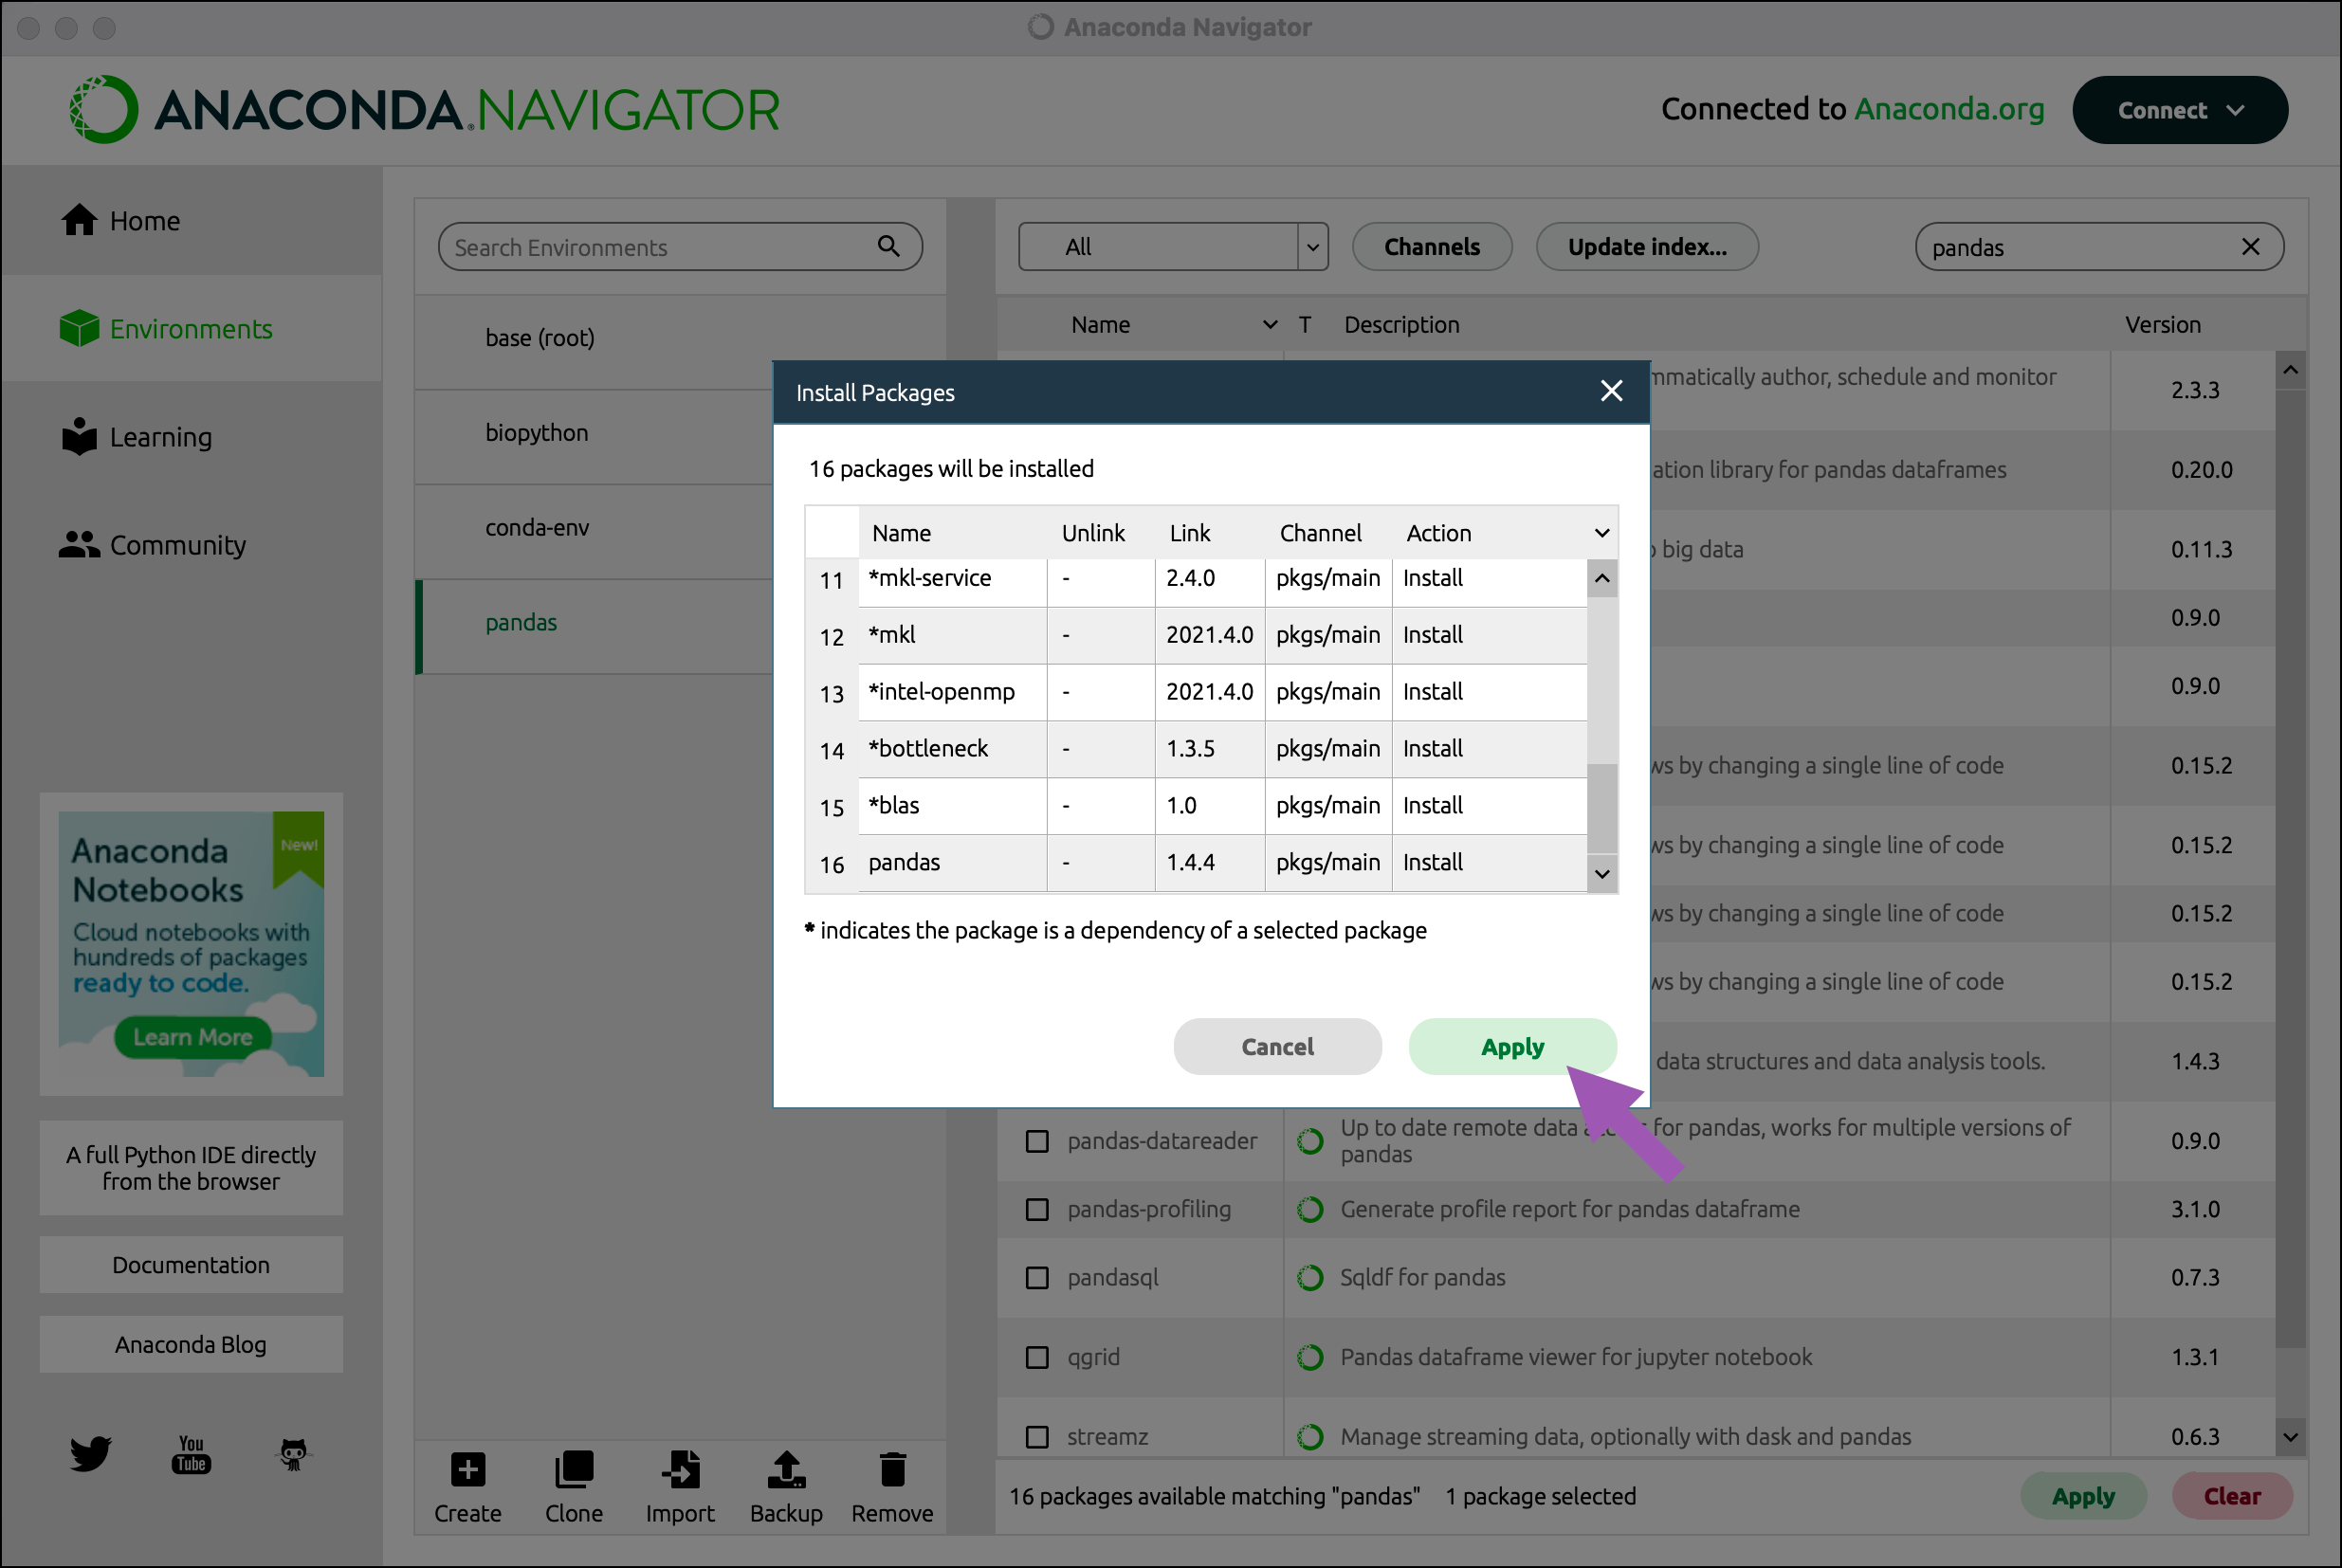
Click Apply.
Review the dialog that displays pandas and all of its dependencies.
Click Apply.
A progress bar appears below the packages pane while Pandas and its dependencies are installed.
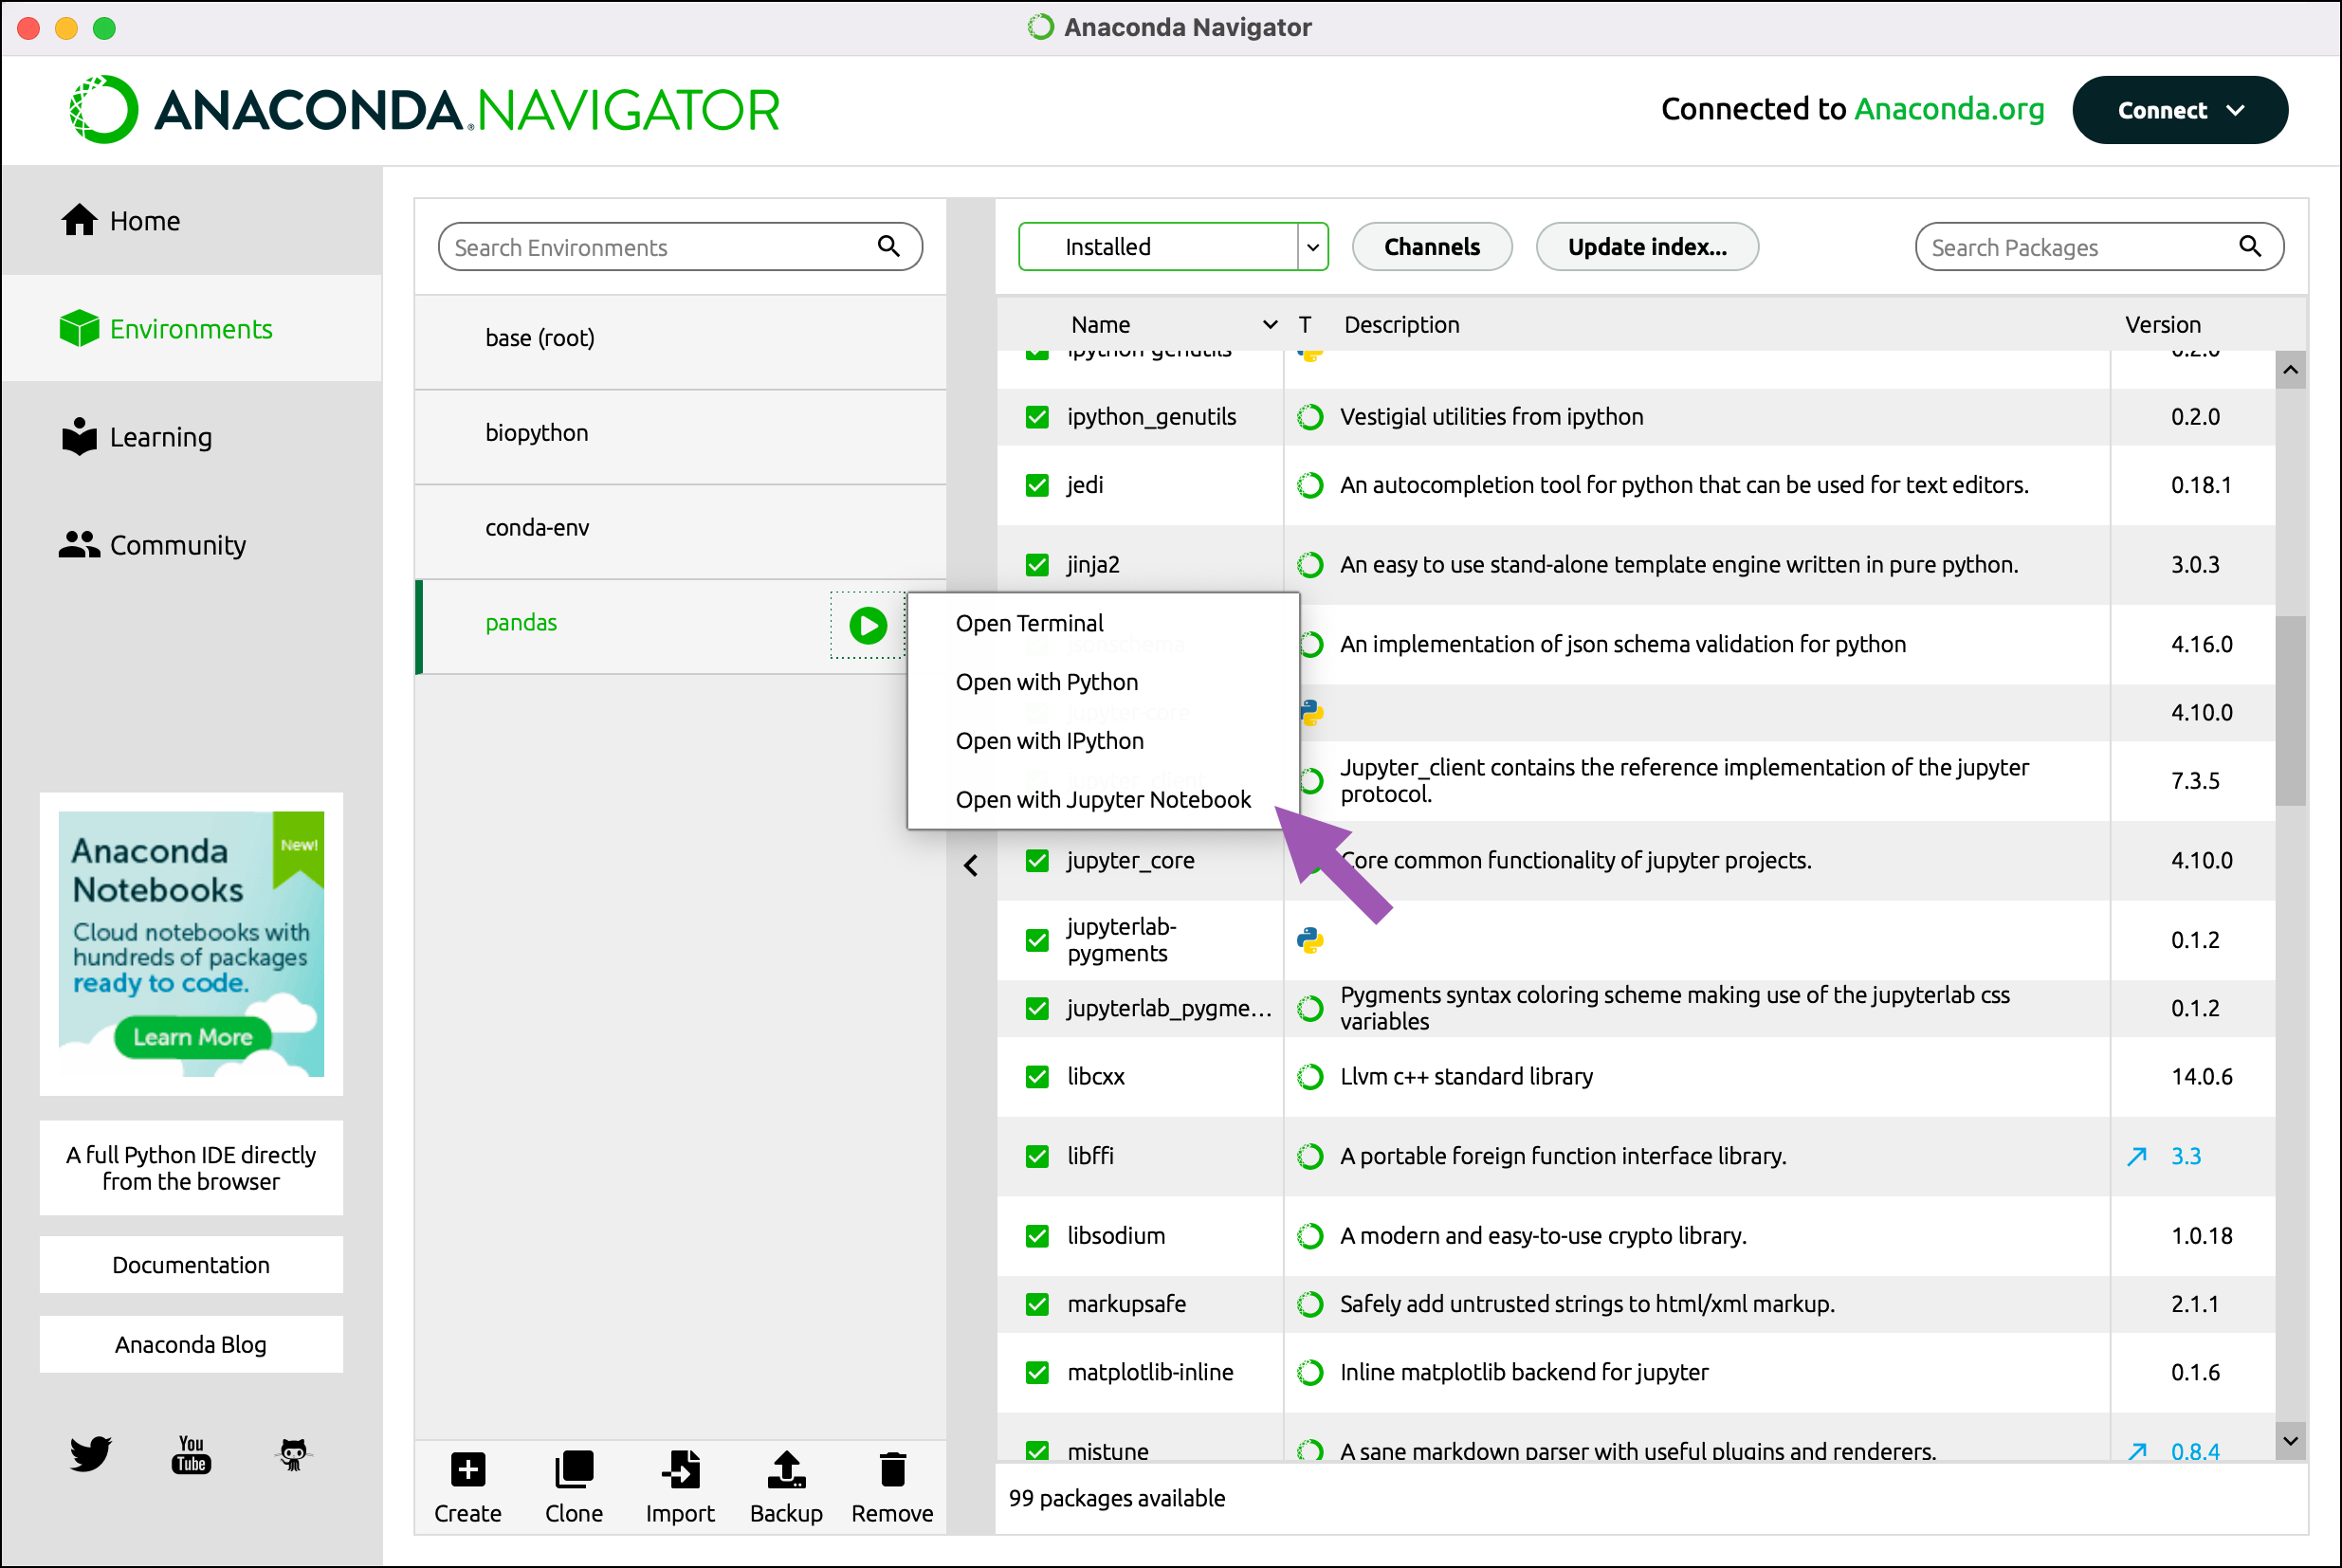
To begin using your new environment, on the Environments page, click the play button beside your active Pandas environment name.
In the list that appears, select the tool to use to open Pandas. To access the iPython or Jupyter Notebook tool options, install JupyterLab or Jupyter Notebooks from the Home page.
Note
In macOS, you will need to give Anaconda Navigator permission to open the tool you choose, if it is your first time using Navigator to open it.