Managing packages#
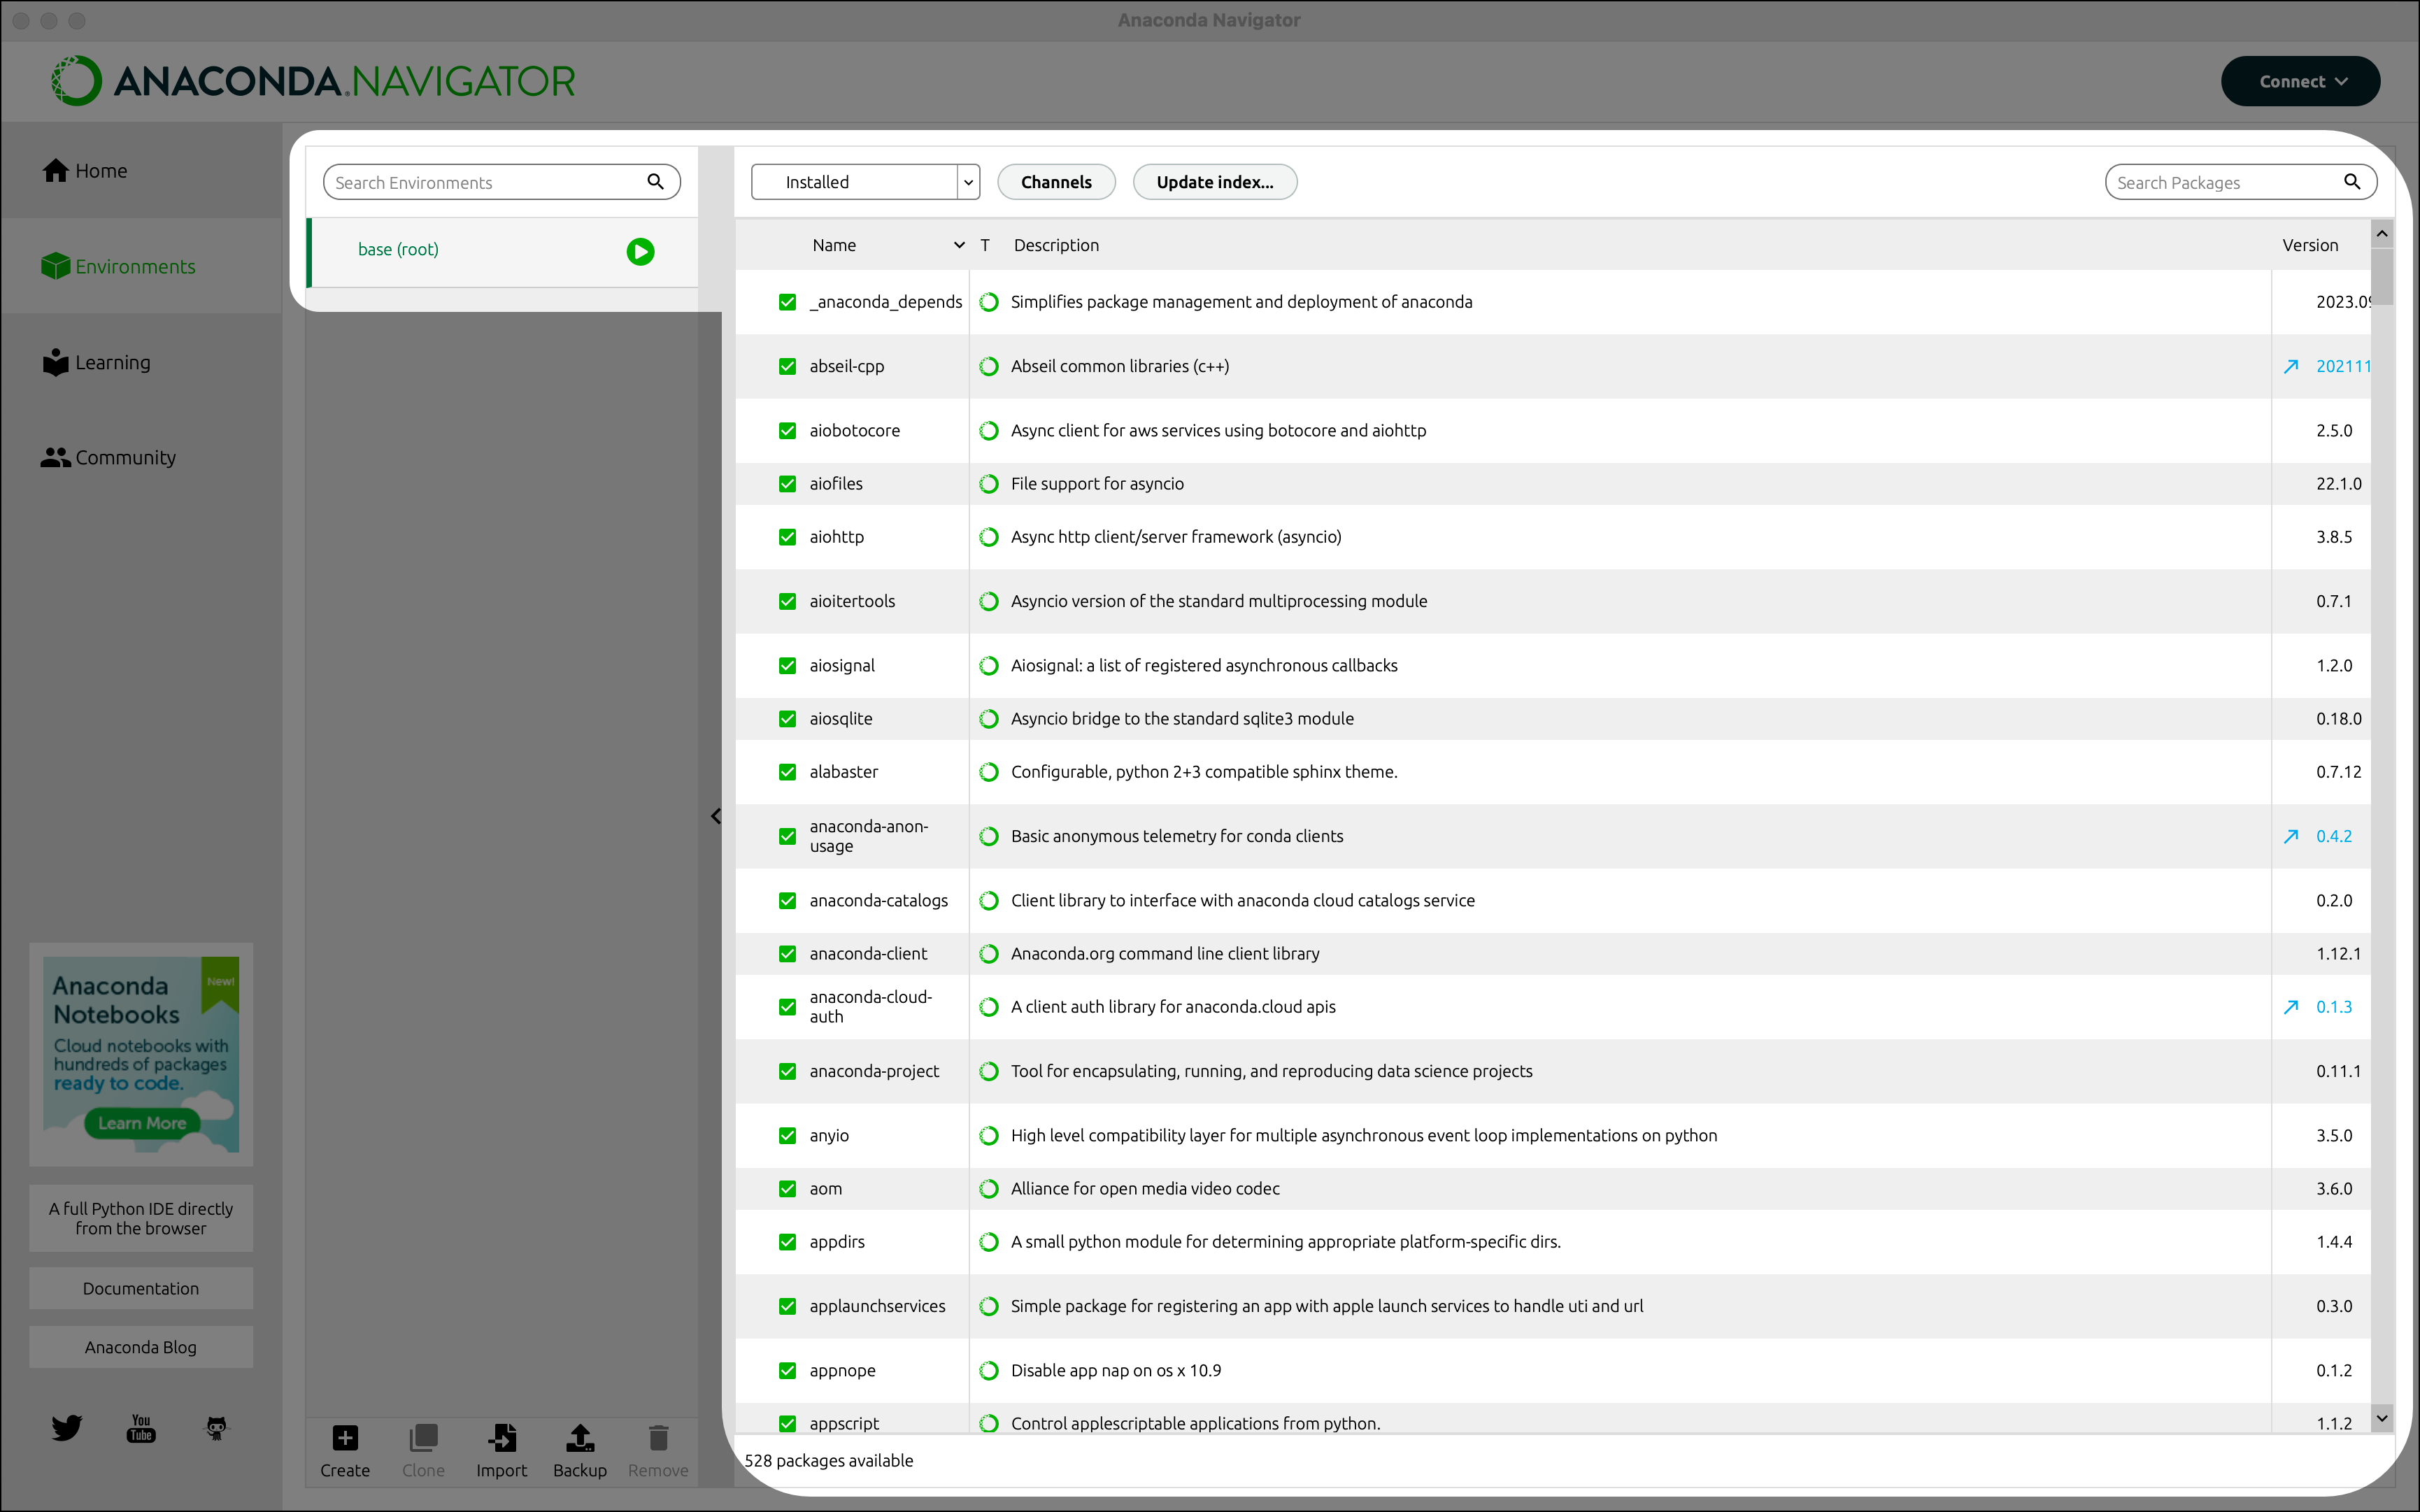
On the Environments page, the packages table in the right column lists the packages included in the environment selected in the left column.
Note
Packages are managed separately for each environment. Changes you make to packages only apply to the active environment.
Tip
The Update Index button refreshes the packages table with all packages that are available in any of the enabled channels.
Filtering the packages table#
By default, only installed packages are shown in the packages table. To filter the table to show different packages:
Click the dropdown beside Channels.
Select which types of packages to display.
Note
Selecting the Updatable filter option lists packages that are installed and have updates available.
Searching for packages#
To search for a specific package, type all or part of the package’s name into the Search Packages box.
The results of the search depend on:
the channels added to Navigator,
the selected package list filter option, and
the environment selected, if searching for already-installed packages
If a package you are expecting doesn’t appear in the search, make sure you have the correct filter option and environment selected. If the package is not available in the default channels, make sure the correct channels are added to your Channels list.
Installing a package#
Select the environment where you want to install the package.
Note
Anaconda does not recommend installing packages in your
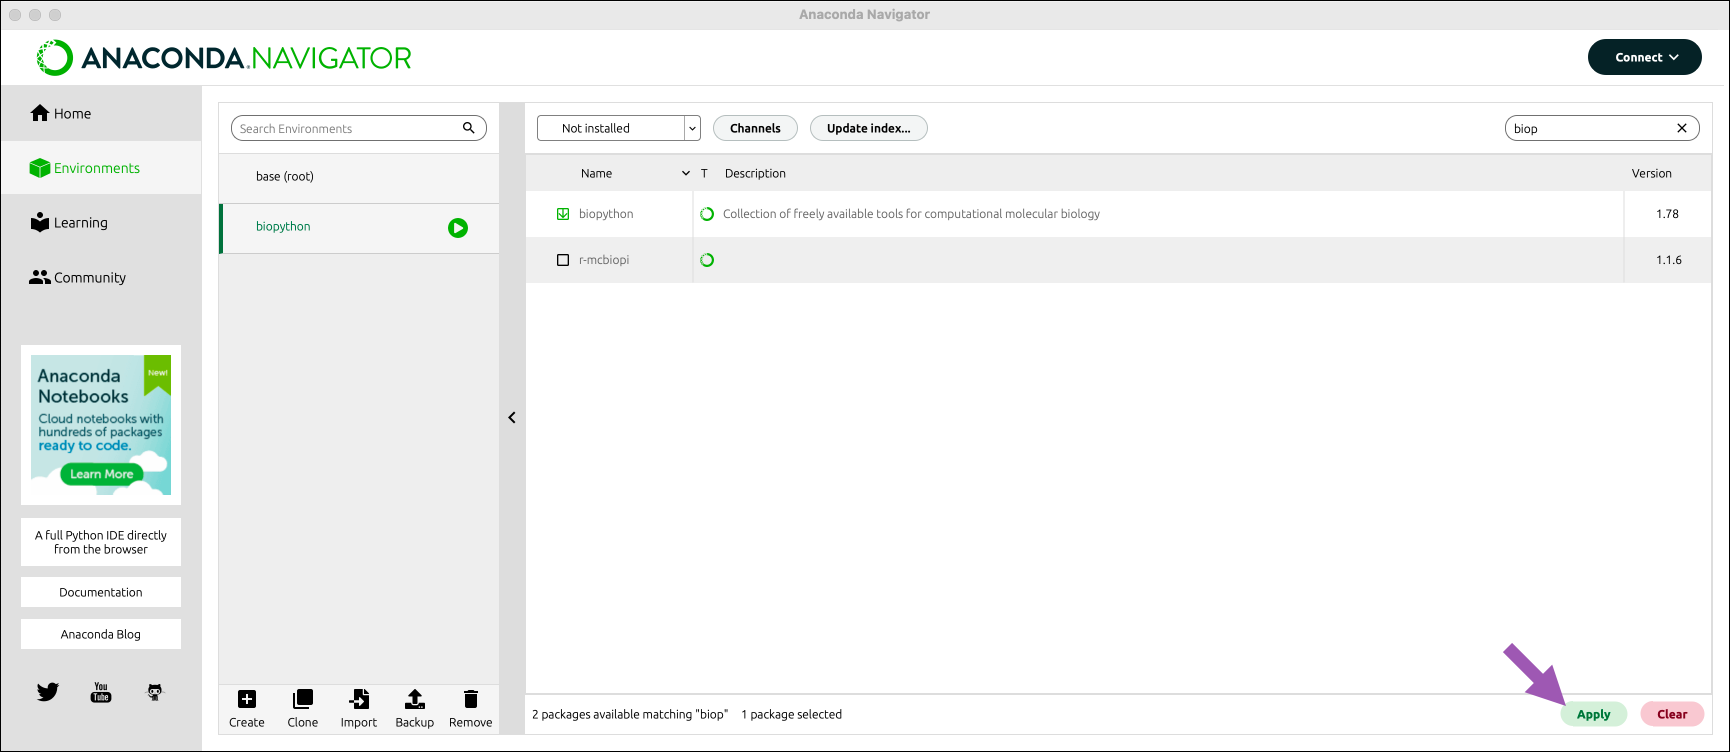
baseenvironment.Select the Not Installed filter option to list all packages that are available in the environment’s channels, but not installed.
Note
Only packages that are compatible with your current environment are listed.
Use the Search Packages box to narrow the package options, if necessary.
Select the package you want to install.
Click Apply.
Review the Install Packages information. This dialog lists the packages chosen for installation and all dependencies of those packages that also need to be installed.
You can sort the list of packages to be installed by the following information:
- Name
The name of the package.
- Unlink
The package version being uninstalled.
- Link
The package version being installed.
- Channel
The channel from which the package is being installed.
- Action
The action being taken. In this case, “Install”.
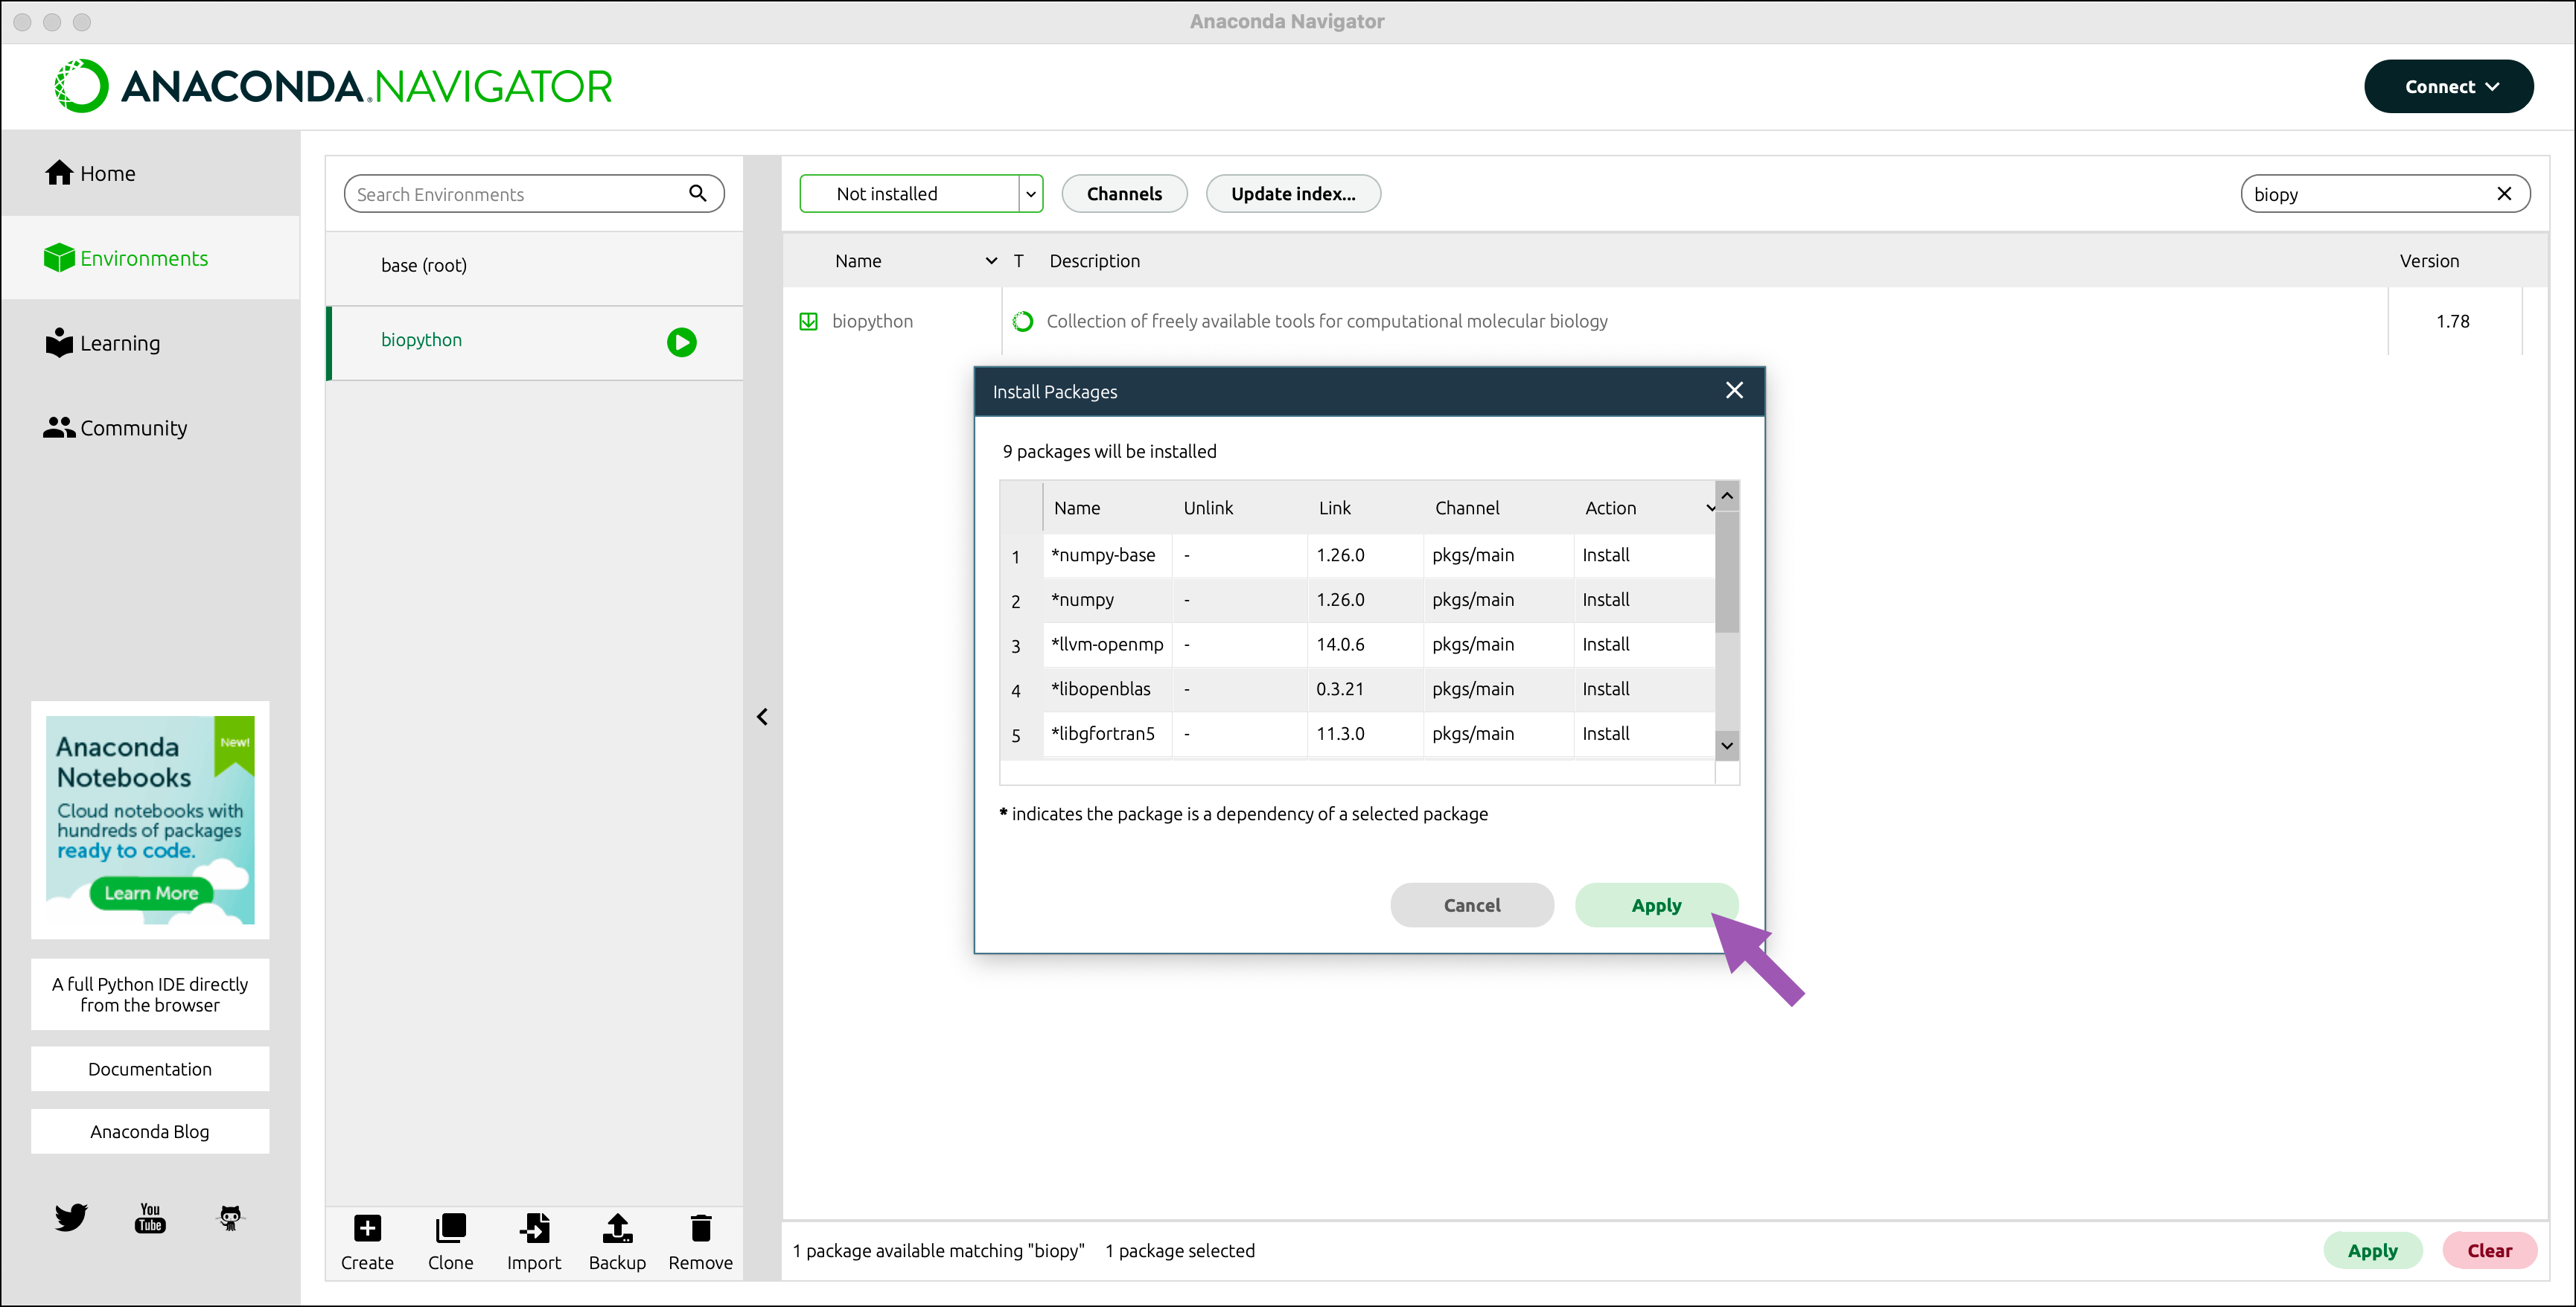
Click Apply.
Tip
If a new package doesn’t appear in the packages table after you install it, select the Home page, then click Refresh to reload the packages table.
Confirming a package is installed correctly#
Once a package is installed, it appears in the Installed package list for the given environment, but another way to confirm that a package is installed correctly is by opening a Jupyter Notebook in that environment, importing the package, and displaying its help text. These instructions assume you created an environment named biopython and installed the BioPython package into it.
On the Home page, select the
biopythonenvironment from the environment dropdown.Click Install on the Jupyter Notebook application tile to install it into the
biopythonenvironment.Launch Jupyter Notebook from its application tile.
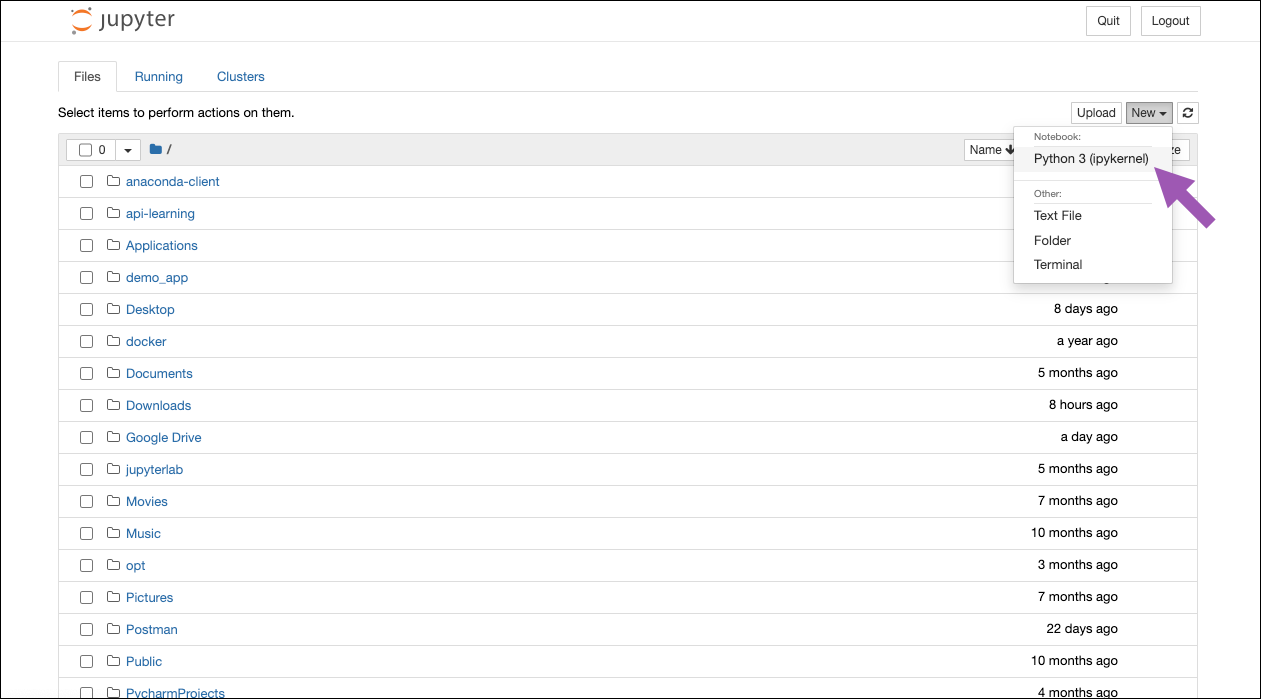
In the Jupyter Notebook, click New and select the Python 3 kernel.
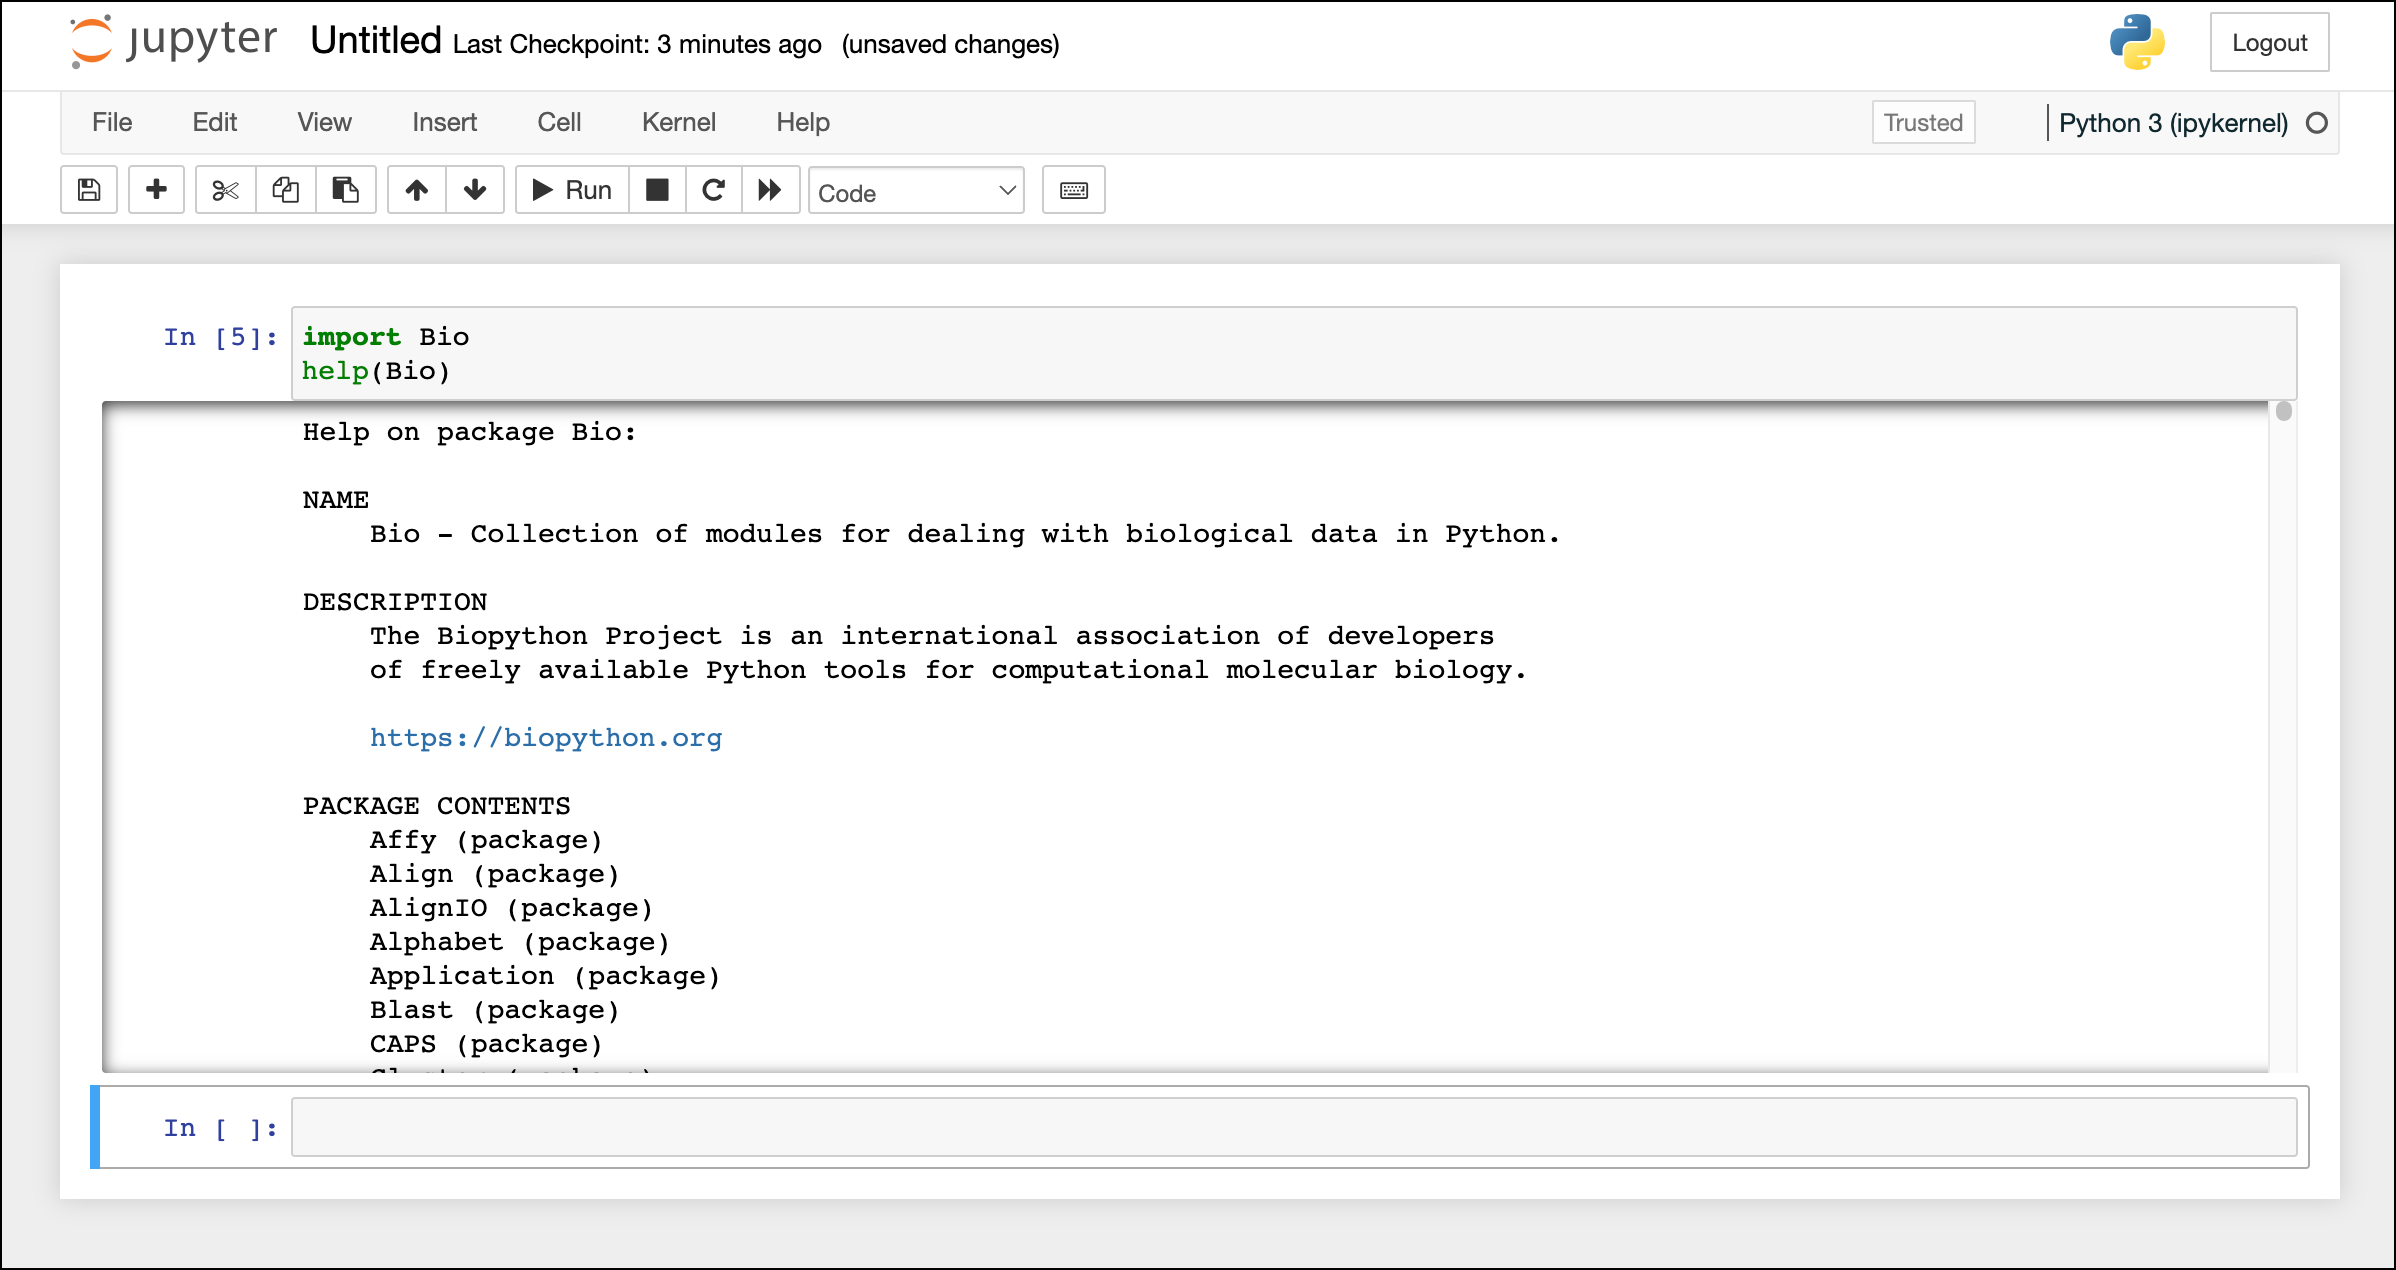
Copy and paste the following code into the first cell:
import Bio
help(Bio)
To run the code, click Run or use the keyboard shortcut Ctrl+Enter (Windows)/Ctrl+Return (Mac).
The BioPython help text is displayed.
Note
To determine the import name of a package (such as
Biofor BioPython), search the package’s documentation.
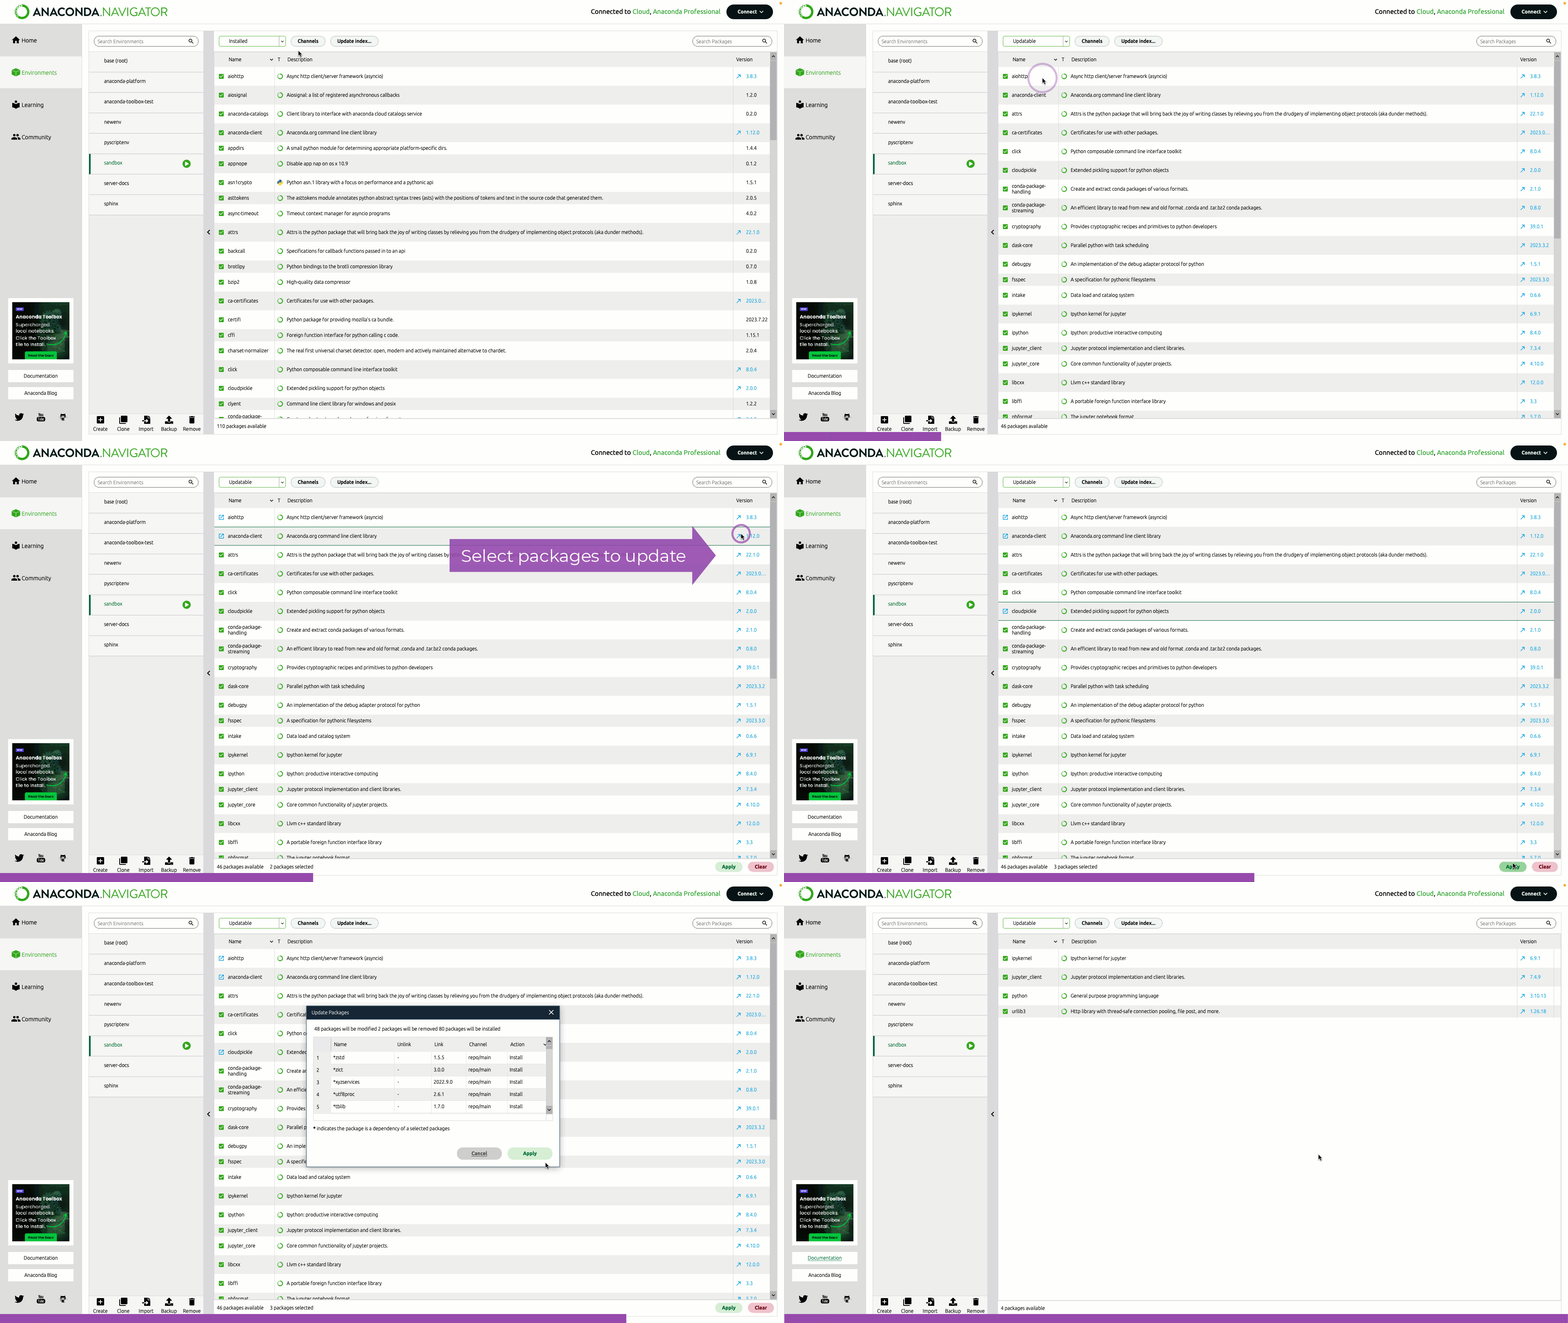
Updating a package#
To mark packages for updating:
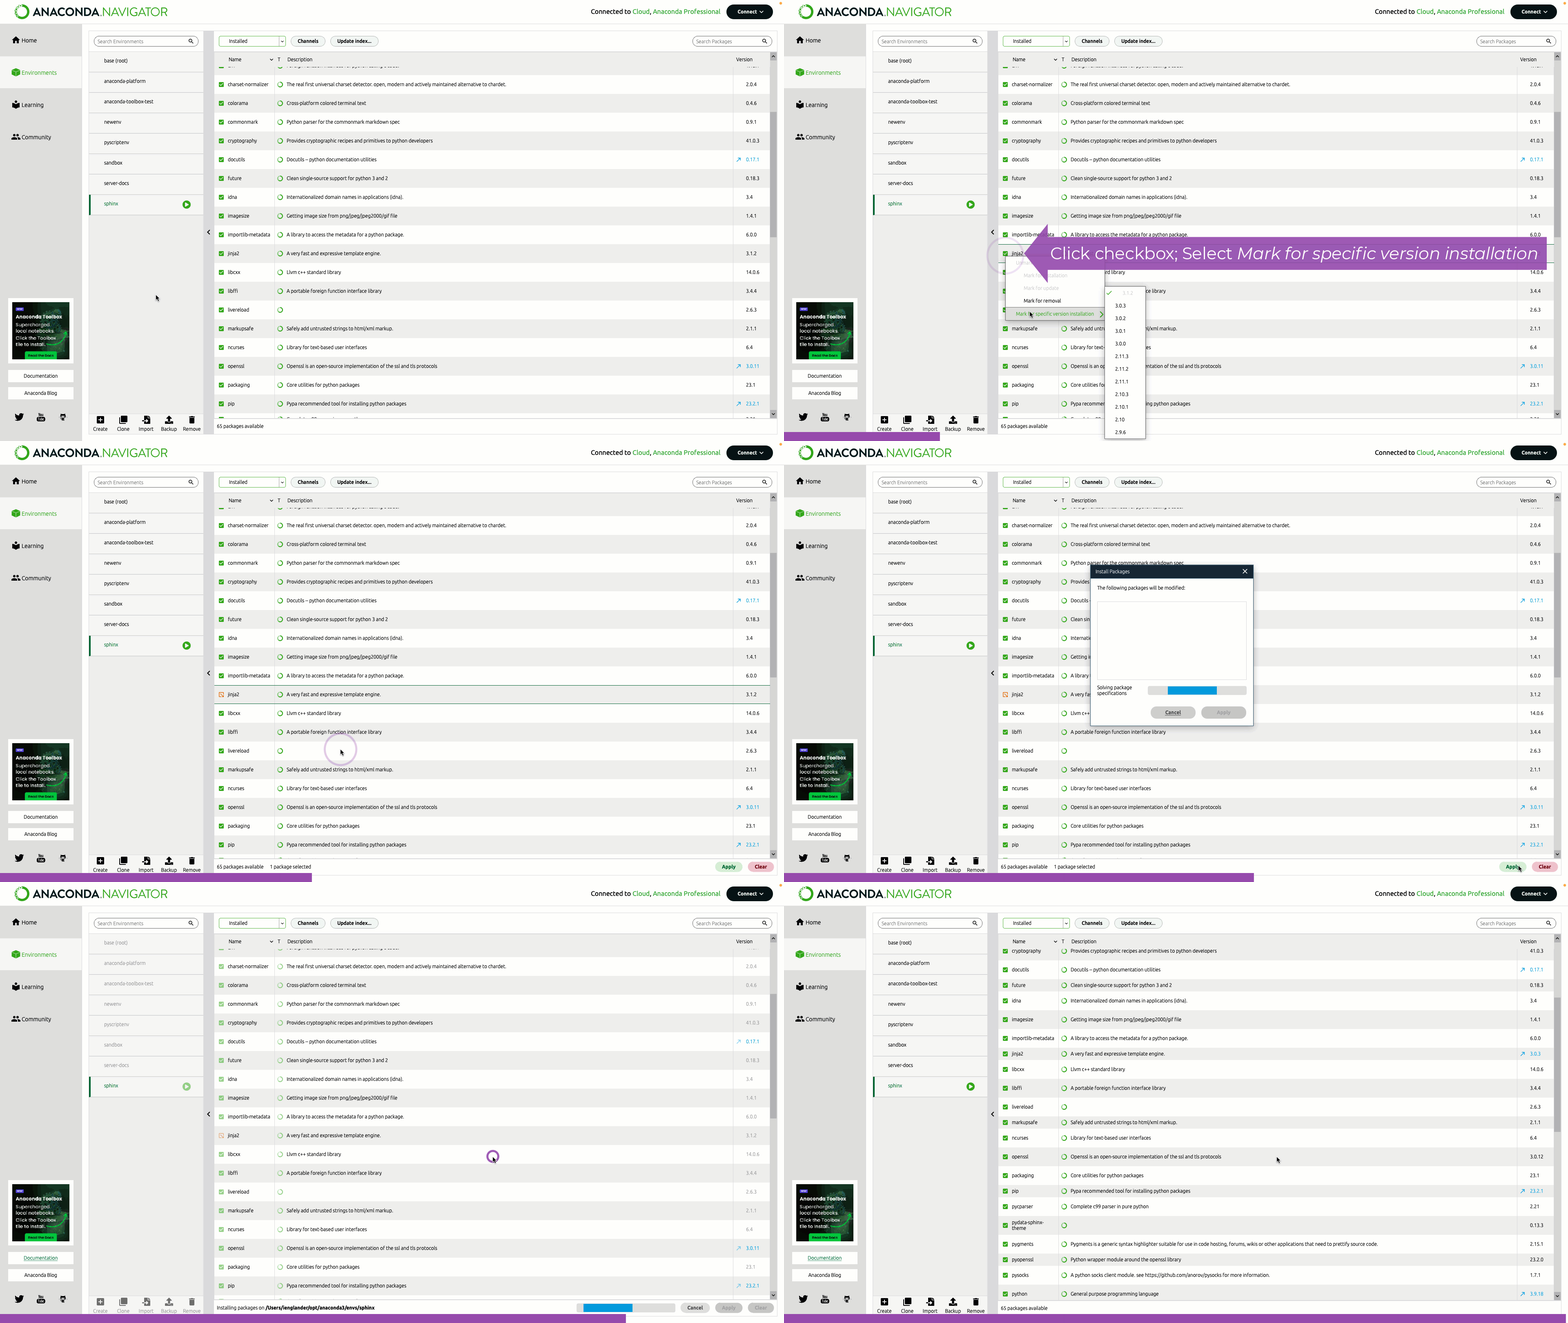
Installing a different package version#
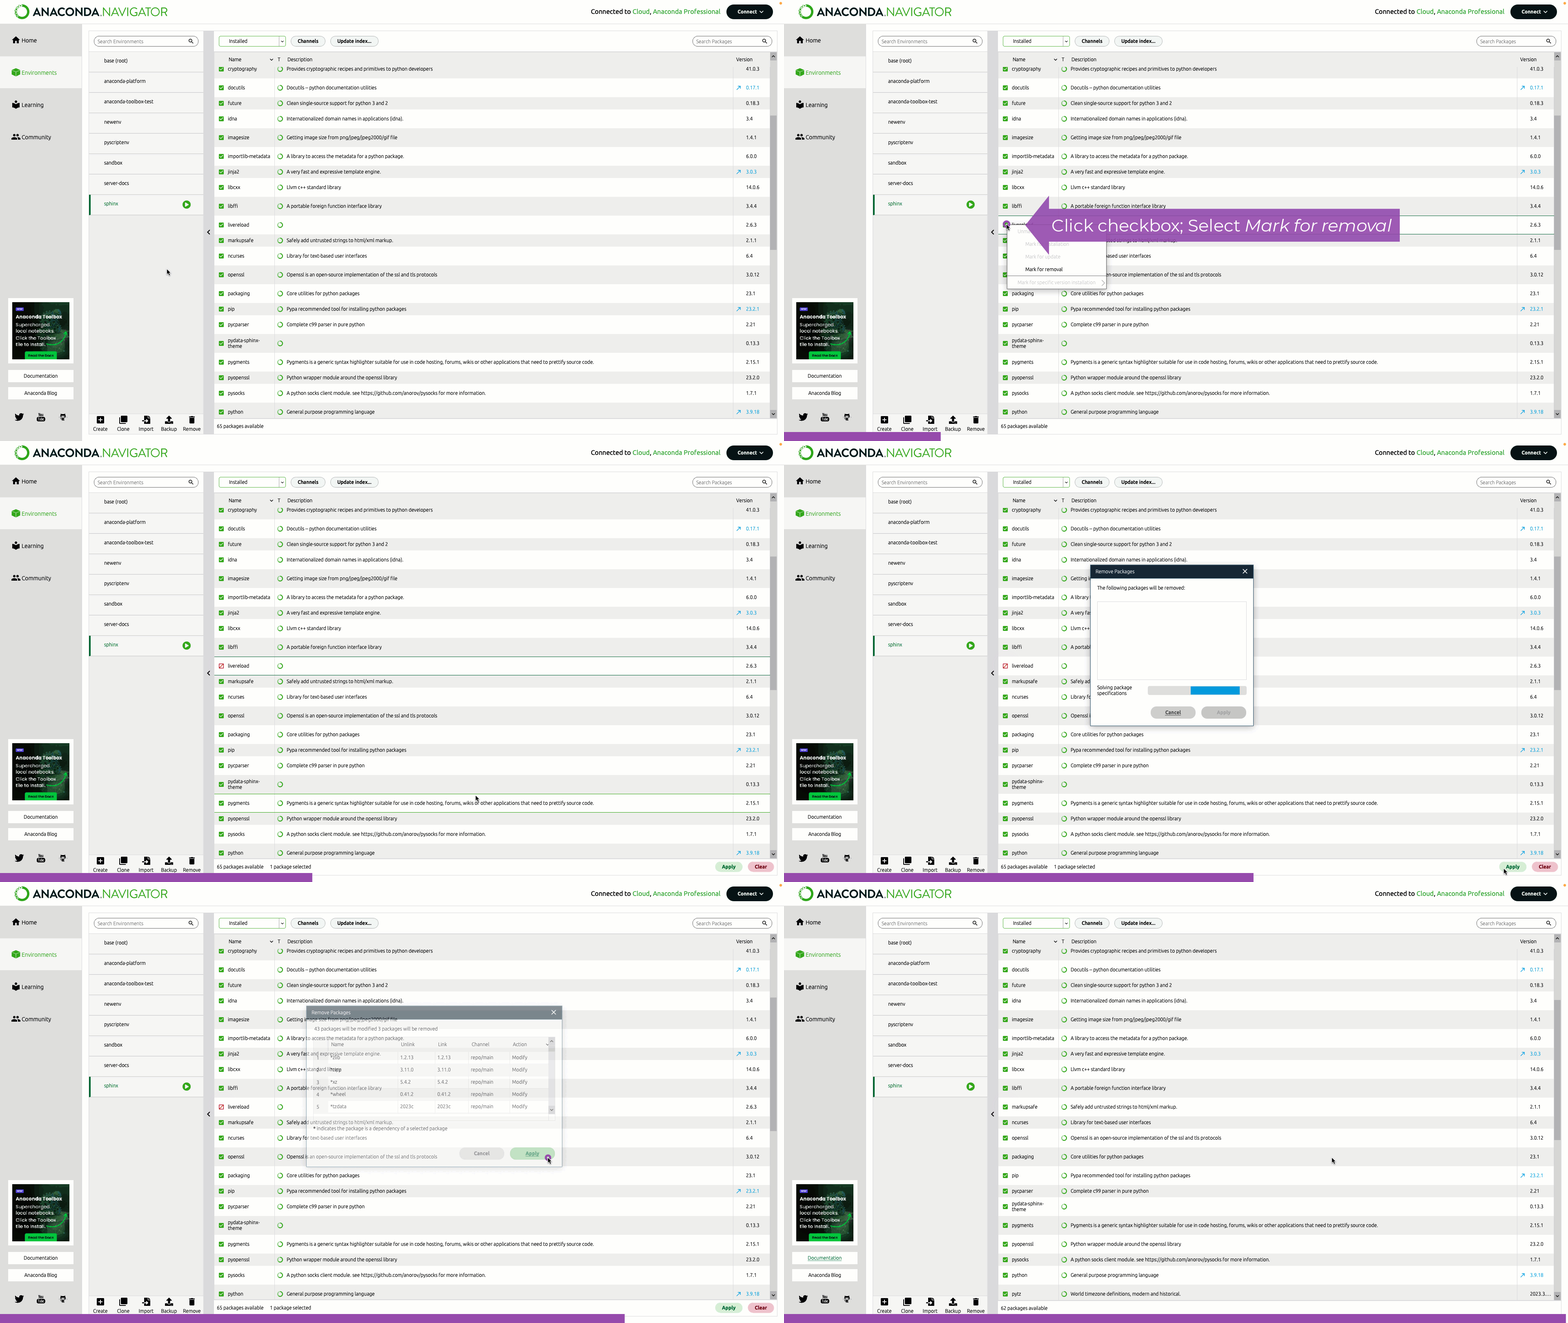
Removing a package#
Advanced package management#
Navigator provides a convenient graphical interface for managing conda environments, channels, and packages. But if you’re comfortable working with Anaconda Prompt (terminal on Linux or macOS), you can access additional, advanced management features. To learn more, see Managing packages in the conda documentation.
