Working with environments#
AEN runs on conda, a package management system and environment management system for installing multiple versions of software packages and their dependencies and switching easily between them.
A conda environment usually includes 1 version of Python or R language and some packages.
The ability to have a custom project environment is one of the most powerful features of AEN. Your project environment is integrated so that all of your project applications recognize it and all of your team members have access to it.
This section contains information about:
Creating a default conda environment using the Jupyter Notebook application
Creating a default conda environment using the Jupyter Notebook application
NOTE: This conda environments guide is specific to AEN. For full conda documentation—including cheat sheets, a conda test drive, and command reference—see the conda documentation.
Creating a default conda environment using the Jupyter Notebook application#
You can create, activate, and install packages and deactivate environments from within the Notebook menu bar.
To install from the Notebook menu bar:
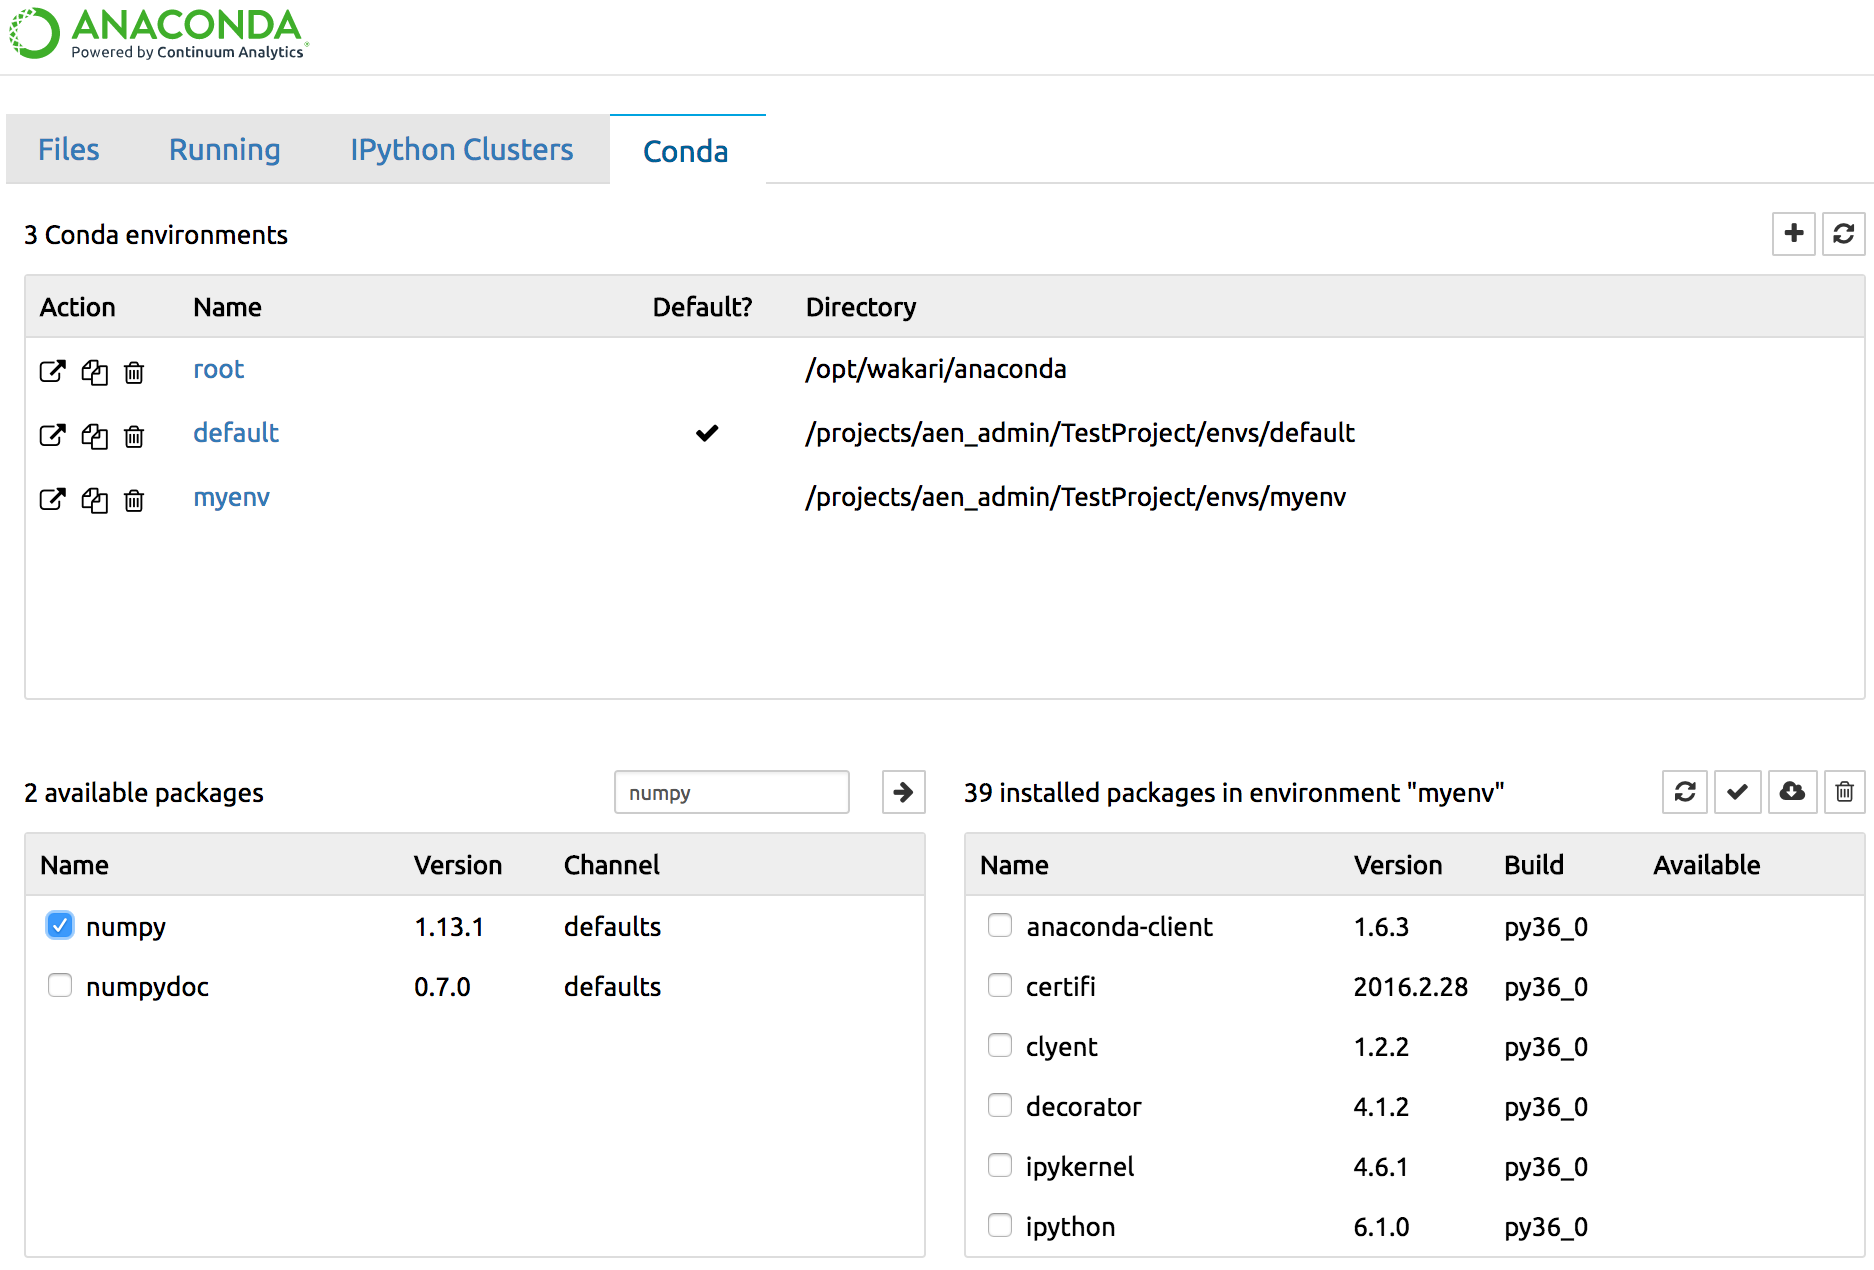
Click the Conda tab and select the plus sign icon.
Search for
numpyin the package search box.Select numpy from the search results.
Click the Install button.
The environment is added to the project’s env directory.
Creating a default conda environment using Terminal#
In AEN, all new environments created with conda automatically include Python, Jupyter Notebooks and pip. You can specify any other packages you want included in your new environment.
TIP: By default, conda creates a new environment in your project’s env
directory—so that all team members have access to the environment. For
information about limiting your team member’s read, write or execute
permissions, see Workbench.
To create a new environment within your AEN account, run the command
conda in a Terminal application.
EXAMPLE: To create a new environment named WeatherModel that contains
Python, NumPy, pip and Jupyter Notebooks in your project’s env directory:
Log in to AEN.
Open a project.
On the project home page, click the Terminal application icon to open a Terminal.
Create the environment:
conda create -n WeatherModel numpy
TIP: Python, pip and Jupyter Notebooks are automatically installed in each new environment. You only need to specify NumPy in this command.
Make the new environment your default:
source activate WeatherModel
To use your new environment with Jupyter Notebooks, open the Notebook application.
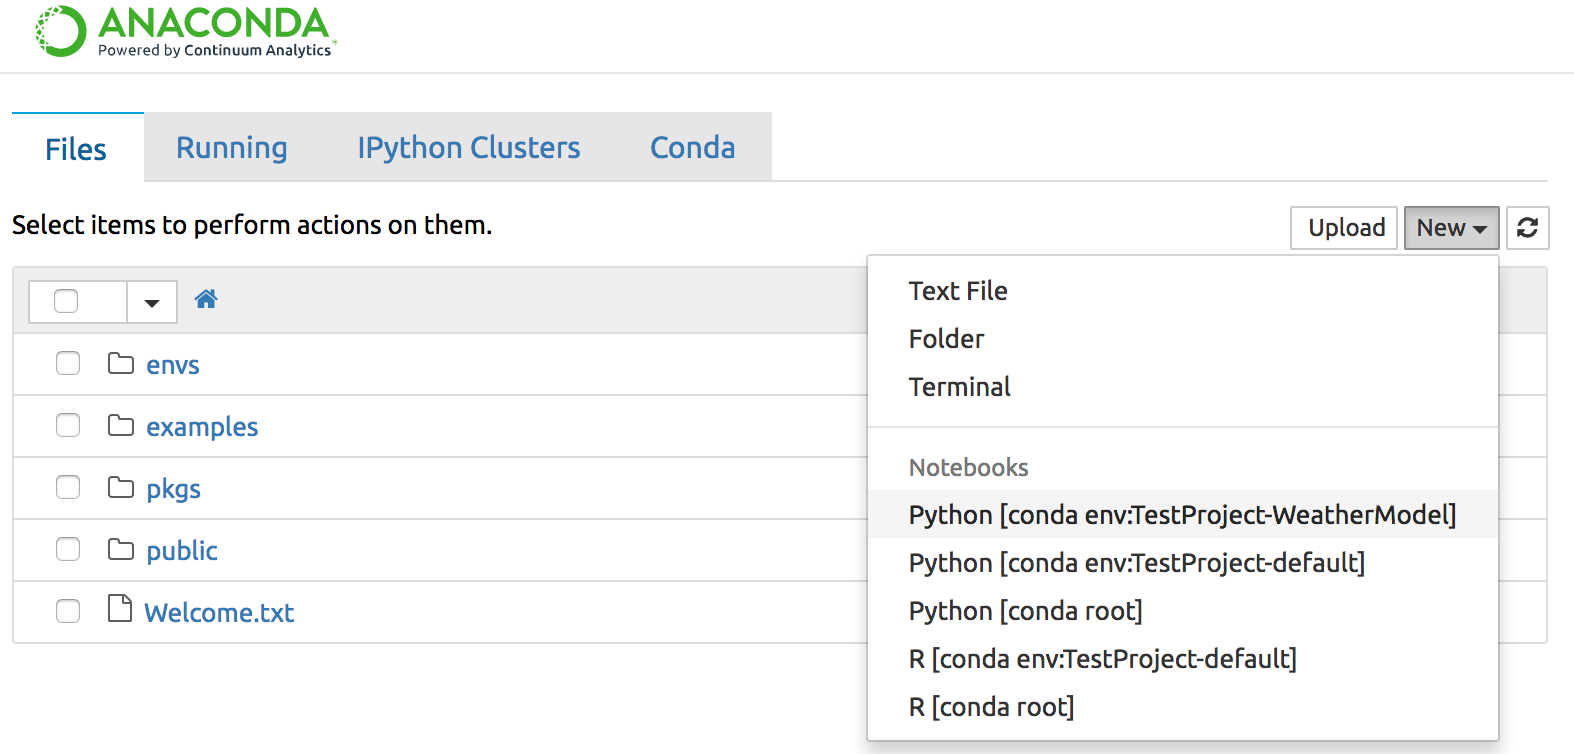
Click the New button to open a new notebook. In the drop-down menu under Notebooks, the environment you just created is displayed.
To activate that environment, select it.
The environment is added to the project’s
envdirectory.
NOTE: You can deactivate the new environment when you are finished with your
notebook by opening the Terminal application and running the command
source deactivate.
Using your conda environment in a notebook#
Whether you have created an environment using conda in a terminal, or from the Conda tab in a notebook, you can use the conda environment in the same way.
When working in a notebook, to select the environment you have created and want to use with that notebook, in the Kernel menu, select Change Kernel.
EXAMPLE: If you have an environment named my_env in a project named
test1 that includes NumPy and SciPy and you want to use that environment
in your notebook, in the Kernel menu, select Python [conda env:test1-my_env].
The notebook code will run in that environment and can import NumPy and SciPy functions.
Customizing your conda environment#
If you need a Python package that AEN doesn’t include by default, you can install additional packages into your AEN environment.
TIP: You cannot install packages into the default Anaconda environment. You must create your own environment before installing a new package into that environment.
AEN is built on Anaconda, so you can install additional Python packages using conda or pip—both of which are included with Anaconda.
Installing a conda package using Terminal#
To install a conda package using the Terminal application:
Create and activate the environment using the steps in Creating a default conda environment using the Jupyter Notebook application.
In your Terminal application, run the command
conda install <packagename>.NOTE: Be sure to specify the Python version you want when using conda to create the environment, or it will use the same version as root.
EXAMPLE:
conda create -n mypy3 python=3 numpy scipy
A conda environment named mypy3, running on Python 3 and containing NumPy and SciPy is created. All subsequent packages added to this environment will be the Python 3 compatible versions.
Installing a conda package using Notebook#
You can also install the package within your notebook without using the terminal app:
From the Notebook application, click the Conda tab.
Select the environment you wish to use.
Search for the package you want to add.
Click the Install button.
Uninstalling a conda package#
To uninstall a package using this method, run the command conda remove <packagename>.
NOTE: Replace <packagename> with the name of the package you are
uninstalling.
