Datasets#
Datasets enable you to securely upload and update datasets in Anaconda Cloud. You can then provide access to other users, as well as import your datasets to a separate workbook to continue your data analysis from any machine, anytime.
Understanding datasets#
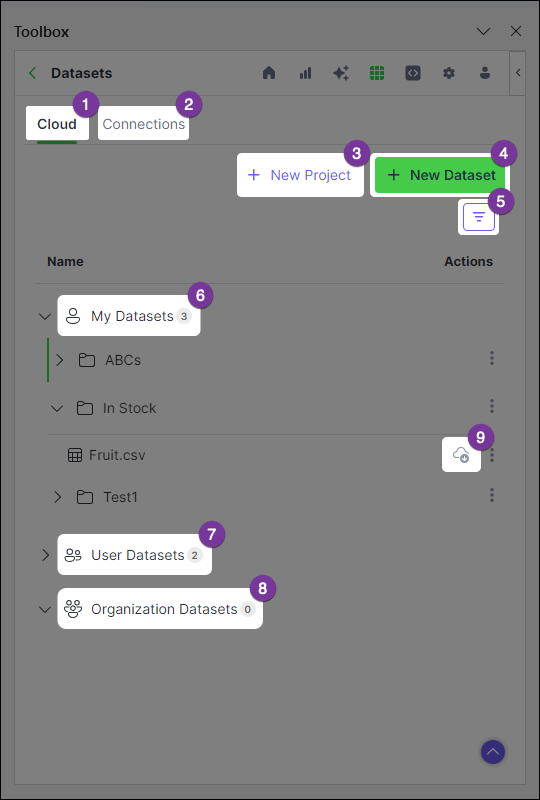
Let’s take a look at the different elements and tabs within Datasets.

- Cloud
Shows all projects and project contents
- Connections
Displays datasets previously uploaded to or downloaded from Anaconda Cloud
- New Project
Create a new project to store and share datasets (sheets and tables)
- New Dataset
Create a new dataset and assign it to a project
- Filters
Apply filters to efficiently locate data in your catalog
- My Datasets
A collection of all your cloud projects and their nested datasets
- User Datasets
Projects to which you have access, owned by other individuals
- Organization Datasets
Projects to which you have access, owned by organizations
- Status Icons
Indicates the connection status of your dataset
Creating a project#
When you first access Datasets, you are prompted to create a new project. You can think of projects as folders for storing your datasets.
Create a project at any time using the following steps:
From the Cloud tab, click + New Project.
Enter a unique title for your project and an optional description.
Designate the project owner(s) for your project. By default, you are set as the only project owner.
Note
Administrators and project owners are the only users allowed to edit projects. Anaconda Cloud organization administrators have full permissions for any projects owned by their organization.
(Optional) Provide access to your project by inviting users from one of your organizations.
Click Save.
Uploading data#
Protect your local datasets and increase their accessibility by saving them in cloud storage. If you experience hardware failure, or need to work on a different device, your projects will be right where you left them!
Upload sheets and tables to your projects using the following steps:
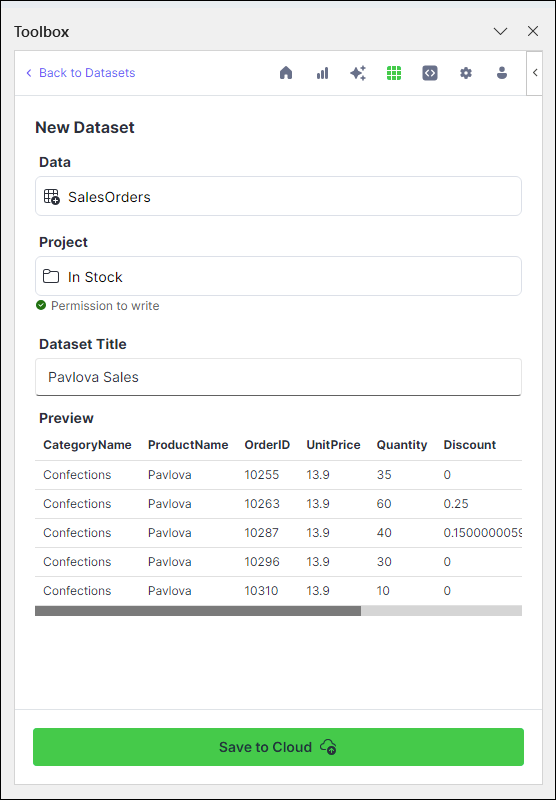
From the Cloud tab, click + New Dataset.
Under Data, choose a range of data manually, a specific table, or an entire sheet.
Under Project, select a project to house your dataset.
Under Dataset Title, provide a title for your dataset.
Complete the upload by clicking Save to Cloud.
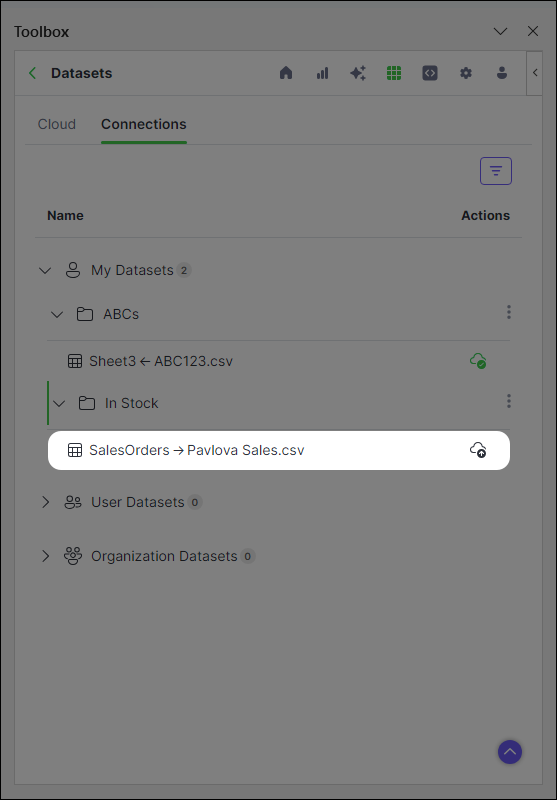
You can now see the established connection between your dataset and Anaconda Cloud on the Connections tab.

When you make changes to the dataset, re-upload it to update the dataset stored in the cloud.
Downloading data#
If another user shares a project with you, or if you’ve uploaded a dataset in another workbook or Anaconda Notebook, download appears beside that dataset. Datasets can be downloaded as either an Excel range reference or as an Anaconda Code object.
To download a dataset as an Excel range reference:
Click download beside the dataset you want to download.
Under Workbook Placement, select the sheet where you want to insert the data.
Complete the download by clicking Download to Workbook.
The data is now available in the selected sheet.
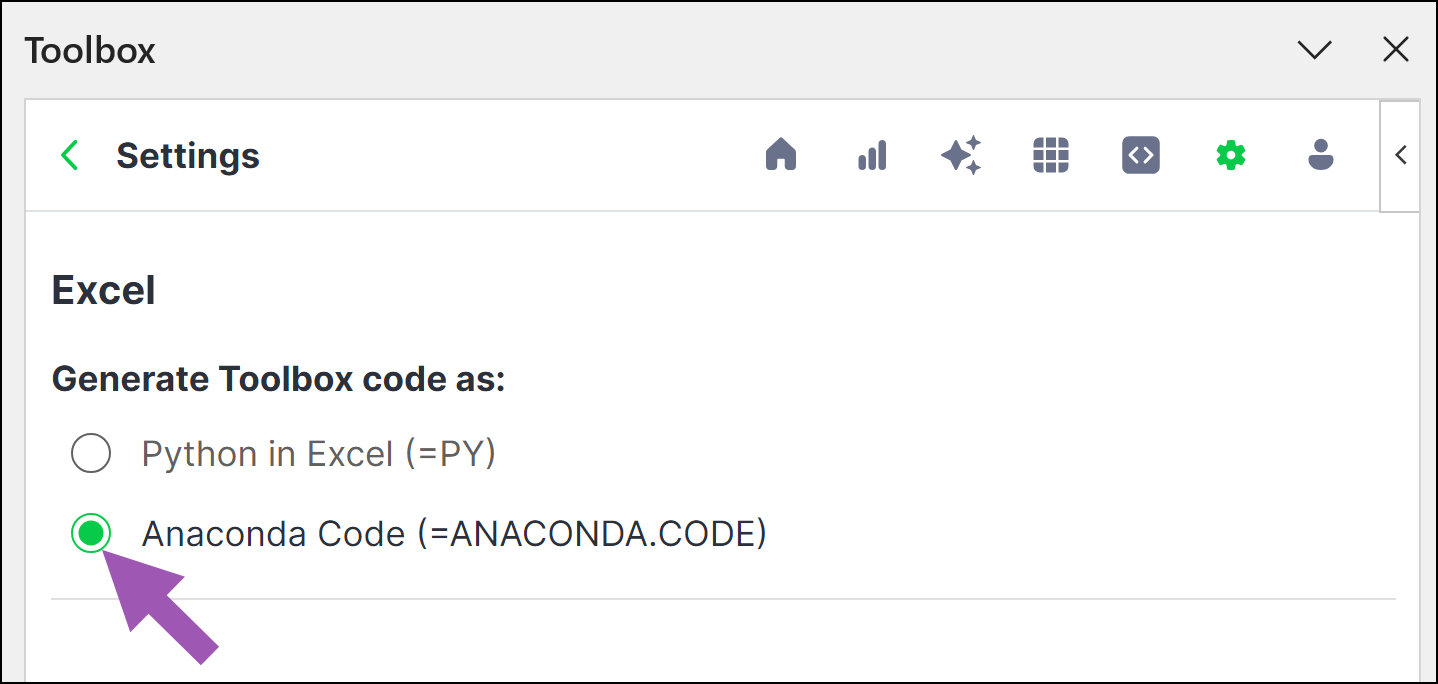
To download a dataset as an Anaconda Code object:
Click download beside the dataset you want to download.
Select Import as Anaconda Code object.
Click Click to select.
Select an empty cell.
Click OK in the Select Data dialog.
Click Download to Workbook.
The selected cell will display PyScript Data. Click to see details about the object.
Understanding status icons#
Status icons appear by each dataset. Click the icons to perform the following functions:
Icon |
Name |
Function |
|---|---|---|
|
Upload |
Click to upload a dataset in your workbook to Anaconda Cloud. |
|
Re-upload |
Click to re-upload the dataset in your workbook to Anaconda Cloud. |
|
Download |
Click to download a dataset from Anaconda Cloud to your workbook. |
|
Re-download |
The dataset on Anaconda Cloud has been updated. Click to update the dataset in your Excel workbook with these changes. |
|
Synced |
The dataset in your Excel workbook is up-to-date with the dataset in Anaconda Cloud. |
|
Conflict |
The dataset on Anaconda Cloud has been updated and now conflicts with the dataset in your Excel Workbook. Click to resolve the conflict. |


