Getting started with Anaconda AI Navigator#
This guide is designed to walk you through the essential steps to begin using Anaconda AI Navigator. It provides guidance on signing in, downloading models, chatting with a model, and loading models into the API server.
Note
For help with installation, see Installing Anaconda AI Navigator.
Signing in#
Anaconda AI Navigator requires you to have an Anaconda Cloud account to sign in. If you do not have an Anaconda Cloud account, click Get Started to register an account for free.

You have several options for account registration:
Register with a GitHub, Gmail, or Microsoft account
Sign in manually with an email and password
Once your account is created, or if you already have an account, Sign In using the same method you used to register your account.
Browsing and downloading models#
If you do not have a model downloaded, you can download one of Anaconda’s recommended models by clicking Download on the model tiles shown on the Home page, or you can click Explore Curated Models to open the Models page and view a full list of curated models available for download.
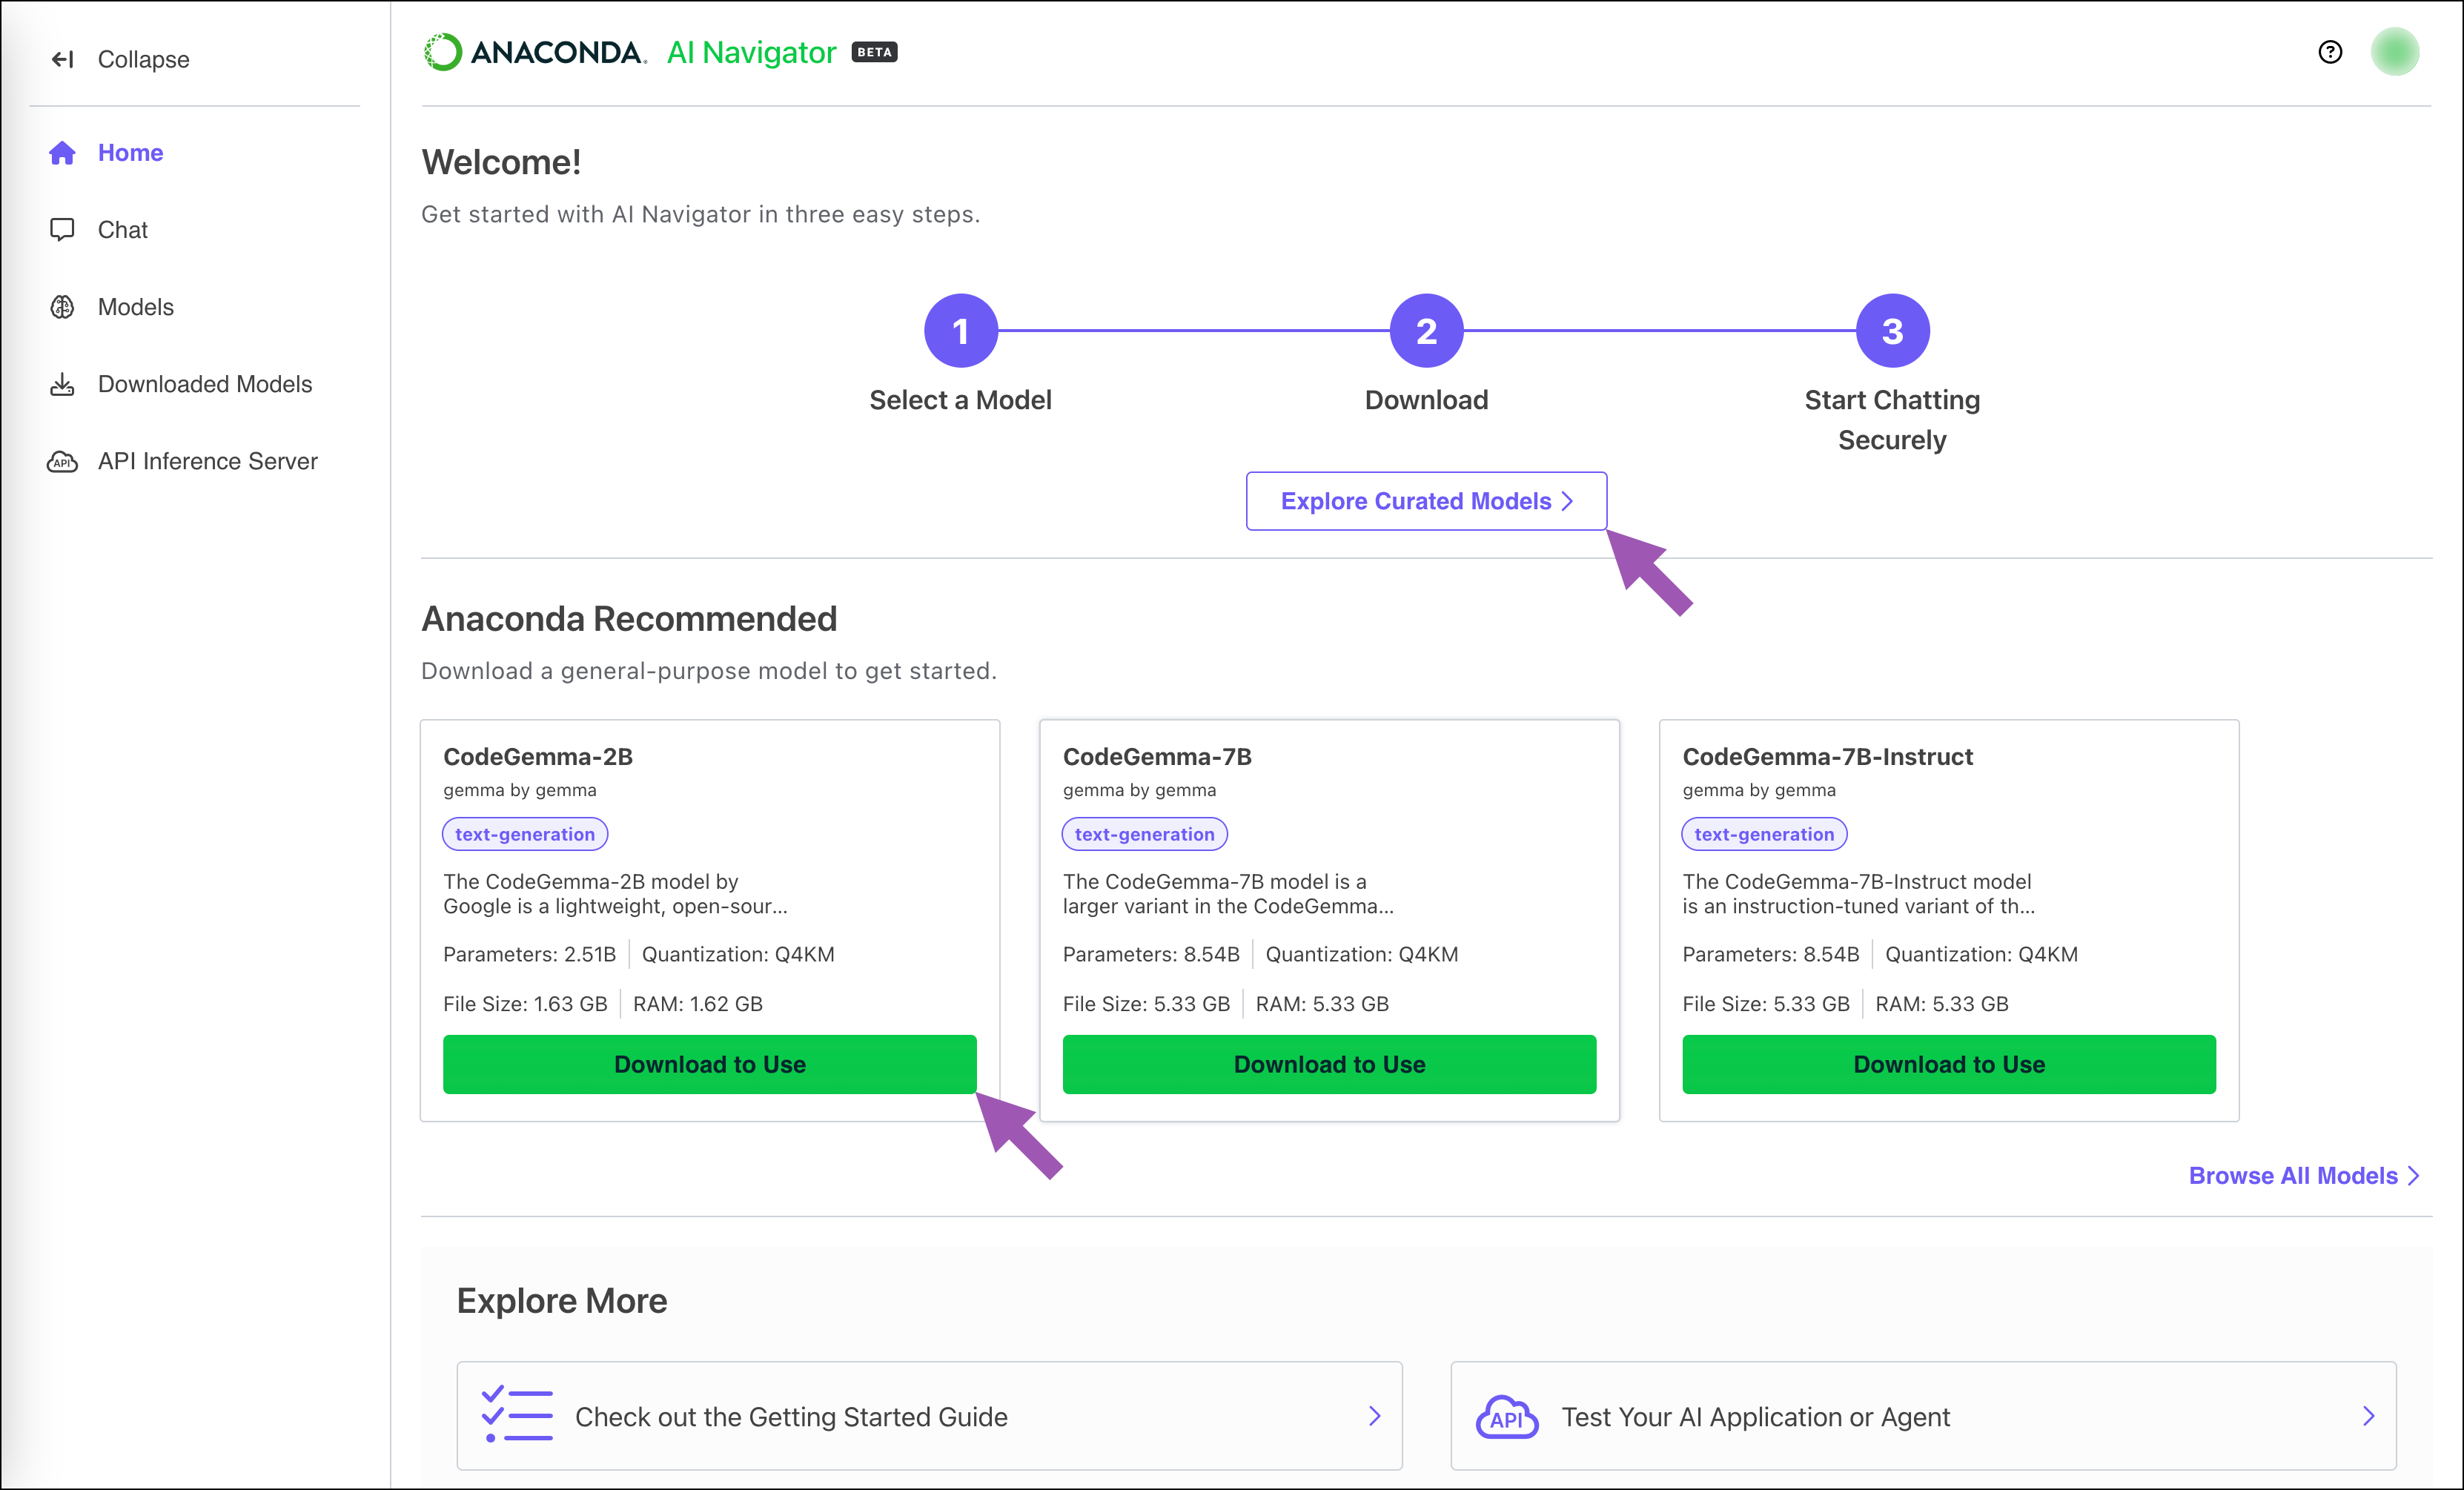
To download a model:
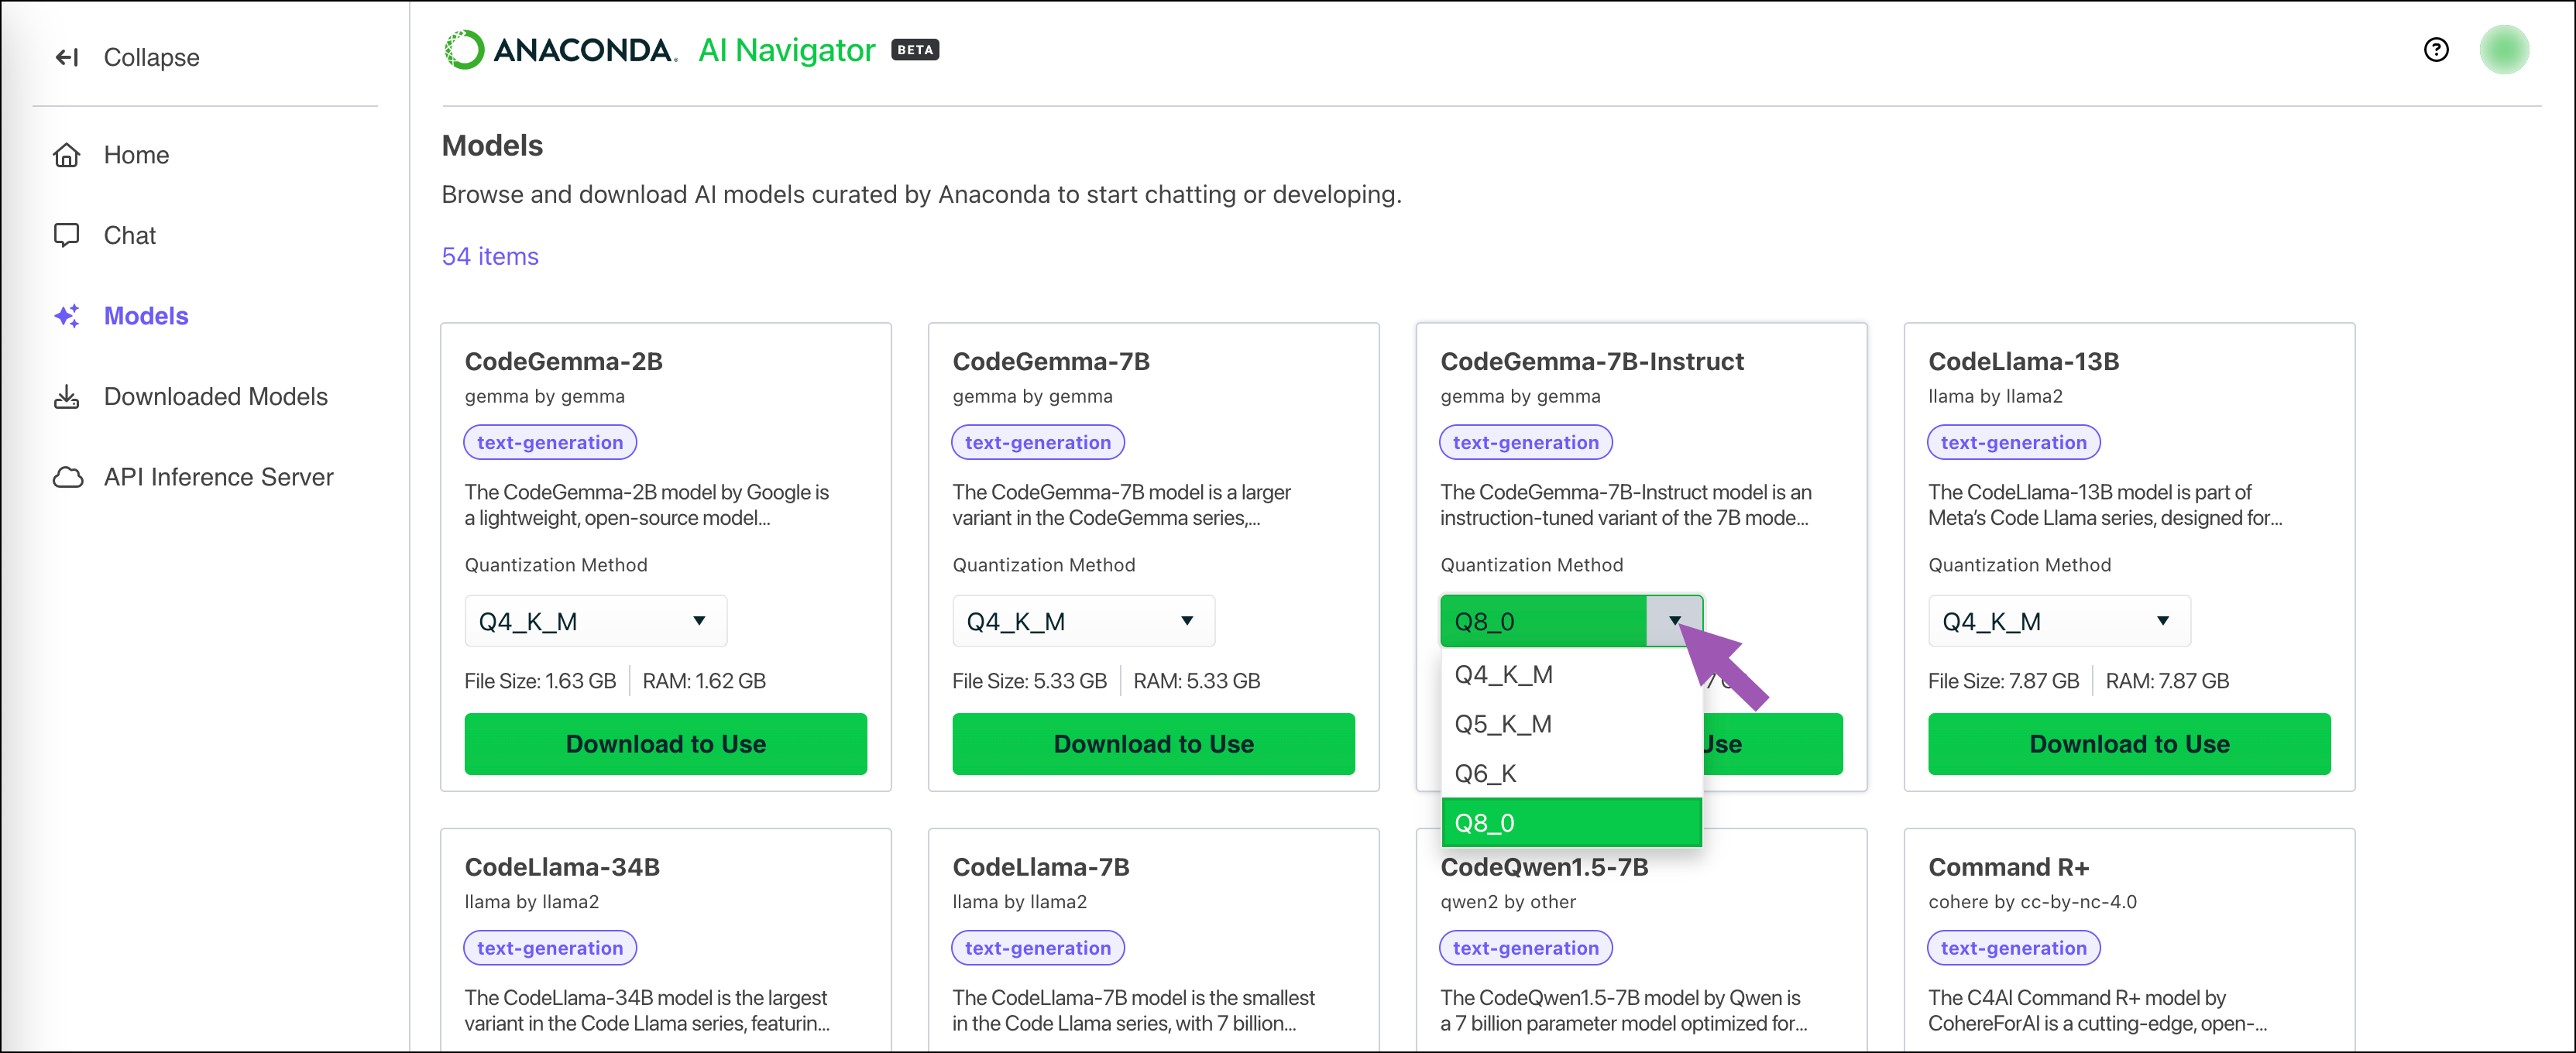
Select Models from the left-hand navigation.
Locate a model you want to download.
Open the Quantization Method dropdown and select a file quantization level, then click Download to download the model locally.
Note
Models are listed alphabetically by name. Verify that you have the available disk space and RAM required before you download a model.
For more information about models and quantization methods, see Models.
Chatting with models#
Load the model you downloaded into the chat interface to start using it immediately!
To load a model into the chat interface:
Select Chat from the left-hand navigation.
Open the Specify Model dropdown and select your model.
Open the Specify File dropdown and select your model file.
Note
If you only have one file for the model, it is automatically loaded into the chat interface.
Enter a prompt to chat with the model!

For more information on using the chat feature, see Chat.
Loading a model into the API server#
Make inference requests to the model from other applications by loading it into the API server.
To load a model into the API server:
Select API Server from the left-hand navigation.
Open the Specify Model dropdown and select your model.
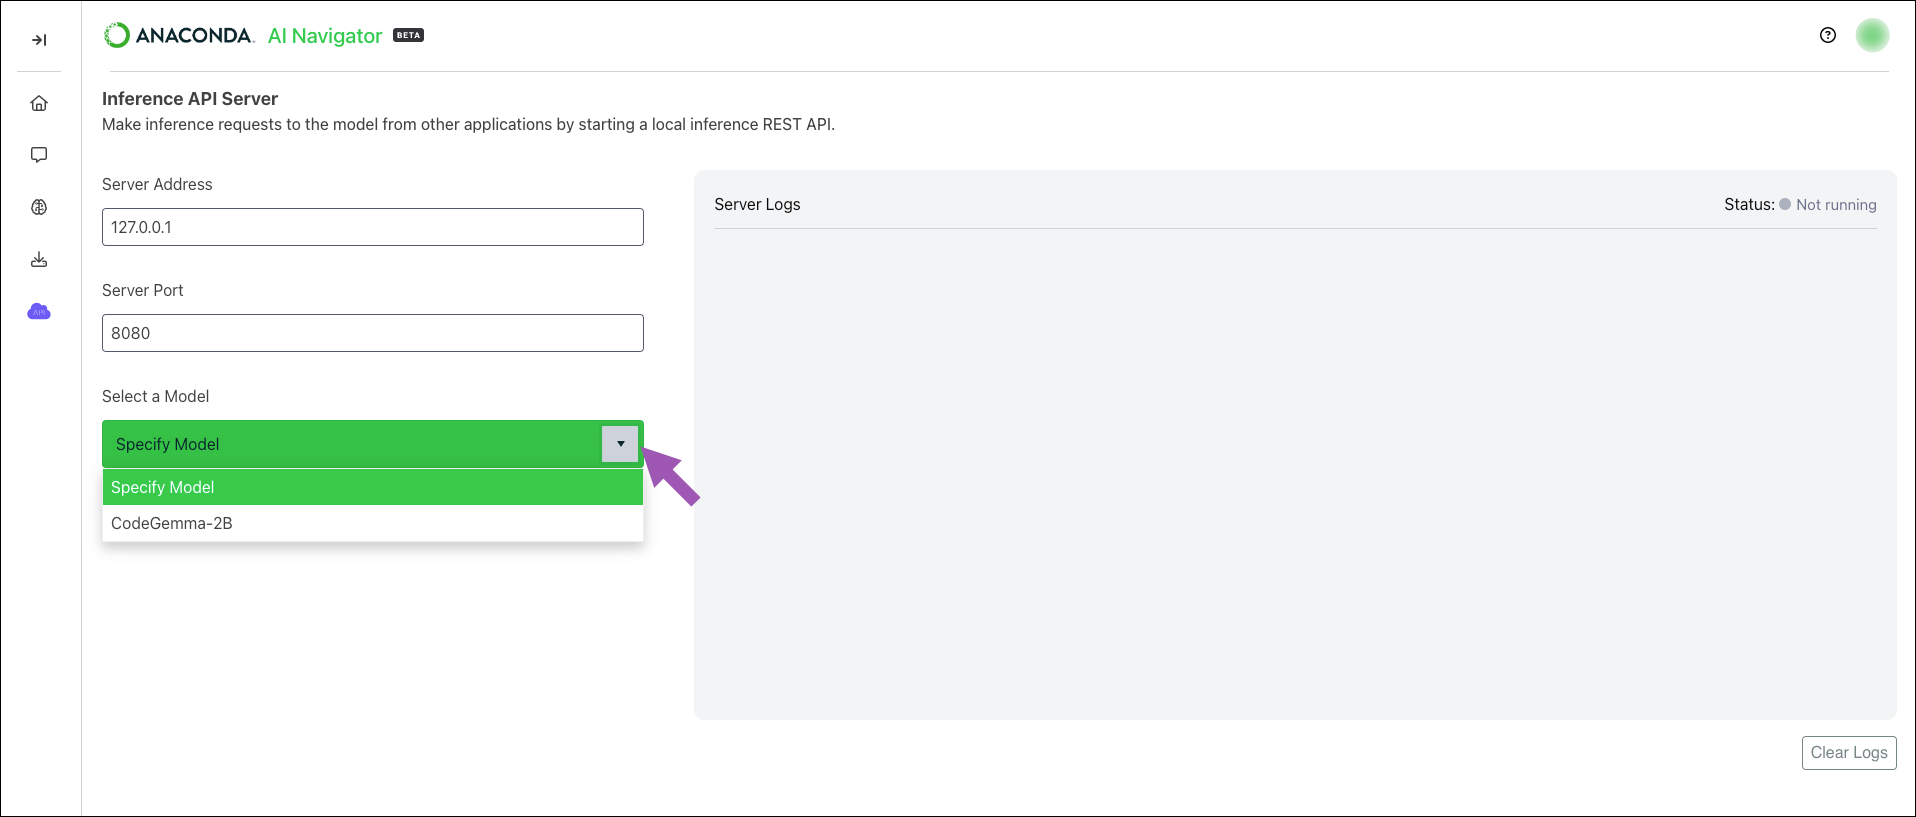
Open the Specify File dropdown and select your model file.
Note
If you only have one file for the model, it is automatically selected.
Click Start to start the server and expose the model to inference requests at the specified server address.
For more information about the API server, see API server.
For step-by-step instructions on how to build a basic chatbot application in Python that makes inference requests to the API server, see our Developing a chatbot tutorial.