Manage your hosted packages#
Adding a collaborator to a package#
You can add other users that are not part of an organization to collaborate on your packages.
From your dashboard, select the package.
To display the package settings, select the Settings option.
To display the current collaborators, select the Collaborators option.
Enter the username of the person you want to add as a collaborator, then click Add.
Note
All collaborators are given full read/write permissions to the package, even for private packages.
Removing a collaborator from a package#
To revoke package access previously granted to a collaborator:
From your dashboard, select the package.
To display the package settings, select the Settings option.
To display the current collaborators, select the Collaborators option.
Click the red X beside a collaborator to revoke their access.
Transferring a package to a new owner#
By default, when you create or add packages, they are attached to your individual profile. You can transfer ownership to another owner account you control, such as an organization profile you manage.
To transfer a package to a new owner:
From your dashboard—or the dashboard of an organization you administer—select the package for which you want to transfer ownership. The system displays options for that package.
To display the package settings, select the Settings option.
Select the Admin option.
Under Transfer this package to a new owner, click Transfer.
Select the organization name for the new owner.
Click Transfer Ownership.
Copying a package#
The following command is an example of how to copy a package from the conda-forge channel to a personal channel called jsmith:
anaconda copy conda-forge/glueviz/0.10.4 --to-owner jsmith
conda-forge/glueviz/0.10.4 is a “spec” that can be formatted in one of two ways: user/package/version or user/package/version/filename.
Caution
The anaconda copy commands from-channel and to-channel have been deprecated. If you attempt to run anaconda copy --from-channel conda-forge --to-channel jsmith glueviz, you will receive an error that Label conda-forge does not exist.
Caution
If the package glueviz/0.10.4 already exists for user jsmith, you will receive the following error message: File conflict while copying!. If you want to copy the package anyway, try prepending the command with one of the following flags:
--replace- allows you to overwrite an already existing package--update- allows you to add missing metadata to an existing package
Removing a previous version of a package#
To remove a previous version of one of your packages from Anaconda.org:
Select the package name.
Navigate to the Files tab.
Select the checkbox to the left of the version you want to remove.
In the Actions menu, select Remove.
To remove a previous version of one of your packages using Anaconda Prompt (Terminal on macOS/Linux), run:
# Replace <USERNAME> with your username
# Replace <PACKAGE> with the package name
# Replace <VERSION_NUMBER> with the desired version
anaconda remove <USERNAME>/<PACKAGE>/<VERSION_NUMBER>
You can now see the change on your profile page at http://anaconda.org/<USERNAME>/<PACKAGE>, where <USERNAME> is your username and <PACKAGE> is the package name.
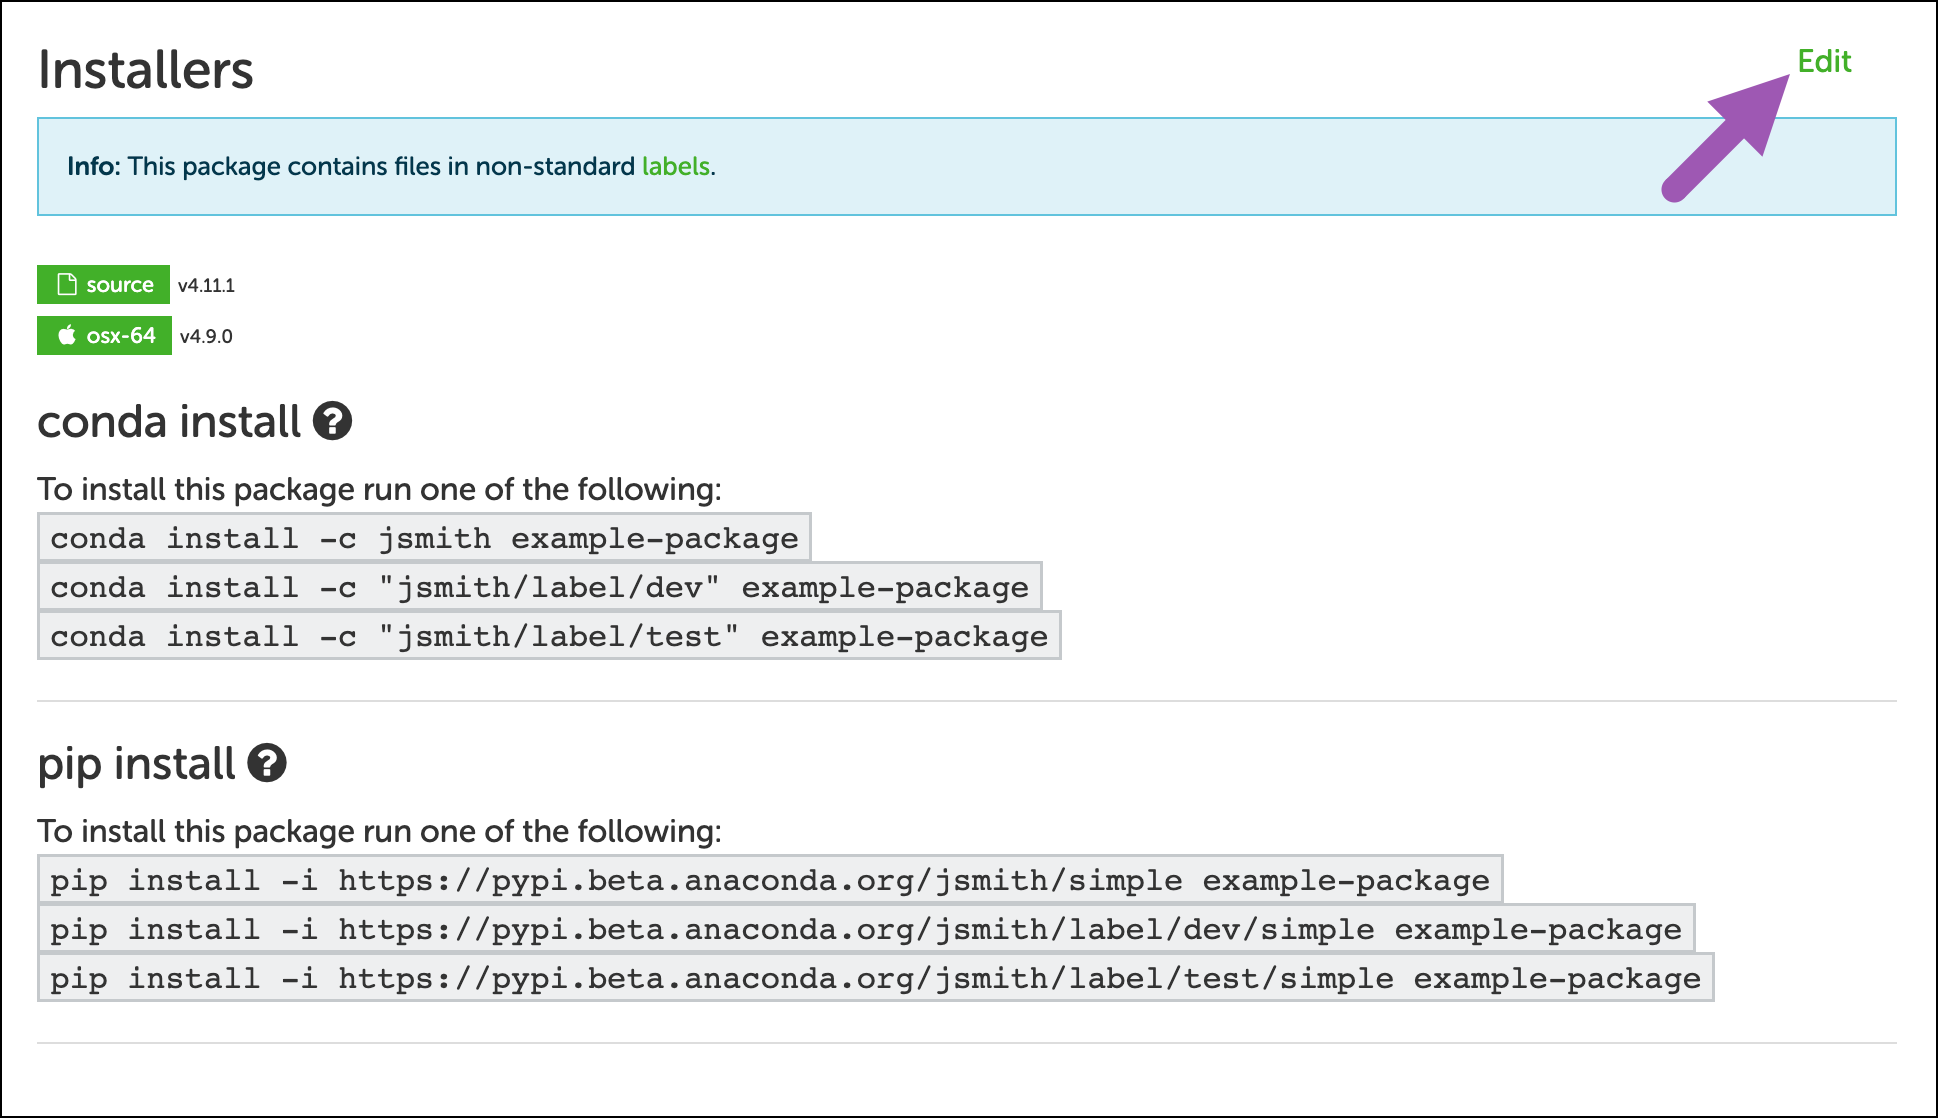
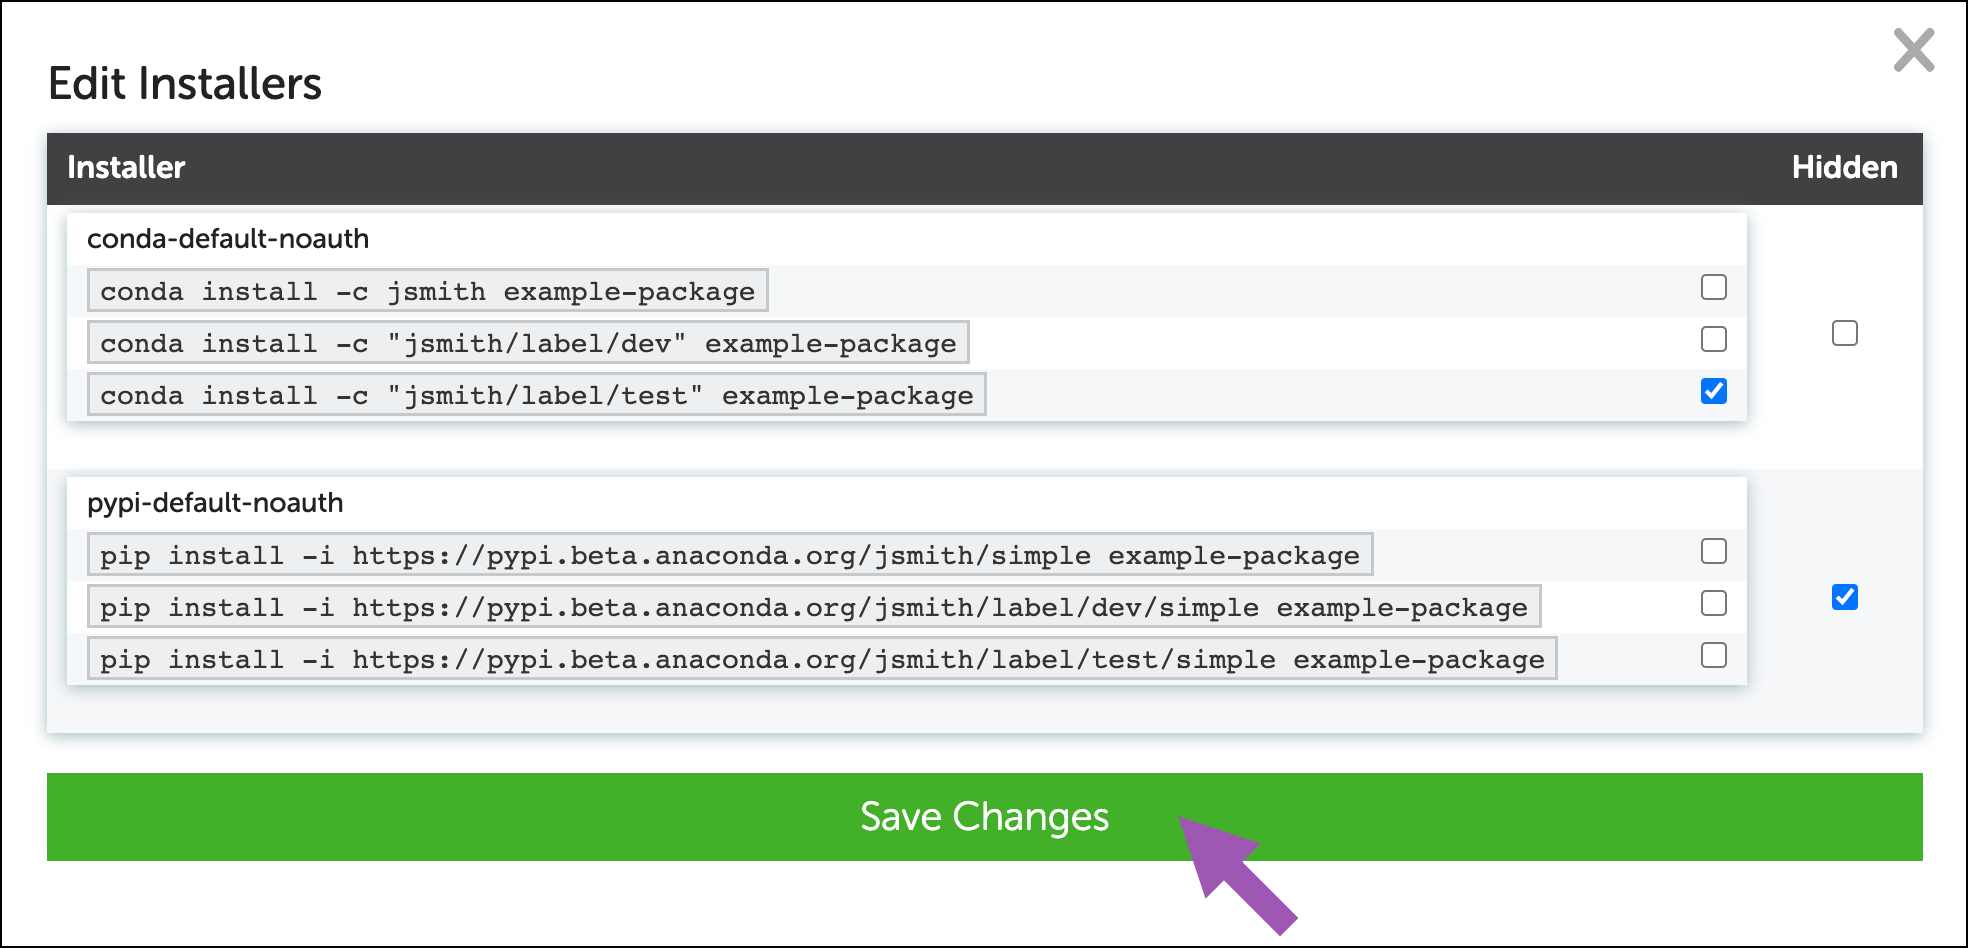
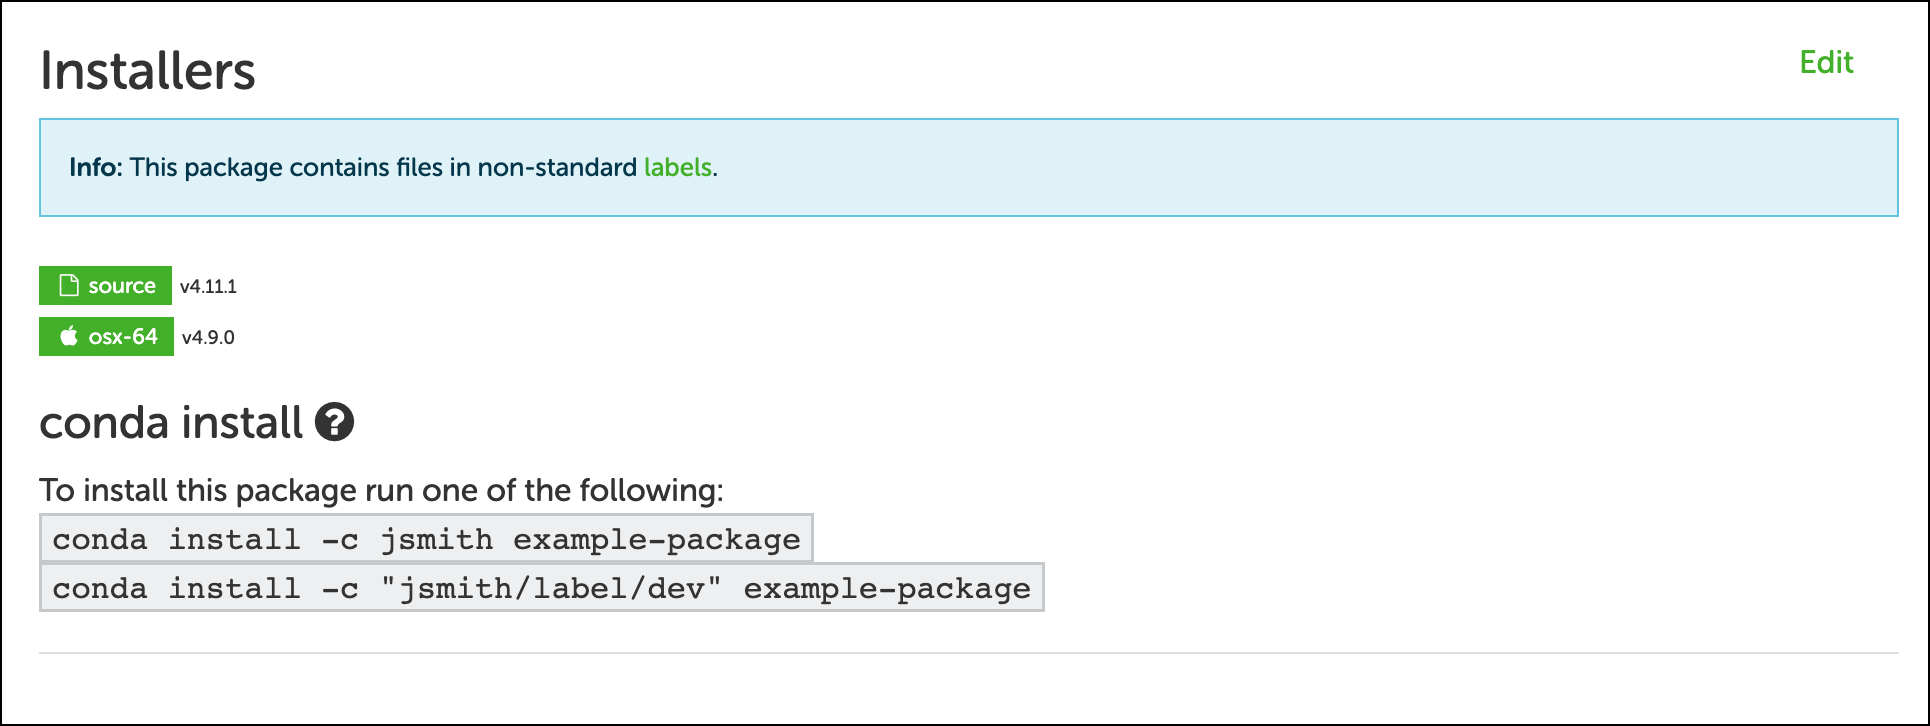
Hiding package install instructions#
After you have uploaded packages to an account or organization, you can control what install instructions appear on your package’s download page. Install instructions will vary depending on the package’s labels or package type (conda or standard Python).
To edit the visibility of your package install instructions:
Deleting a package#
To delete a package and all of its versions from Anaconda.org:
Select the package name.
Select the Settings option.
Select the Admin option.
Click Delete.
To delete a package and all of its versions using Anaconda Prompt (Terminal on macOS/Linux), run:
# Replace <USERNAME> with your username
# Replace <PACKAGE> with the package name
anaconda remove <USERNAME>/<PACKAGE>
You can now see the change on your profile page at http://anaconda.org/<USERNAME>, where <USERNAME> is your username.
Updating package metadata#
Much of the metadata provided in your package’s meta.yaml file appears on your package’s download page. This is information like your package’s license, description, Git repository URL, and documentation URLs. For more information on what is usually contained in conda-build’s meta.yaml file, see the conda-build documentation.
Anaconda Client automatically updates metadata defined in the meta.yaml file of your package upload, as long as the package version number has never been uploaded previously. To update your metadata without needing a new package version, use --force-metadata-update.
anaconda upload /your/path/conda-package.tar.bz2 --force-metadata-update
Using the .conda compression format#
Currently, when you use conda build to create packages, those packages are compressed into a .tar.bz2 format. This format has been used since the inception of conda and has become very slow when compared to modern compression formats. With that in mind, the .conda compression format was created. See Conda packages and the Downloading and Extracting Packages section of the
Understanding and Improving Conda’s Performance blog post for more detailed information on .conda.
The most important thing to understand about the .conda format is that it allows much faster access to packages’ metadata by compressing that metadata into its own tarball file separate from the rest of the package contents.
To see how the .conda format vastly improves the speed of package extraction, try the following:
#Install the conda-package-handling package
conda install conda-package-handling

#Transmute a .tar.bz2 package format into a .conda format
#cph transmute IN_FILE(file to convert) OUT_EXT(extension to convert to, i.e. .conda)
cph transmute mkl-2018.0.3-1.tar.bz2 .conda

#Test the speed of extracting the .tar.bz2 file versus the .conda file
$ time cph extract mkl-2018.0.3-1.tar.bz2 --dest mkl-a
cph extract mkl-2018.0.3-1.tar.bz2 --dest mkl-a  18.16s user 0.59s system 98% cpu 19.015 total
$ time cph extract mkl-2018.0.3-1.conda --dest mkl-b
cph extract mkl-2018.0.3-1.conda --dest mkl-b  1.41s user 0.65s system 87% cpu 2.365 total
As you can see the .conda file is extracted nearly an order of magnitude more quickly than the .tar.bz2 file.
.conda files can be uploaded to Anaconda.org using anaconda upload, just like any .tar.bz2 file. The current workflow for creating .conda packages is to build them using conda build, then transmute the .tar.bz2 files into .conda files using cph transmute, and then upload them normally as described
in the uploading conda packages section.


