Anaconda Assistant#
Anaconda Assistant is your digital pair programmer for data science in Anaconda Notebooks! Made for novice and intermediate JupyterLabs notebook practitioners—yet handy for users of all levels—this AI assistant can help you:
Write and debug code
Analyze data
Visualize results
The number of prompts you can make to the Assistant per day differs based on your tier:
Capabilities |
Free |
Starter |
Pro/Business |
Enterprise |
|---|---|---|---|---|
Number of Assistant chats per day |
30 |
60 |
120 |
Unlimited |
Follow this quickstart guide to learn how to make the most of your Anaconda Assistant.
Starting with a notebook#
Anaconda recommends using the Assistant after you’ve loaded a DataFrame in your notebook.
Note
Throughout the Assistant, DataFrames refer to Pandas DataFrames only, though certain dataframe types compatible with Pandas DataFrames could work as well.
This can be done in a few different ways:
If you’re starting with an empty notebook, the Assistant provides you with the option to generate a DataFrame with random data, which you can then use to generate graphs and more.
Use Anaconda data catalogs as a starting point:
Open a new Launcher by clicking the blue plus + in the top-left corner.
In the Launcher, under Anaconda Data Catalogs, click Explore Catalogs.
Click Run All Cells to restart and run all the cells available in your notebook. This will render a DataFrame(s) in the notebook.
If you already have specific data you’d like to work with and a proficiency in Jupyter Notebooks, import the data and generate a DataFrame as you normally would.
Accessing the Anaconda Assistant#
To open the Assistant, click the Anaconda Assistant icon. Let’s take a look at the different parts of the Assistant and what we can do with this tool.
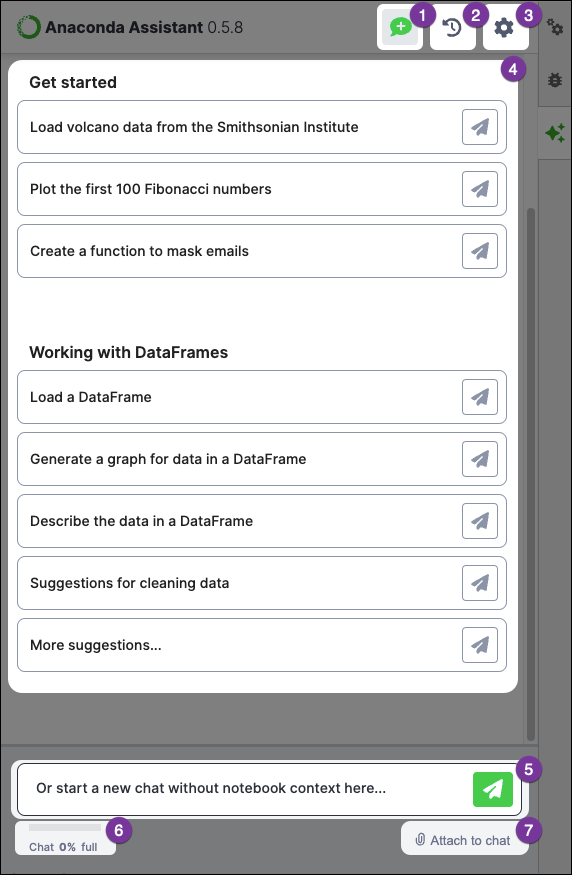
- Start a new chat
At any time, you can start a new Assistant session, or “chat,” by clicking New chat.
- History of previous chats
View and return to previous chats by clicking Chats history.
- Settings
Adjust where code is run in the notebook, enable or disable data collection and usage, and upgrade your account by clicking Settings.
- Assistant tasks
The Assistant allows you to perform a variety of functions, which are covered in the following section.
- Text box
Ask your own questions and make unique requests using the text box at the bottom of the Assistant.
- Chat limit used
Currently, each new chat allows a set amount of requests per 24 hour period. You may encounter a warning message when you reach the daily limit.
- Attach to chat
Add data for the Assistant to analyze and manipulate (In development).
Get started#
Explore code for various math equations and python projects independent of your notebook. Whether you’re starting from scratch or looking to take your project in a new direction, the code examples in this section can serve as much needed inspiration.
Build upon results by asking for deeper analysis or changes to the code using plain English. Make sure you provide specific instructions to the assistant! The more specific you are, the better your results will be.
Working with DataFrames#
For notebooks containing DataFrames, the Assistant provides various methods for viewing and interacting with your data in a new way.
Note
Load a DataFrame is the only option that will appear in this section if your notebook lacks a Pandas DataFrame. Running code to generate a DataFrame will trigger the availability of the other options.
Load a DataFrame#
If you’re starting with an empty notebook, this option will open a menu of DataFrames for you to load in your notebook, which you can then use to generate a wide variety of graphs. You can also ask questions about the generated code and request changes using plain English. Remember to be specific!
Generate a graph for the DataFrame#
This option generates a graph based on the DataFrame(s) in your notebook. If your notebook contains more than one DataFrame, you’re prompted to select which DataFrame you want to generate a graph for.
Click Get Code to have the Assistant provide you with a list of various types of graphs (bar, plot, heatmap, etc.) it can generate based on the data in the DataFrame. You’re also presented with the code for generating the graph described in the first option listed, which you can then run in the notebook by clicking Run in Notebook, or you can copy the code to paste it yourself by clicking Copy.
If you want code for a different graph, or to see a new set of possibilities, use the text box to choose which graph you would like generated. Type something like the following:
Generate the second idea
Plot #3, please
Give me new options!
Describe the data in the DataFrame#
Analyze and visualize data more efficiently by having the Assistant generate a summary of—and potential use cases for—your DataFrame. This can be a great source of inspiration when you’re struggling to clearly explain the value your data provides.
Ask follow-up questions to dive deeper into the results. For example, if you find an interesting trend in your data, you can ask the Assistant to further refine the analysis or provide recommendations.
Suggestions for cleaning data#
The Assistant can provide various means for “cleaning up” your DataFrame by standardizing inconsistent information, removing duplicates, checking for missing values, and more. If your notebook contains more than one DataFrame, you’re prompted to select which DataFrame you want to clean.
For a brand new set of suggestions, click Refresh Suggestions at the top of the Assistant.
More suggestions…#
The Assistant can provide you with ideas for building upon your DataFrame, such as creating new visualizations, filtering based on specific conditions, removing unnecessary information, or even merging the DataFrame with an entirely new DataFrame.
For a brand new set of suggestions, click Refresh Suggestions at the top of the Assistant.
Enhancing the Assistant experience#
This section provides tips on improving your working experience with the Assistant.
Course correcting the conversation#
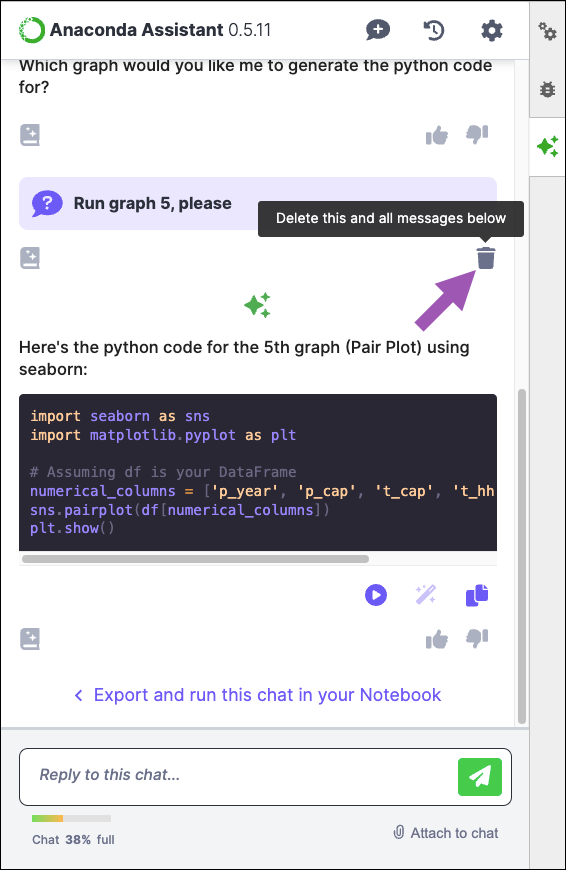
Sometimes, generative AI systems can encounter challenges when processing long conversations, leading to a decline in the quality of responses. If you find that the conversation is becoming less helpful to you, don’t worry! Instead of restarting the entire conversation and losing the responses that were helpful to you, you can selectively remove messages by clicking the trash can located within the prompt. By pruning the conversation, you can seamlessly resume interaction with the Assistant from a point where responses were still valuable and relevant.
Setting code location#
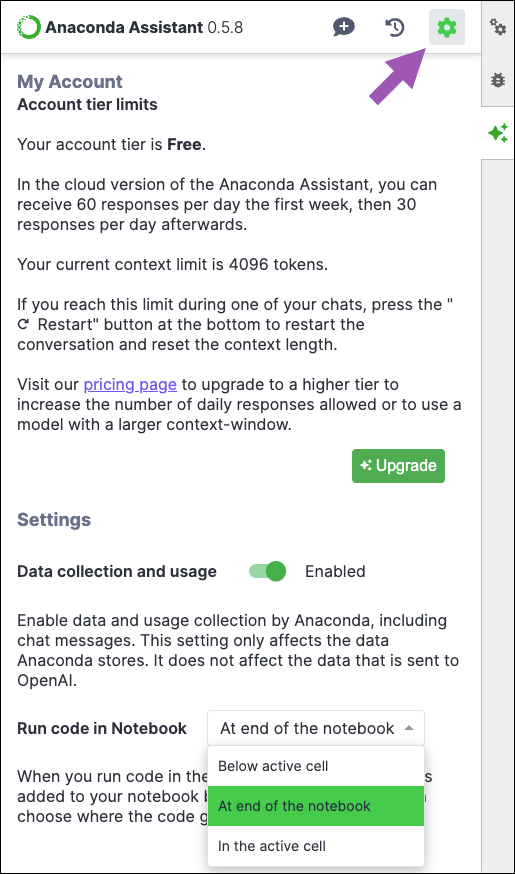
To change where code generated by the Assistant gets added to your notebook, click Settings. Then, under Run code in Notebook, select from the dropdown a location where code should be added and run in the notebook.
Stopping a response from the Assistant#
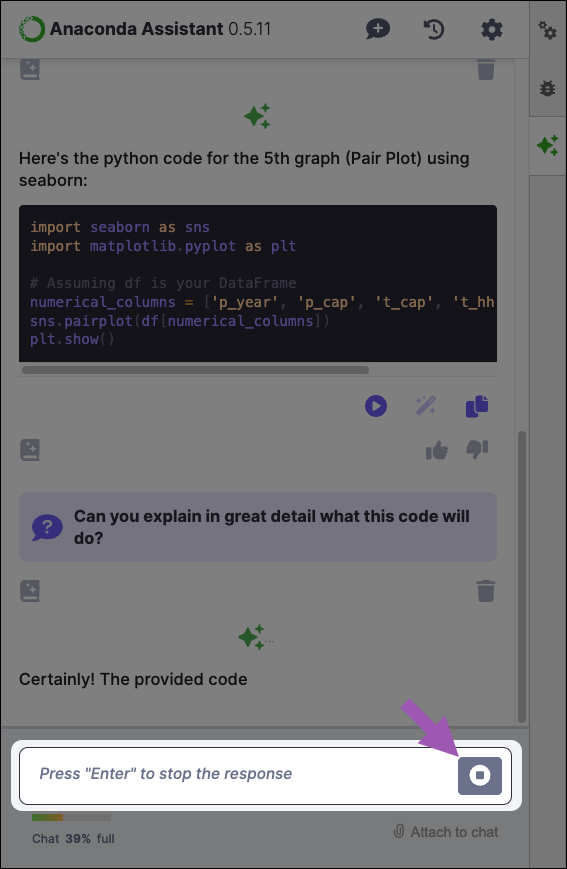
If you want to interrupt the Assistant mid-response (perhaps the Assistant misunderstood your prompt and is providing unnecessary information), simply press “Enter” on your keyboard. Alternatively, you can click Stop in the text box.
Frequently asked questions#
Why am I not seeing all options under Working with DataFrames?#
Some options for working with DataFrames are hidden until you run cells in your notebook that generate a DataFrame. Click Run All Cells to restart and run all the cells available in your notebook. If one or more DataFrames are successfully generated in your notebook, all options should appear in the Assistant.
What programming languages are supported?#
Anaconda Assistant primarily supports Python, but we are planning to expand support to other languages in the future.
What personal data is collected when I use the Assistant?#
When you first use Anaconda Assistant, you are prompted to opt in to Anaconda’s data collection and usage of chat messages. Whether or not you opt in, OpenAI’s terms of use on data collection and usage still apply.
If you opt in, Anaconda collects all chat information, user IDs, and event logs.
If you opt out, Anaconda only collects event logs and your user ID—any prompts you have entered in the chat remain undisclosed.
How do I provide feedback?#
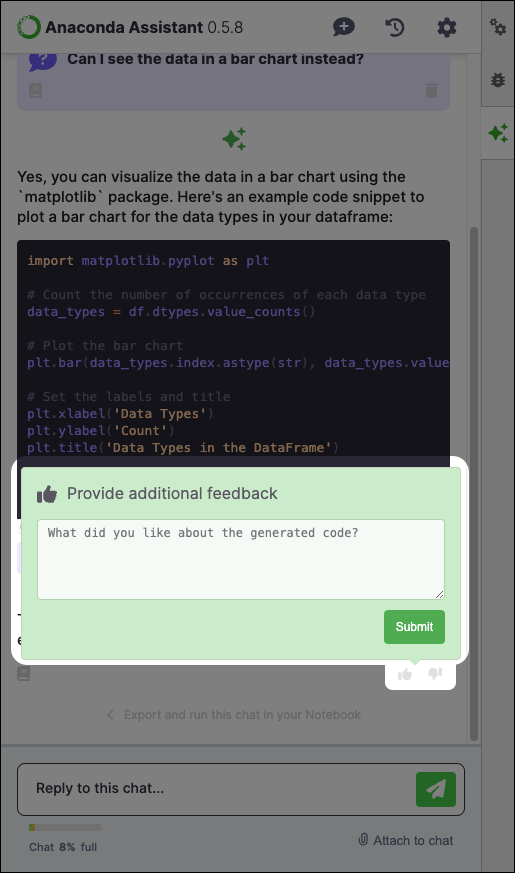
Use the buttons embedded within the Assistant to provide positive or negative feedback:
