Using Anaconda Cloud projects#
Anaconda’s cloud storage solution provides you with greater access to your files across your workspace. By securely uploading your CSVs, notebook files, code snippets, and more to projects in Anaconda Cloud, you can access your files from any machine with Excel and internet access.
What are projects?
You can think of projects as folders for storing your data files, which allow you to:
Access your stored
.csvfiles or code snippets from either Anaconda Notebooks or ExcelKeep related
.csvand.ipynbfiles organizedExecute bulk actions, such as uploading, downloading, and deleting files
Set default environment kernels
For example, you can create a .csv file in Excel, upload it to Anaconda Cloud, then pull that .csv data directly into a notebook in Anaconda Notebooks!
Creating a project#
Create a project using the following steps:
Open Anaconda Toolbox.
Under Anaconda Cloud, click Create a New Project.
Enter a unique title for your project.
Select an environment for your project from the Environment Location dropdown.
Upload files to your project, or transfer files already saved in Anaconda Cloud.
Note
You can upload any file type to your project, but the best options are
.csvand.ipynbfiles under 100MB.Click Create Project. Your project appears under My Projects.
Tip
Save your new project and files by pushing your project to Anaconda Cloud.
Uploading files to a project#
Add files to a project using the following steps:
Open Anaconda Toolbox.
Under Anaconda Cloud, click My Projects.
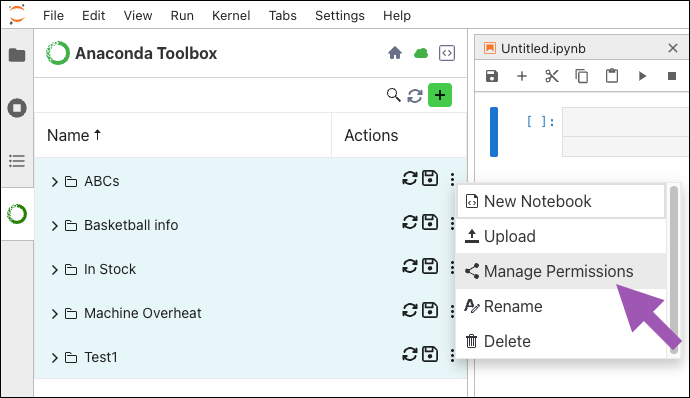
Click actions beside the project, then click Upload.
Upload files to your project, or transfer files already saved in Anaconda Cloud.
Click Upload to Project.
The file(s) appear in the project.
Creating a new notebook#
Begin creating a new notebook from either the home page or directly in a project from My Projects:
Click Create a New Notebook.
Enter a unique name for your notebook.
Select a project to store your notebook in.
Click My Projects.
Click actions beside a project, then click New Notebook.
Enter a unique name for your notebook.
Click Create Notebook. Your new notebook opens.
Select the kernel for your notebook in the Assign a Kernel dialog, then click Assign.
Tip
To always use the same kernel and prevent the dialog from appearing when creating a notebook, select the checkbox beside “Always start the preferred kernel”.
To remove a project’s preferred kernel, open an associated notebook, click the kernel in the top-right corner, and uncheck “Always start the preferred kernel”. Alternatively, go to Settings, select Settings Editor, select Notebook from the left sidebar, and clear “Automatically Start Preferred Kernel”.
You can now begin working in your new notebook.
Syncing projects to Anaconda Cloud#
While it’s best practice to save your work as you go, an extra step is required to ensure your project files are securely uploaded to the cloud for easy retrieval and use on other machines and software.
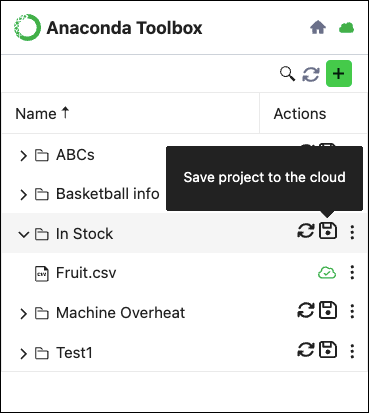
Save a project to Anaconda Cloud by clicking Save project to the cloud beside the project title.

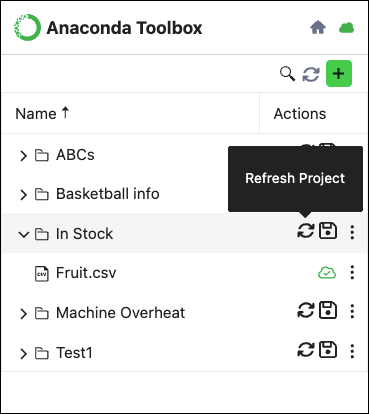
Sync your local projects with those stored on Anaconda Cloud by clicking Refresh Project beside the project title.
Warning
Refreshing your project(s) will synchronize your local files with those stored on Anaconda Cloud, overwriting your local project files. Make sure to save your projects to the cloud before refreshing to avoid losing any progress.

Tip
Refresh all projects at once by clicking Refresh all projects at the top of My Projects.
