Using Jupyter Notebook#
The Jupyter Notebook application allows you to create and edit documents that display the input and output of a Python or R language script. Once saved, you can share these files with others.
NOTE: Python and R language are included by default, but with customization, Notebook can run several other kernel environments.
This page provides a brief introduction to Jupyter Notebooks for AEN users.
For the official Jupyter Notebook user instructions, see Jupyter documentation.
For information on the notebook extensions available in AEN, see Using Jupyter Notebook extensions.
Opening the Jupyter Notebook application#
Log in to AEN.
Select the project you want to work on, or create a new project and open it.
On the project home page, click the Jupyter Notebook icon:

Jupyter Notebook opens in a new browser window:

TIP: You can see the same File Manager in the Terminal, Workbench, and Viewer applications.
Using example notebooks#
The Examples folder in Jupyter Notebook contains several
types of Notebook examples created in Python—and one with R
language—kernel environments.
Open any example notebook to experiment and see how it works.
Creating a new Jupyter Notebook#
An the top right of the Files tab, click the New button.
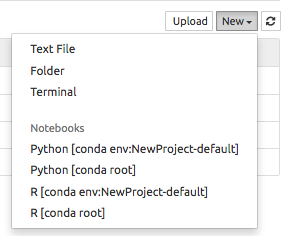
Select the kernel environment to create your new notebook in.
NOTE: Customizable Python and R Language kernel environments are automatically created for you during project creation.
Your project’s default conda env kernels are a cloned copy of the root environment. You can customize them and install and delete additional packages.
Root environment is managed by your Administrator. You cannot make or save any changes to it.
You can switch between Python, R language and any other custom kernels in the notebook as you work in your notebook. For more information, see Using the Synchronize Environments extension.
The new notebook is saved in the related project directory and displayed.