Working with Cloudera Manager parcels#
Anaconda Enterprise 4 Repository provides a way to integrate with Cloudera Manager to distribute your Anaconda data science artifacts to your Hadoop cluster.
Creating parcels, management packs and installers#
You can create custom Cloudera Manager parcels with the packages you want, including your own packages.
NOTE: Creating custom parcels requires a local mirror of the Anaconda packages.
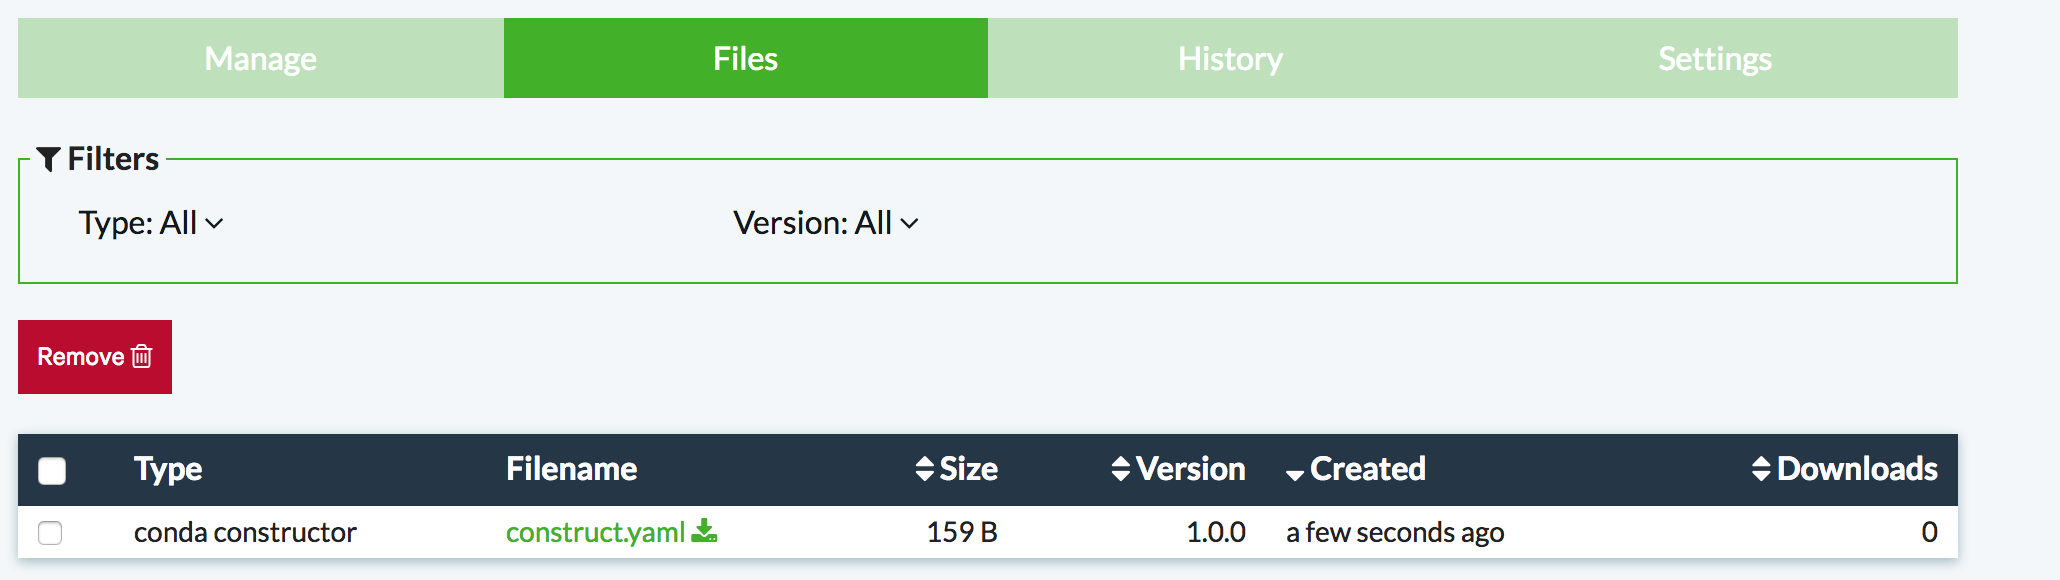
When creating a parcel, Repository generates a 64-bit Linux
installer including the specified packages and a file named
construct.yaml, which can be used with conda constructor.
To create a custom parcel, management pack or installer:
From the view button, select Installers.
Click the Create new installer button.
NOTE: Use only letters, numbers, dashes and underscores in the installer name.
When creating a parcel, Anaconda Enterprise 4 Repository generates a 64-bit Linux installer with the specified packages, and a file named
construct.yamlwhich can be used with conda constructor.
To create just the installer script, click Create installer; to create a parcel, click Create parcel.
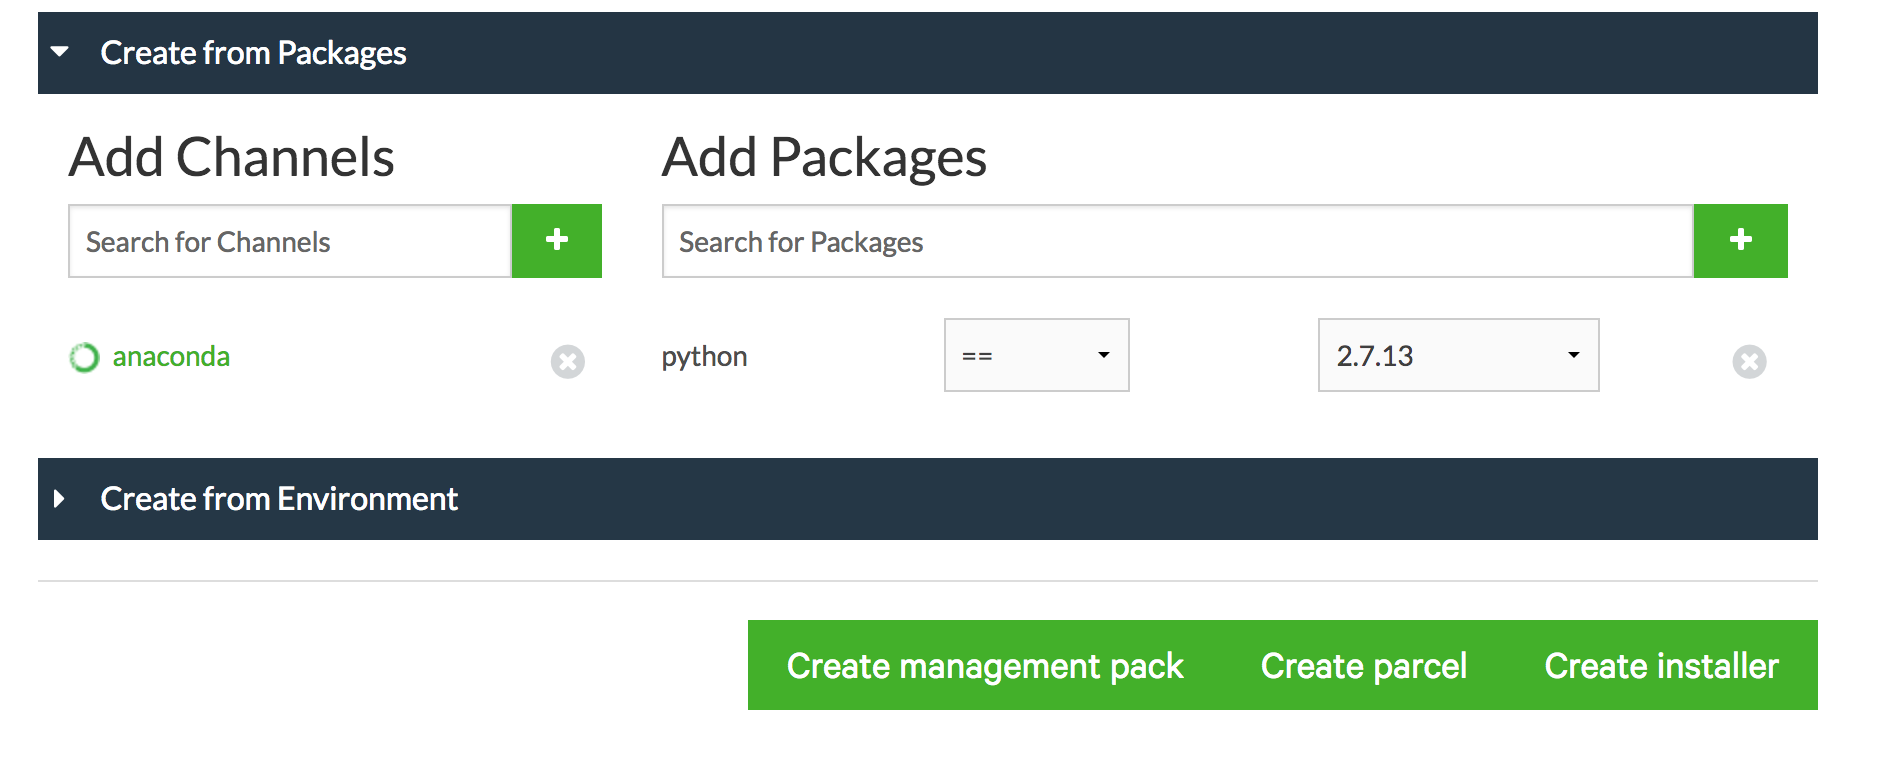
Creating a parcel by selecting packages#
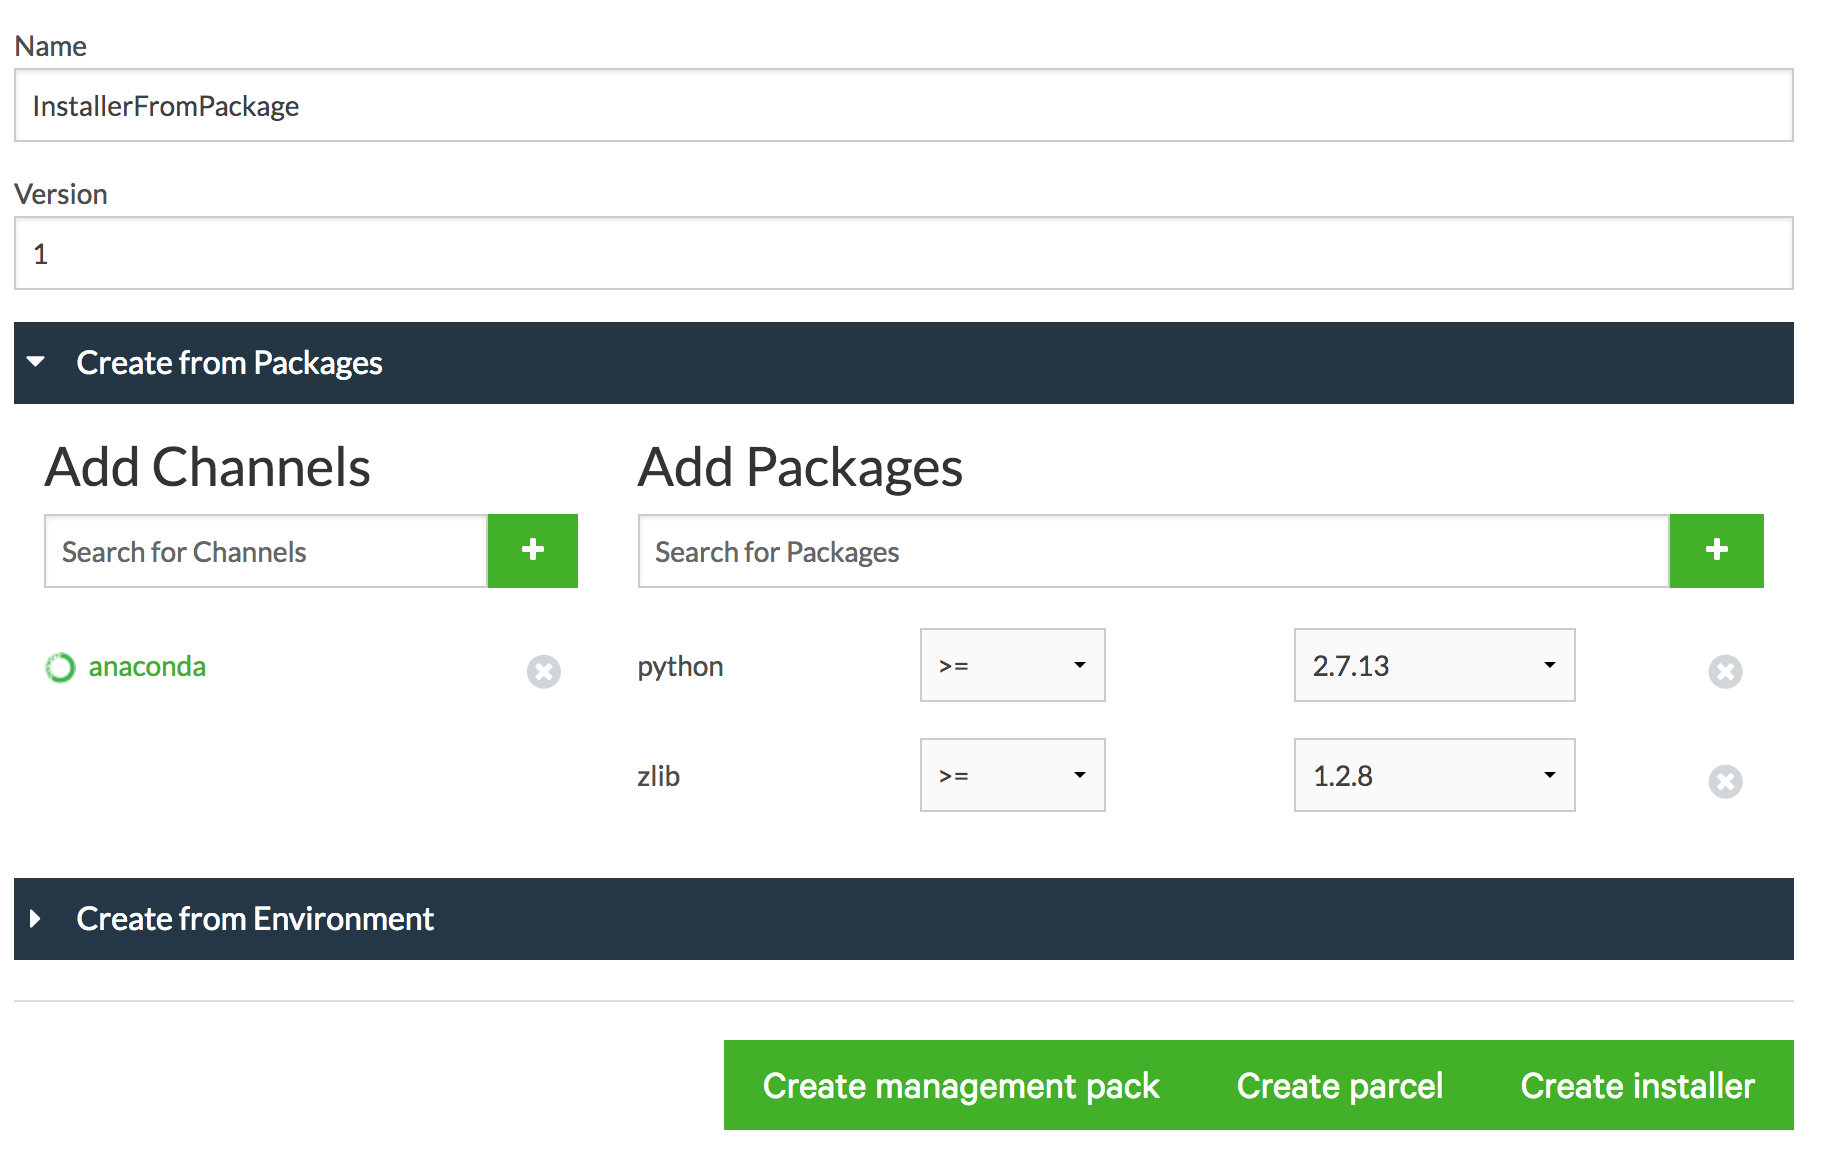
Click the Create from Packages tab.
Add channels from which to fetch packages into the Search for Channels box. Add each channel by clicking the green + (plus) button next to the Search for Channels box.
NOTE: The
anacondauser is added by default.Add package names into the Search for Packages box. Add each package by clicking the green + (plus) button next to the Search for Packages box.
Set version requirements for each package using the list next to the package name.
Creating a parcel by selecting an environment#
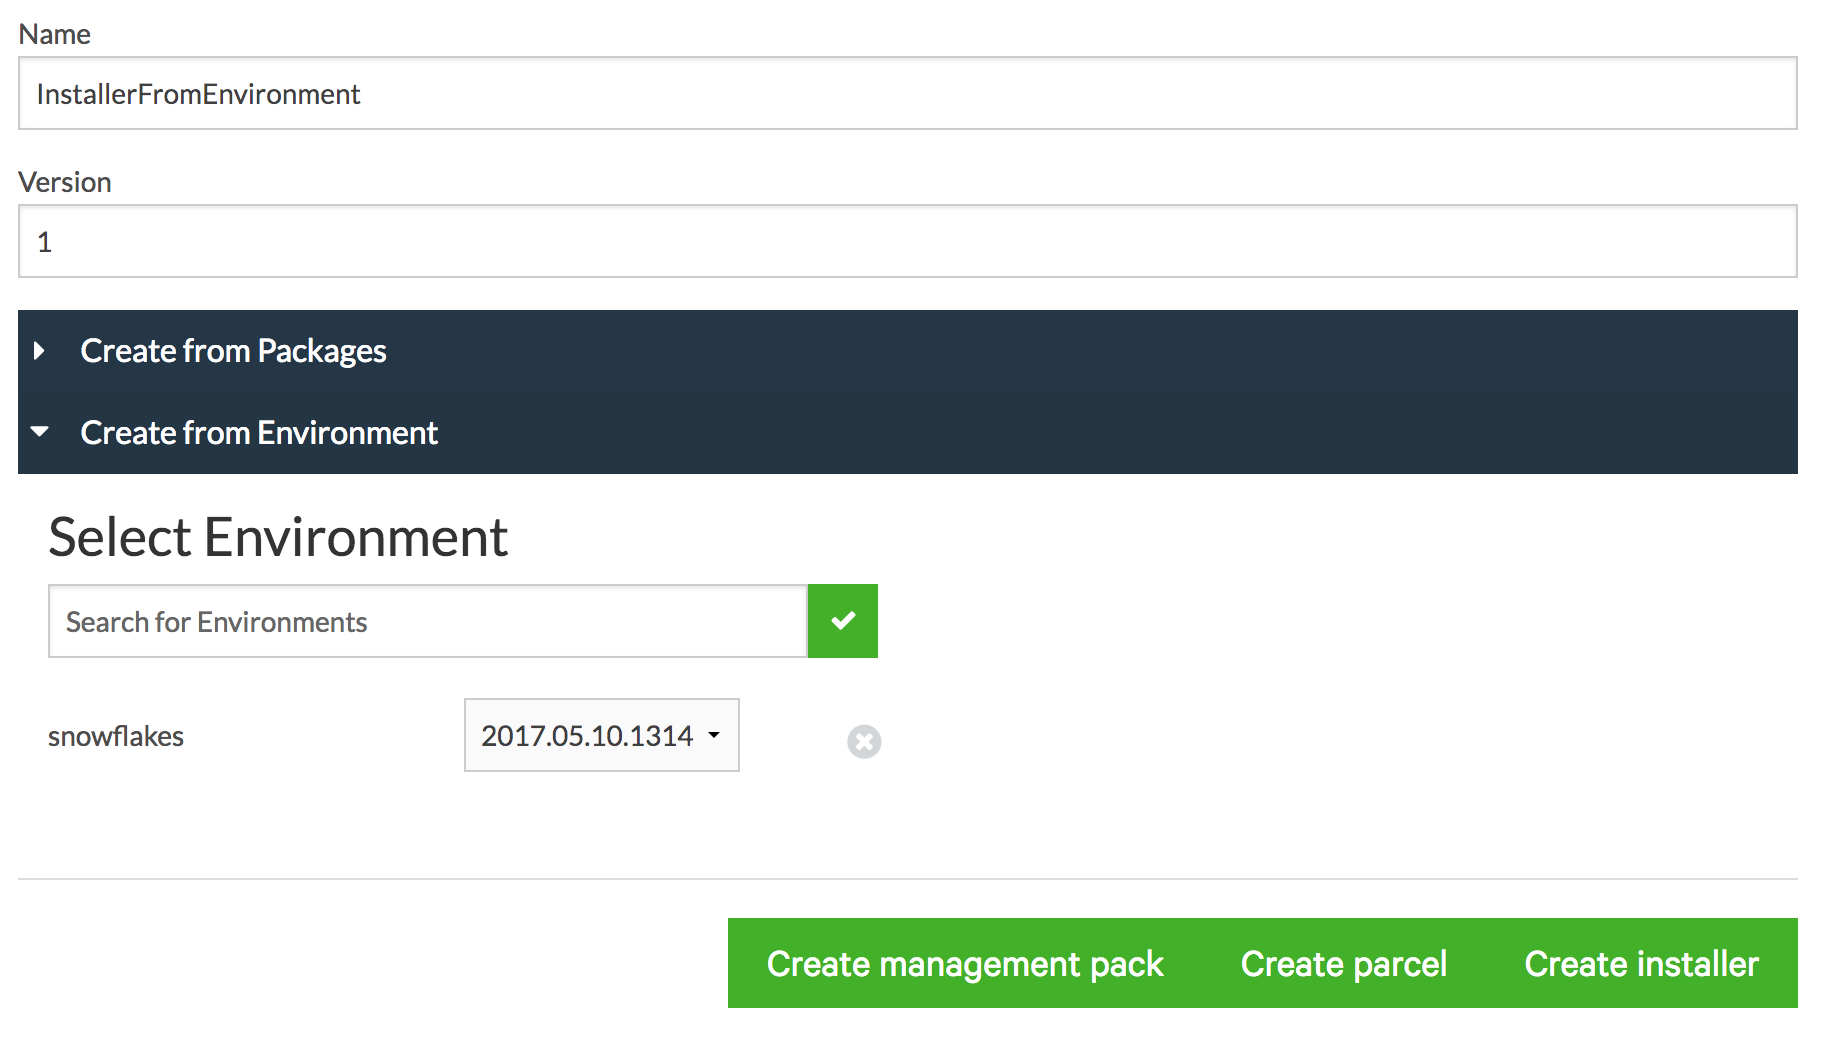
Click the Create from Environment tab.
Type the environment name and click the green checkbox button.
Select the environment version from the list next to the environment name.
Click the Create management pack button, Create parcel button or Create installer button.
NOTE: By default, conda is not included in a custom parcel. To add additional packages to your environment, you can add them using the Repository Web UI.
A parcel is generated with the prefix of
/opt/cloudera/parcels/PARCEL_NAME. This is the default
location where activated parcels are loaded. If you are
deploying parcels in a different directory, you can change
this prefix with the PARCELS_ROOT configuration
setting.
Viewing a list of packages in a custom parcel#
To see a list of packages included in your custom parcel, see:
/opt/cloudera/parcels/PARCEL_NAME/meta/parcel.json
NOTE: Replace PARCEL_NAME with the name of the desired parcel.
Distributing custom parcels#
After you have created a custom parcel, you can distribute it to your
cluster by adding
http://<repository ip>:<port>/USERNAME/installers/parcels/ as
a Remote Parcel Repository URL.
NOTE: Replace <repository ip> with the Repository IP address,
<port> with the port address and USERNAME with your user
name.
Cloudera Manager detects the parcels hosted on Repository and provides the option to download and distribute the parcels.
By default, Repository generates a parcel file for every compatible distribution.
You can customize which parcel distributions are created by configuring the PARCEL_DISTRO_SUFFIXES configuration setting.
NOTE: If you have configured conda via ~/.condarc on your
server for use of a proxy—for example, to mirror behind a
proxy—you must disable proxying for Repository. For more
information, see the conda documentation.
EXAMPLE:
proxy_servers:
    https: http://proxy.corp.example.com
    http: http://proxy.corp.example.com
    'http://<repository ip>': false
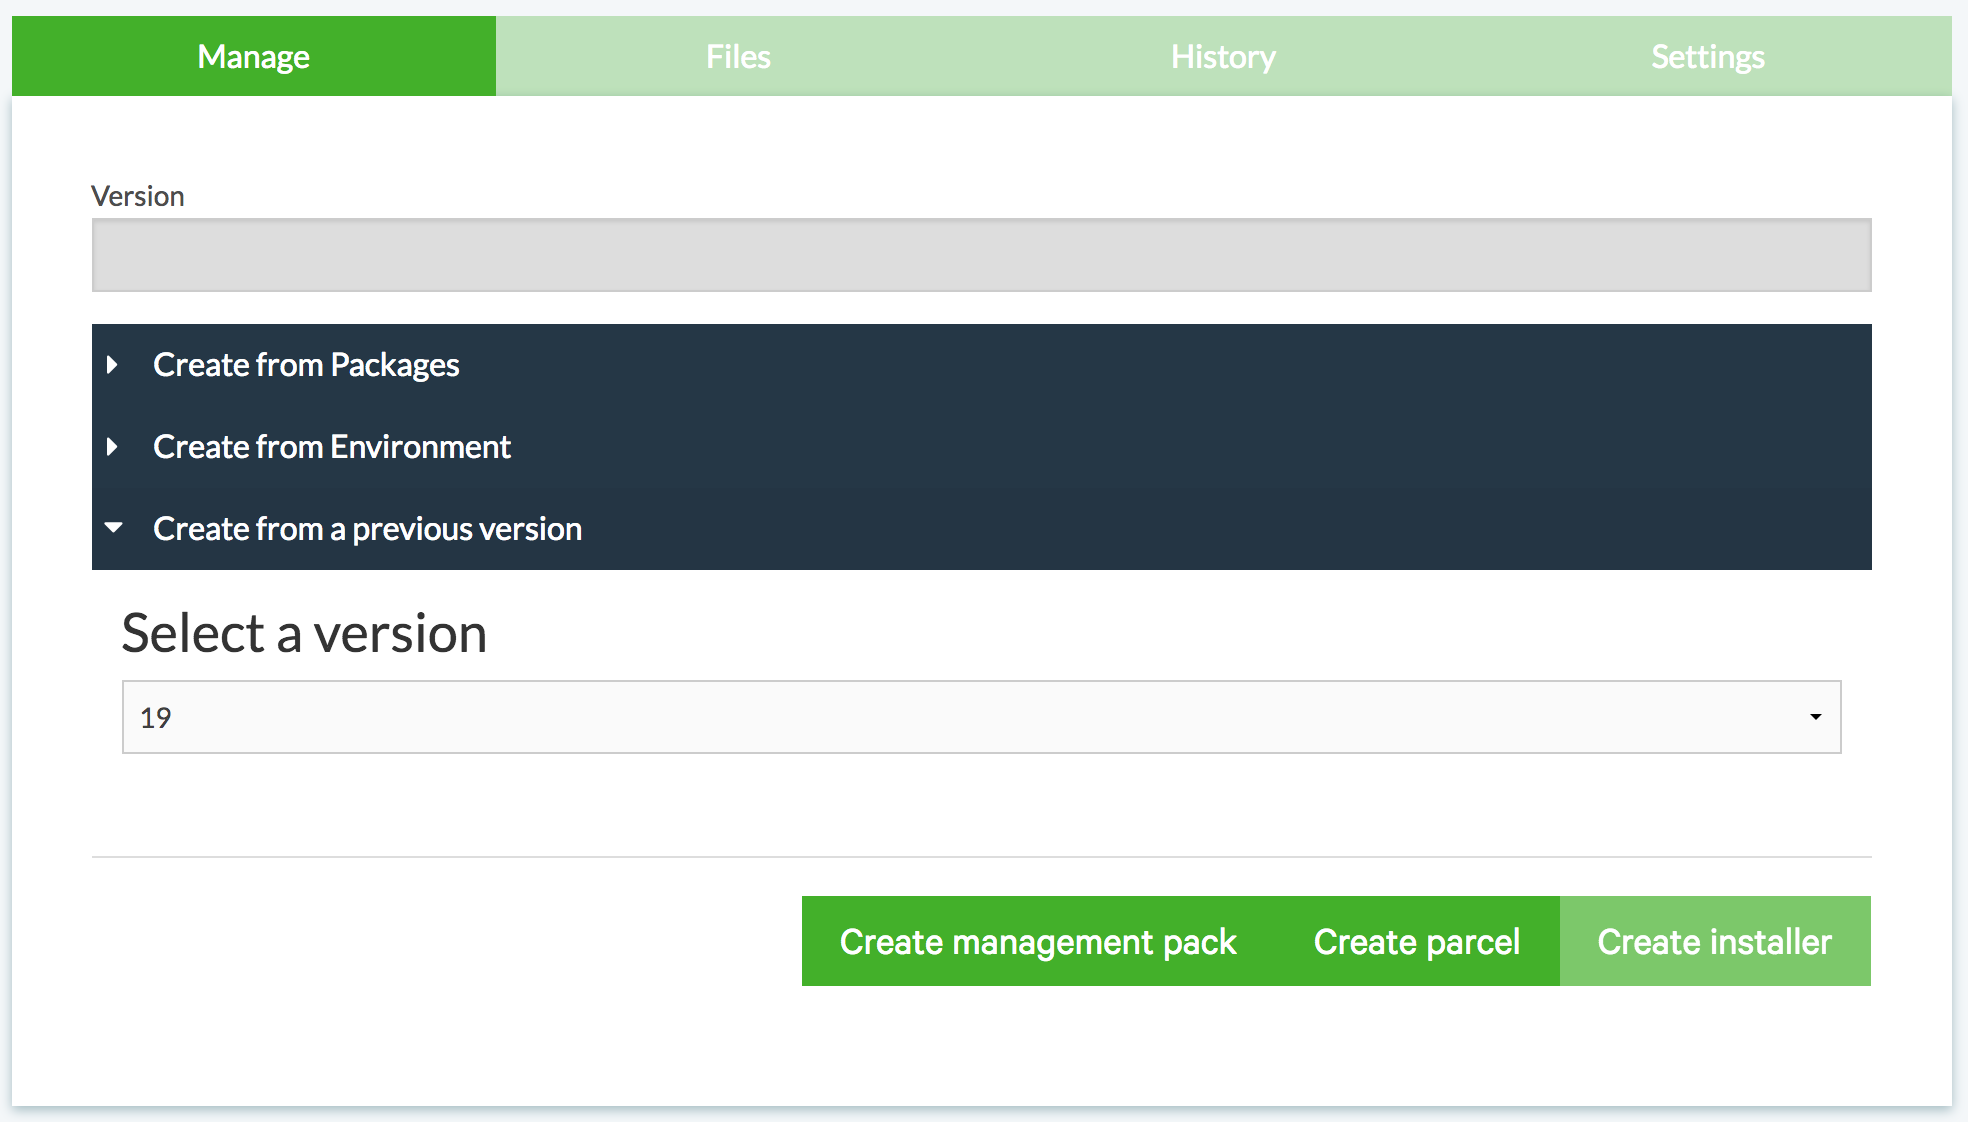
Creating from a previous version#
Once you have an installer created, you can return to this page and create a management pack or a parcel from a specific version. Use the Create from a previous version option to choose which version you want to use. The Create Installer button will be disabled since you have already created an installer. The other buttons will be disabled if you have already created management packs or parcels for those versions.
The versions listed on the drop-down list are the versions that successfully created an installer. An installer is needed to create a management pack or a parcel, so versions which failed won’t be listed.